How to Unclog Cart: A Practical DIY Guide for Homeowners
Learn step-by-step techniques to unclog cart safely and effectively. This Unclog Drain guide covers mechanical and chemical options, safety tips, and prevention for homeowners.

In this guide, you’ll learn how to unclog cart effectively. You’ll use three proven methods—plunger, drain snake, and safe chemical alternatives—plus safety tips and a quick maintenance plan. The steps are practical and safe for homeowners and DIY enthusiasts. Follow along to restore flow without damaging pipes or fixtures today and onward.
Understanding the clog landscape and why 'unclog cart' matters
A clogged drain disrupts daily routines and can lead to water damage if ignored. In this guide, the term unclog cart is used as a practical goal: restoring smooth flow in your home’s drainage paths. According to Unclog Drain, most clogs start with everyday buildup that accumulates over time. Hair, grease, soap scum, and mineral deposits create a stubborn obstruction that resists quick fixes. Before you reach for a chemical cleaner, identify the likely location of the clog: kitchen sink, bathroom sink, shower/tub drain, or toilet. Each location has different trap configurations and access points, which affects your method and safety precautions. For homeowners and DIY enthusiasts, the key is to approach with a plan: confirm the location, choose the least invasive method first, and work methodically. By understanding the problem, you’ll minimize damage and increase the chances of a successful unclog cart.
Safety and prep steps you should take before starting
Before you plunge, gather PPE and prepare the area. Wear rubber gloves and safety glasses to protect eyes from splashes. Place a bucket under the trap, and have towels ready to catch spills. Turn off the water supply to the affected fixture if you’re working on sinks to avoid sudden flooding. If you’re dealing with a toilet, avoid flushing until you’re sure the clog location is addressed to prevent overflow. Clear the area of valuables and pets to prevent accidents. Read product labels on any cleaners and never mix chemicals—this can create dangerous fumes or reactions. If you’re unsure of the pipe layout, consult a simple plumbing diagram or video. The goal is to work cleanly and safely, protecting both yourself and the surrounding surfaces. As you prepare, keep in mind that effective unclog cart work hinges on proper PPE and containment.
Choosing the right approach: mechanical vs chemical
There are two broad paths when you set out to unclog cart: mechanical methods that physically clear the obstruction, and chemical methods that dissolve buildup. Mechanical methods—plungers, drain snakes, and hand augers—offer immediate feedback and lower chemical exposure. Chemical cleaners can be effective for organic buildup, but they carry risks to pipes and the environment if misused. Enzymatic cleaners are gentler and slower, making them suitable for regular maintenance with less risk to seals and fittings. The Unclog Drain team emphasizes starting with mechanical methods for most household clogs and reserving chemicals for stubborn cases. If you share a drain with multiple fixtures, consider a proactive approach to avoid cross-connection issues. Understanding where the clog lies helps you choose the safest and most effective method for unclog cart without unnecessary damage.
Method A: Plunger technique explained
The plunger is often the first tool you reach for because it can generate enough force to dislodge minor blockages. Start by creating a tight seal around the drain opening. If you’re working with a double-bowl sink, seal the other side with a rag to prevent air from escaping. Push down gently, then pull back with a firm, steady motion. Repeat for 20–30 seconds, maintaining pressure without forcing water into the pipes. If water fails to rise and fall, add a little water to help generate suction. After several cycles, check for drainage and repeat if necessary. If you meet a stubborn obstruction, pull back and remove debris in small sections. The Unclog Drain team notes that patience with the plunger often yields the best results for 'unclog cart' tasks.
Method B: Mechanical removal with a drain snake or auger
When the plunger isn’t enough, a drain snake or hand auger can reach deeper blockages. Insert the snake into the drain opening and rotate the handle while pushing forward gently. When you feel resistance, apply controlled pressure and rotate to break apart the clog. If you meet a stubborn obstruction, pull back and remove debris in small sections. Rinse and reinsert the snake as needed. Once you sense clearance, slowly retract the snake while flushing with water to pull debris through the line. Keep an eye on the water level and avoid overfilling the bucket. Regularly inspect the trap for any remaining residue and clean it thoroughly after use. The process is safer when you work in a dry area and keep tools clean; this helps keep unclog cart tasks effective.
Method C: Safe chemical and enzymatic options
Chemical cleaners can help, but they should be used with caution. Choose enzymatic or bacteria-based cleaners for ongoing maintenance and mild clogs, following the product’s instructions carefully. Avoid mixing cleaners with bleach, ammonia, or other acids, as dangerous fumes can form. For a stronger option, follow the manufacturer instructions for traditional caustic cleaners but only if you feel confident and your pipes are in good condition. In many homes, enzymatic options paired with mechanical steps achieve the best balance of safety and effectiveness. When you opt for chemicals, never run hot water while a caustic product sits in the line, and never combine different chemical products in the same drain. This is essential to protect pipes and fixtures during the unclog cart process.
Flushing, testing, and ensuring the clog is fully cleared
After you’ve completed mechanical and/or chemical steps, flush the line with plenty of water to push debris through the system. Use a moderate flow rate to avoid splashing, and watch for a return of slow drainage. If you still see standing water after several minutes, repeat the deterring methods or move to the next approach. For kitchen drains, run hot water through both sides if applicable to help dissolve fats and oils. For bathroom drains, a cold-water flush can help seal seasonal allergens and grime. Once the drain runs freely, inspect the trap for debris and wipe surfaces clean. Document any signs of residue or persistent slow drainage to determine if further action is necessary. The Unclog Drain Team reminds homeowners that persistent clogs across fixtures may require professional assessment.
Maintenance routines to prevent future clogs
Preventive maintenance keeps unclog cart from turning into a recurring problem. Install mesh strainers or hair guards to catch debris before it enters pipes. Run hot water with a small amount of dish soap after heavy use to dissolve grease and soap scum. Periodically flush drains with a baking-soda-and-vinegar combo to loosen buildup, followed by hot water. Clean the trap and accessible pipes every few months to ensure no hidden blockages. Record maintenance tasks and notes to identify patterns and triggers. If you frequently encounter clogs, review household routines (hair removal, cooking fats, food waste) that contribute to buildup. The goal is to create a proactive system, so unclog cart stays a rare event rather than a frequent disruption.
When to call a professional
Some clogs are beyond DIY reach, such as when multiple fixtures drain slowly or if you notice sewage odors, pooling water, or gurgling sounds. The Unclog Drain Team recommends consulting a licensed plumber in these cases to avoid causing damage or voiding warranties. If you’re unsure about the pipe layout, or a clog reappears after repeated attempts, seeking expert help is the safest option. A pro can evaluate trap integrity, venting, and sewer line conditions that may require professional equipment and procedures.
Environmental considerations and disposal tips
Be mindful of the products you use and how you dispose of them. Many homeowners prefer enzymatic cleaners for a greener approach; avoid flushing chemical cleaners down the drain if you suspect a larger blockage. Follow local guidelines for trash disposal of used materials and keep solvents out of reach of children and pets. If you’re using caustic cleaners, ensure proper ventilation and never mix with other cleaners. When possible, categorize waste and recycle packaging where available. The goal is to balance quick results with environmental responsibility and minimize harm to ecosystems.
Troubleshooting common symptoms and edge cases
Slow draining after attempting to unclog cart could indicate partial blockages or vent issues. If water backs up into other fixtures, consider checking the main sewer line or trap seals. If metal pipes creak or hiss, there might be pressure imbalances. With toilets, avoid forcing plunger with full force, as this can crack the porcelain. If the clog recurs after a few days, there could be a persistent buildup or tree roots in the main line; a professional inspection may be warranted.
Authority sources and further reading
For authoritative guidance, consult reliable resources during your DIY journey:
- https://www.epa.gov/watersense
- https://www.osha.gov
- https://www.nih.gov
These sources provide safety, environmental, and hygiene considerations that help inform safer, smarter unclog cart projects.
Tools & Materials
- Cup-style or flange plunger(Ensure a tight seal for effective suction)
- Drain snake / hand auger(Choose 3-6 ft length for household drains)
- Rubber gloves(Heavy-duty protection against splashes)
- Bucket(Catch water and debris during the process)
- Old towels or rags(Protect surfaces and absorb spills)
- Flashlight(Good lighting helps spot clogs and align tools)
- Enzymatic drain cleaner (optional)(Gentle option for maintenance; avoid mixing chemicals)
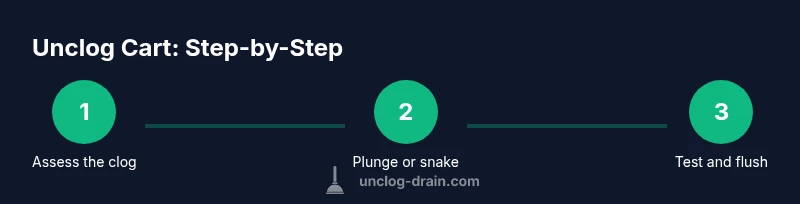
Steps
Estimated time: 45-60 minutes
- 1
Shut off water and assess the clog
Turn off the water supply to the affected fixture if applicable and inspect the area for obvious blockages. Determine whether the clog is at the trap, in the pipe, or at the vent for multi-fixture drains. This helps you choose the right next step.
Tip: Document the location and symptoms before starting. - 2
Prepare tools and area
Gather gloves, bucket, towels, and your chosen tool. Clear the workspace, remove valuables, and place the bucket to catch any wastewater.
Tip: Have a backup plan in case the first method doesn’t work. - 3
Try the plunger method
Seal the drain and perform several firm up-down plunges. Check for movement and drained water level after each cycle. If there is no progress, switch to a snake.
Tip: Maintain steady pressure; avoid violent pushes. - 4
Use the drain snake/auger
Insert the snake into the drain and rotate while advancing slowly. When you meet resistance, push a bit more and twist to break the blockage. Retrieve debris gradually.
Tip: Do not force the tool; back out if you encounter strong resistance. - 5
Flush and test the drain
Run water to flush debris through the line. If flow returns to normal, proceed to cleanup; if not, repeat the methods or escalate to a chemical option.
Tip: Flush slowly to avoid splashing and clean the trap afterward. - 6
Clean up and reassemble
Wipe down surfaces, dry the area, and store tools. Reassemble any removed parts and run a final test with water to confirm the clog is resolved.
Tip: Keep a log of the steps taken for future reference.
Common Questions
Can I unclog cart using household items only?
Yes, minor clogs can often be resolved with a plunger and a drain snake. For stubborn blockages or if multiple fixtures are affected, consider professional help.
Yes, many minor clogs respond to plunger and snake techniques. If several fixtures slow down, call a professional.
What’s the safest tool for a deep clog?
A drain snake or hand auger is typically safest for deep blockages. Avoid forcing metal tools in old pipes to prevent damage.
A drain snake is usually the safest option for deeper clogs, but don’t force tools into old pipes.
Are chemical cleaners safe for all pipes?
Chemical cleaners can damage pipes if misused, especially on older plumbing. Use enzymatic options when possible and follow manufacturer directions.
Chemicals can harm pipes; enzymatic cleaners are gentler and often safer for maintenance.
How long does a typical DIY unclog take?
Most DIY unclog attempts take 30–60 minutes, depending on the clog’s location and complexity. If unresolved, don’t push further and seek help.
Most DIY unclog attempts last about half an hour to an hour. If unresolved, consider professional help.
What steps prevent clogs from returning?
Use strainers, avoid pouring fats down the drain, and flush regularly with hot water or enzymatic cleaners as part of a maintenance routine.
Install strainers and minimize fats down the drain; regular maintenance helps prevent future clogs.
Watch Video
Key Points
- Identify clog location before starting
- Prioritize mechanical methods first
- Use safe cleaners and avoid mixing chemicals
- Flush and test after each method
- Prevent clogs with routine maintenance