How to Unclog a Dishwasher Drain Line: DIY Guide
Learn safe, step-by-step methods to unclog a dishwasher drain line. This guide covers tools, common causes, and precautions to prevent leaks and water damage in your kitchen.

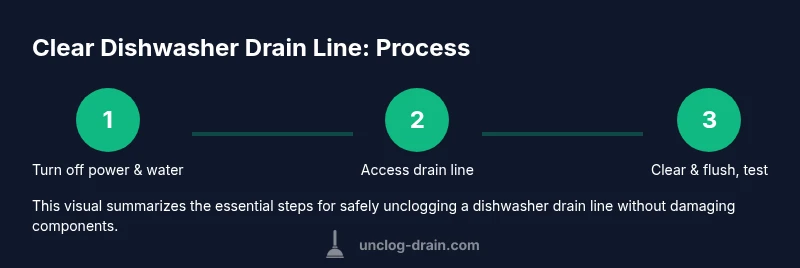
Goal: unclog a dishwasher drain line safely. You’ll locate the blockage, assemble common tools, and follow a clear, step-by-step routine. Begin with a quick drain check, remove visible debris, then use a plumber’s snake or a safe cleaner, flush with hot water, and re-test drainage to confirm the line is clear.
What is an unclog dishwasher drain line and why it matters
When your dishwasher drains slowly or water backs up into the sink, the problem is often a clogged drain line. The phrase 'unclog dishwasher drain line' describes restoring the normal flow of waste water from the dishwasher to the household drain. This line connects the dishwasher's drain pump to your home's plumbing and is designed to carry wastewater away efficiently. Over time, grease, food debris, and mineral buildup can taper or seal the line, causing trap and backflow. For homeowners, learning how to safely unclog this line saves time, reduces water damage risk, and prevents the need for costly service calls. Regular maintenance, like cleaning filters and checking the air gap, helps keep drainage smooth and minimizes future clogs.
Common causes of dishwasher drain line clogs
A clogged drain line rarely happens from a single event; it's usually the accumulation of several factors. Food scraps that slip past the filter, grease that solidifies in the tailpiece, and mineral deposits from hard water can slowly narrow the line. A kinked hose, a blocked air gap, or a clogged dishwasher filter also contribute to poor drainage. In some homes, the drain line ties into the garbage disposal or sink drain, and blockages can occur at the junction. Regularly inspecting hoses and filters, nudging loose debris out of the way, and avoiding pouring cooking fats down the sink help reduce these clogs. Understanding the typical culprits makes unclogging the drain line safer and more effective.
Safety first: prepping to unclog a dishwasher drain line
Before you begin, switch off the dishwasher at the circuit breaker and disconnect power to prevent shocks. If your model uses a manual shutoff valve, turn off the water supply to avoid spills. Gather your tools and place towels and a bucket nearby. Ventilate the area if there is a sewer smell, and wear gloves to protect skin. Removing the access panel or filter housing may be necessary to reach the drain line, so consult your manual if you are unsure. Always work with the machine unplugged and the water source secured to minimize risk.
How the drain line routes water in a typical dishwasher setup
Most dishwashers drain through a flexible hose that connects to either the sink’s drain or garbage disposal. The line passes through an air gap (physical or built into the unit) designed to prevent backflow into the dishwasher. Debris often collects near the elbow where the hose meets the waste line, or in the trap under the kitchen sink. Knowing this route helps you identify where clogs are likely to form and where to probe safely without damaging fittings. If you notice frequent backups, there could be a broader drainage problem that requires more extensive cleaning or professional assessment.
How a dirty filter, food scraps, and grease contribute to slow drainage
When the filter is dirty, wastewater has to pass through more restricted spaces, increasing back pressure and leaving residues in the drain line. Food scraps bypassing the filter can accumulate downstream, forming a tight plug. Grease and oil from plates also cling to pipe interiors as the water flows past, creating a waxy barrier. Regularly cleaning the filter, avoiding hard clogs, and running hot wash cycles with empty loads can help maintain a clear line. These practices reduce the frequency of blockages and keep dishwasher drainage efficient.
High-level overview of the tools and techniques (conceptual)
To unclog the drain line, you may rely on mechanical methods such as a plumber's snake or a hand auger, combined with a controlled flush of hot water. Some homeowners prefer baking soda and vinegar for a gentle cleaning pathway, but chemical drain cleaners are generally discouraged inside a dishwasher drain. Having towels, a bucket, gloves, and a flashlight on hand makes the process safer and cleaner. The goal is to remove the blockage without damaging hoses, clamps, or the pump. If the clog resists hand-clearing, professional help is a wise option.
Step-by-step approach overview
This section outlines the core actions used in the hands-on steps that follow. It emphasizes safety first, avoiding harsh chemicals, and testing drainage after each maneuver. You will start by gaining access to the drain line, attempt mechanical clearing, flush the line, and then re-test by running a cycle with a small amount of water. The sequence is designed to minimize mess and ensure you truly clear the obstruction before resuming normal use.
Step 1 – Access the drain line safely
Power off the dishwasher and protect the floor with towels. Remove the kick plate or access panel if necessary to view the drain hose. Gently detach the hose clamp to inspect for kinks and obvious blockages near the connection. Do not force fittings; if you encounter resistance, pause and reassess rather than pulling hard. This step sets the stage for successful clearing and reduces the risk of leaks.
Step 2 – Clear the blockage with proper techniques
Insert a plumber's snake into the drain line and rotate it to dislodge debris. If you encounter a hard plug, apply gentle forward pressure and back off to avoid knotting the cable. Alternate pushing and turning to snag the obstruction. For smaller blockages, a mixture of baking soda and hot water can help loosen gunk without harsh chemicals. Keep a bucket handy to catch any dislodged material.
Step 3 – Flush and re-test drainage
After clearing, flush the line with hot water to wash away loosened debris. Reconnect the hose, or reassemble any panel, and run a test cycle with a small amount of water to verify proper drainage. If the water backs up again, repeat the clearing steps or consider trying a longer snake length. Watch for leaks around clamps and seals during testing.
Step 4 – Post-cleanup and preventive habits
Once drainage is flowing freely, perform routine maintenance to prevent future clogs. Clean the dishwasher filter monthly, avoid pouring fats down the drain, and periodically inspect hoses for wear. Keep the air gap free of mineral buildup and ensure the disposal inlet is clear. These habits reduce the chance of recurring clogs and extend the life of your appliance.
When to seek professional help and safe alternatives
If you cannot clear the line after multiple attempts, stop and call a licensed plumber. Persistent backups, unusual smells, or water leaks indicate a more serious issue such as a broken line or vent problem. Avoid using caustic cleaners that could damage plastics or metal parts. A professional can diagnose whether the problem is in the dishwasher, the sink plumbing, or the main sewer line, and recommend safe, effective solutions.
Tools & Materials
- Plunger (cup-style)(Best for a tight seal on the drain hose)
- Plumber's snake / auger (38-60 inches)(Flexible tip to reach clogs in drain line)
- Buckets and towels(To catch and absorb spills)
- Rubber gloves(Protect hands from grime)
- Flashlight(Inspect hoses and connections)
- Dishwasher-safe drain cleaner (optional)(Use with caution and only if manufacturer-approved)
- Screwdriver or pliers(If panels require removal)
Steps
Estimated time: 40-60 minutes
- 1
Turn off power and water
Power off the dishwasher at the circuit breaker and shut off the water supply if applicable. This eliminates the risk of shock and spills while you inspect the drain line. Gather towels and a bucket before you start.
Tip: Verify power is off at the breaker with a quick test, to avoid electric shock. - 2
Access the drain line and inspect
Remove the kick plate or access panel to reach the drain hose. Look for kinks, loose clamps, or obvious blockages near the connection. Do not force fittings; if resistance is felt, pause and reassess.
Tip: Take a photo of connections before removing components so you can reassemble correctly. - 3
Clear the blockage with a snake
Gently insert the snake into the drain line and rotate while pushing forward. When you feel resistance, try to snag or break up the blockage by subtle advances and twists. Remove debris as it loosens and keep the area clean.
Tip: Never yank the snake; controlled motion reduces the risk of damage. - 4
Flush and re-test drainage
Flush the line with hot water to wash away loosened material. Reconnect hoses or panels and run a test cycle with a small amount of water to verify drainage. Look for leaks around clamps and seals.
Tip: If the drain still backs up, repeat the snake process before concluding. - 5
Post-cleanup and preventive habits
After successful drainage, clean the filter and inspect hoses monthly. Avoid pouring cooking fats down the sink and keep the air gap clear. These steps minimize future clogs and extend appliance life.
Tip: Set a monthly reminder to inspect the dishwasher's filter and hoses.
Common Questions
What are the signs of a clogged dishwasher drain line?
Common signs include slow draining, water backing up into the sink, gurgling sounds, or a dishwasher that won't drain after a cycle. If these occur, inspect the drain line and filters first.
Look for slow draining, backups, or strange noises in your dishwasher, then inspect the line and filters.
Can I use chemical drain cleaners for the dishwasher drain line?
Chemical drain cleaners are generally not recommended for dishwasher lines because they can damage plastic components and seals. Mechanical clearing with a snake is safer.
Chemical cleaners are usually not a good idea for dishwasher lines; safer options involve a snake or flushing.
How long does it take to unclog a dishwasher drain line?
With common blockages, a typical self-guided unclogging session takes 30–60 minutes, depending on blockage location and your familiarity with the process.
Most DIY attempts take about half an hour to an hour, depending on how stubborn the clog is.
Should I disconnect the dishwasher before starting?
Yes. Always disconnect power to the dishwasher and, if possible, shut off the water supply to avoid shocks or spills during maintenance.
Yes—power off the dishwasher and shut the water supply if you can.
What if the blockage is at the main sewer line?
A blockage at the main sewer line requires professional intervention. Do not attempt aggressive DIY methods that could cause more damage.
If you suspect the main sewer line is blocked, call a professional right away.
Can regular maintenance prevent future clogs?
Yes. Regularly cleaning the filter, avoiding fats in the sink, and inspecting hoses can significantly reduce the chance of future clogs.
Regular maintenance prevents most clogs from returning.
Watch Video
Key Points
- Identify likely blockage spots in the drain line
- Use mechanical clearing tools first, avoid harsh chemicals
- Flush thoroughly and re-test drainage after clearing
- Maintain filters and traps to prevent future clogs
- Know when to call a professional to avoid damage