How to Unclog a Dishwasher: A DIY Guide
Discover a practical, DIY plan to unclog a dishwasher drain safely. Learn causes, essential tools, step-by-step actions, and maintenance tips to prevent future clogs.

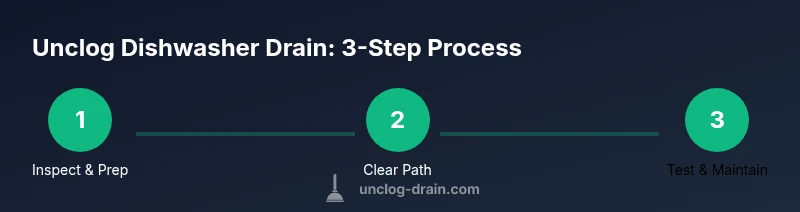
Goal: unclog a dishwasher drain quickly and safely. You’ll inspect the drain hose and air gap, remove food debris from filters and the sump, clear the discharge path with a plumber’s snake or a flexible brush, and run a short, hot-water cycle to rinse. Finish with preventive maintenance to avoid future clogs.
Causes of Dishwasher Clogs
According to Unclog Drain, dishwasher clogs are most often caused by a combination of routine use and imperfect installation. The primary culprits include stubborn food debris that slips past the filter and accumulates in the sump, mineral buildup from hard water, and grease that attaches to the interior walls of the drain. Over time, these deposits create a dense pocket that resists normal water flow, pushing wastewater back toward the tub or into the kitchen sink. Another frequent offender is a damaged or disconnected drain hose that kinks or traps food particles, or an air gap that has become blocked, especially in homes with older piping. Finally, misuses like rinsing cookware with large bits of leftover food can overwhelm the filter and lead to faster clog formation. Understanding these common causes helps you target the right area during the unclog process and prevents recurring issues.
When you unclog a dishwasher, you’re addressing both the symptom (slow draining or standing water) and the underlying cause (debris or mineral buildup). Regular maintenance reduces the frequency of these issues and extends the life of the appliance. In homes with hard water, mineral scale can settle into the service lines, requiring more thorough flushing and occasional descaling. By focusing on the drain hose, air gap, filters, and sump, you can systematically restore flow without costly repairs. This approach aligns with Unclog Drain’s emphasis on practical, non-chemical methods for DIY drainage issues.
Quick Diagnosis: Where to Look
A clogged dishwasher drain usually shows up as standing water after a cycle, slow draining, or a faint odor. Start with the most accessible parts: the filter, spray arm, and sump area where debris tends to collect. Check the drain hose under the sink for kinks or clogs that may prevent proper water flow. If your system has an air gap, inspect it for visible blockage and clean it out with a small brush or wire. A simple test is to run a hot water rinse with the dishwasher empty; if the water moves freely, the issue is likely near the filter or hose. Document any observations, such as a persistent odor or recurring backups, to guide your next steps. If the blockage persists after inspecting these components, you’re likely dealing with a deeper, more stubborn obstruction.
Tools & Safety for DIY Unclogging
Safety is non-negotiable when unclogging a dishwasher drain. Begin by unplugging the unit or switching off the circuit at the breaker, then shut off the hot water supply if accessible. Wear heavy-duty gloves and eye protection, and keep a towel or small bucket handy for minor spills. Essential tools include a drain snake or plumber’s auger (6–8 feet is typical for kitchen drains), needle-nose pliers or an adjustable wrench, a flashlight, and a stiff brush or old toothbrush for scrubbing filters and the sump. A bucket helps manage dirty water removed during cleaning. For odor control, you can use a small amount of vinegar and baking soda after clearing the drain, but avoid relying on chemicals to clear clogs. Keep children and pets away from the work area.
Remember: never mix chemical cleaners with dishwasher components, and always reseal hoses and panels after finishing.
Cleaning the Filter and Sump
A clean filter is essential to prevent future clogs. Start by removing the bottom rack and locating the filter assembly at the base of the tub. Rinse the filter under warm running water, using a soft brush to loosen caked grime. Inspect the sump area for lodged food—use tweezers or tongs if needed. If you notice a worn rubber seal or gasket, replace it to prevent leaks. Wipe the interior walls to remove residue that could contribute to buildup. After cleaning, reassemble the filter exactly as designed and reinsert the rack. A thorough cleaning can noticeably improve drainage and performance, reducing the likelihood of a recurrence when you “unclog dishwasher” in the future.
Keep in mind that a dirty sump not only causes clogs but can also lead to foul odors, so prioritize this area during routine maintenance.
Clearing the Drain Path: Hoses, Air Gap, and Snake
With power off, inspect the drain hose for kinks or twists that can trap solids. If your setup includes an air gap, remove the cap and clean the passages with a small brush or pipe cleaner. To clear deeper blockages, insert the drain snake into the drain line or air gap, advancing slowly until you meet resistance. Rotate the snake and pull back debris gradually; never force it. After removing the obstruction, wipe the end of the snake and inspect the material you pulled out to tailor future prevention. Finally, flush the line with hot water to push out remaining particles. If you still notice resistance, re-check the hose connections and ensure there are no leaks at the clamps.
Flushing and Test Run
Reconnect any removed hoses, restore power, and run a hot water cycle with the dishwasher empty. Observe the drain during the cycle to confirm water exits into the sink smoothly. If standing water returns, repeat the snake clearing or re-examine the air gap for residual blockages. After a successful test, run another hot cycle with a light dish soap load to help clear minor debris from seals. If the second run drains normally, you’ve likely solved the issue. If not, consider seeking professional guidance to avoid potential damage.
Document the process so you can replicate the fix in the future.
Maintenance to Prevent Future Clogs
Prevention is simpler than repeated unclogging. Clean the filter regularly—weekly or with every load if you wash heavily soiled items. Inspect the sump monthly for mineral buildup or residue and address any signs of wear. Run an empty hot-water cycle every few weeks to keep the interior clean and reduce biofilm formation. Use only dishwasher-safe items and pre-rinse heavily soiled dishes to minimize debris. If you live in a hard-water area, a rinse aid can help reduce mineral deposits on interior surfaces. Finally, arrange dishes to avoid large scraps in the drain and consider pre-rinsing only when necessary. These habits align with Unclog Drain’s recommendations for maintaining efficient dishwasher drainage.
When to Call a Professional
If you can’t remove the blockage after multiple attempts or notice frequent backups or sewage odors, it’s time to call a plumber. Significant clogs may indicate a blocked main line, venting issues, or improper installation that require professional equipment and expertise. Do not attempt complex disassembly or cutting into hidden pipes without proper training. When in doubt, schedule a professional assessment to protect your appliance and home plumbing. If you’re unsure about any step, seek guidance from a licensed pro to avoid costly damage.
Tools & Materials
- Drain snake (plumber’s auger)(6–8 ft is typical for kitchen drains; longer if needed)
- Adjustable wrench or pliers(To disconnect hoses or clamps)
- Screwdriver (flat-head and Phillips)(For removing panels or screws)
- Gloves and eye protection(Protect hands and eyes from debris)
- Flashlight(Illuminates hidden areas under the sink)
- Bucket and towels(Catch and manage dirty water)
- Soft brush or old toothbrush(Cleaning filters and sump)
- Vinegar and baking soda(Odor control after clearing; not a substitute for clearing)
Steps
Estimated time: 30-60 minutes
- 1
Power down and shut off
Power down by unplugging or switching off the dishwasher circuit. If accessible, shut off the hot water supply to prevent leaks when hoses are detached. This reduces the risk of electric shock and water spray during inspection.
Tip: Keep a dry area and use a flashlight to clearly see connections. - 2
Open and access the drain area
Carefully pull out the bottom rack to access the filter and sump. Remove the filter and inspect for trapped debris. Take a quick photo of hose routes before disconnecting anything so you can reassemble correctly.
Tip: Use a towel to catch any remaining water; work slowly to avoid splashing. - 3
Inspect drain hose and air gap
Check the drain hose for kinks and verify the air gap is clean and unobstructed. If you see blockage, remove it and clear with a brush. This step often resolves the blockage without disassembly.
Tip: Do not use force; a small amount of back-and-forth motion usually frees the blockage. - 4
Clear with drain snake
Insert the drain snake into the drain line or air gap and rotate slowly as you push forward. When you meet resistance, back off slightly and pull out debris. Repeat until clear.
Tip: Rotate steadily and avoid forcing the snake; resistance may indicate a tighter bend or solid obstruction. - 5
Clean filter and sump
Recheck and scrub the filter with warm water and a soft brush. Inspect the sump for any stubborn residue; remove with tweezers if needed. Reassemble the filter exactly as designed before testing.
Tip: A clean sump helps the dishwasher drain more efficiently after reassembly. - 6
Test run
Reconnect hoses, restore power, and run a hot water cycle with the dishwasher empty. Check for smooth drainage. If needed, perform a second hot cycle or re-run the earlier steps.
Tip: Document results so you can replicate the fix if the issue recurs.
Common Questions
What causes the dishwasher drain to clog?
Common causes include food debris buildup, hard water mineral scale, grease, and a blocked air gap or hose. Misplaced scraps during loading can also contribute. Regular filter cleaning reduces the risk.
Clogs are usually caused by scraps and mineral buildup; keeping the filter clean helps prevent it.
Can I use chemical drain cleaners in a dishwasher?
No. Chemical cleaners can damage seals and piping and may leave harmful residues. Mechanical clearing with a snake and proper cleaning is safer for dishwashers.
Avoid chemical cleaners; mechanical clearing is safer for your dishwasher.
Do I need to remove the dishwasher to unclog it?
Usually not. Many clogs can be cleared from under the sink or via the air gap. Some models may require panel access, but most DIY fixes stay accessible from the front.
Most clogs can be fixed without moving the appliance; access via the sink area is common.
How long does it take to unclog a dishwasher drain?
Most fixes take about 30–60 minutes, depending on blockage severity and your familiarity with the steps.
Most fixes take about half an hour to an hour.
When should I call a professional?
If the clog persists after multiple attempts, or if you notice recurring backups or odors, a licensed plumber should assess for main-line or venting issues.
If it keeps backing up after trying, it's time to call a professional.
Watch Video
Key Points
- Identify the main blockage source before disassembly
- Clean filters and sump to restore flow
- Test with hot cycles to verify success
- Adopt preventive habits to avoid future clogs