How to Unclog a Main Line Clog: A DIY Guide
Learn how to safely unclog a main sewer line with step-by-step instructions, essential tools, safety tips, and preventive strategies to keep your drains flowing smoothly. From identifying the issue to when to call a pro, Unclog Drain guides you through the process.

To unblock a main line clog, shut off water if possible, locate the main cleanout, and use a hand auger or drain snake to break up the blockage, followed by flushing with hot water. If sewers back up, evacuate fixtures and call a licensed plumber. This guide covers safety, tools, and step-by-step methods.
Understanding the stakes of a main line clog
A main line clog is a serious plumbing issue because it affects every fixture in your home. When the main line is blocked, toilets won’t flush, sinks drain slowly, and showers can back up. Sewage backups can cause unpleasant odors, water damage, and health risks from exposure to waste. Blockages in the main line are commonly caused by tree roots invading pipes, a collapsed section of pipe, or heavy buildup from hair, grease, and soap scum over many years. Recognizing the signs early—such as simultaneous backup in multiple fixtures or gurgling sounds in the drains—helps you act quickly and reduce the risk of extensive damage. According to Unclog Drain, addressing the issue promptly with a measured, safe approach lowers the chance of accidental spills and simplifies subsequent repairs. Remember: safety comes first and DIY attempts should never compromise your health or the home’s structure.
Before you dive in: safety and assessment
Safety is the top priority before you start any main line work. Turn off the main water valve if you can access it, and open the cold taps to relieve pressure. Wear protective gloves and safety goggles, and keep children and pets away from the work area. Do not mix chemical cleaners inside the drain or in the sewer line; fumes can buildup in closed spaces and react unpredictably. If you smell strong sewer gas, evacuate the area and call a professional. Map out which fixtures are affected—are toilets overflowing, or is the basement drain backing up? A quick assessment helps you plan the right strategy and avoid making the situation worse. Unclog Drain’s guidance emphasizes safety as the foundation for any DIY unclogging project.
Tools and materials you’ll need
Having the right tools ready before you start saves time and reduces frustration. You’ll typically need a plumber’s snake (drain auger), protective gloves, safety goggles, a flashlight for visibility, a bucket to catch water, and towels to protect floors. A dedicated clog-clearing plunger can help loosen debris near the opening, but avoid forcing water down the main line if you’re unsure about the blockage location. If you have access to a wet/dry vacuum, it can assist in removing standing water after you disconnect a cleanout cap. Always inspect the area for sharp edges or damaged piping before you begin. This preparation stage reduces the risk of a messy leak or accidental pipe damage and aligns with Unclog Drain’s safety recommendations.
Accessing the main line cleanout safely
Most homes have a cleanout access point on or near the main sewer line. This is your entry point for a drain snake. Protect the area with towels and a bucket, and loosen the cleanout cap slowly to relieve built-up pressure. If the cap is tight, apply steady, even force with a wrench rather than hammering it, which can damage the pipe threads. Once loosened, inspect the interior for visible debris and take note of any unusual smells—that can indicate a deeper problem beyond simple hair buildup. Working from the cleanout is safer and more controllable than forcing water through closed fixtures, and it increases your chances of a successful clearance.
Step-by-step overview for clearing a main line clog (high level)
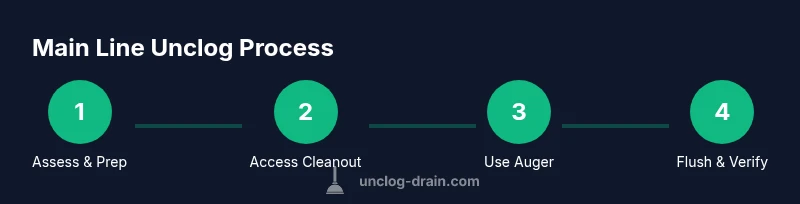
Clear access, feed the auger into the cleanout, rotate to break the blockage, and gradually retrieve debris while pulling back to prevent further compaction. After the blockage loosens, flush with hot water to push remaining material through the pipe, and re-test each fixture to confirm drainage is restored. If you hit resistance or the water backs up again, you may be dealing with a more serious problem that requires professional equipment and expertise. Remember that every main line situation is unique, so proceed cautiously and avoid forcing anything that could damage the pipe. Unclog Drain recommends pausing when you feel excessive resistance and moving to professional options if needed.
Using a drain auger effectively: technique and safety
A drain auger is your primary tool for breaking up blockages in the main line. Insert the auger slowly, keeping the cable straight as you feed it in. With a steady twist, advance the cable and push forward only as far as necessary to reach the blockage. When you feel a bite or resistance, rotate and pull back slightly to bring debris loose. Do not force the auger aggressively; excessive torque can damage pipes or push the clog deeper. Wear gloves and protective eyewear, and keep the auger and any resulting debris away from your face. If the auger jams, back it out a little, clean the head, and try again. Caution and controlled movement reduce the risk of pipe damage and spray.
Flushing the system and verifying results
After clearing the blockage, flush each affected fixture with hot water to help move residual material through the system. Run water in several fixtures simultaneously if necessary to confirm the main line is clear. Listen for a return to normal flow and watch for gurgling sounds, which can indicate lingering issues. If water still backs up, re-access the cleanout and re-run the auger. In some cases, a final pass or a more advanced tool may be required. Document the results and clean up the area thoroughly to prevent recontamination and to help future maintenance efforts.
When to call a professional: red flags and thresholds
DIY unclogging is appropriate for minor, localized blockages near the cleanout. However, multiple fixtures backing up, sewage odors in living spaces, slow drains after repeated attempts, or backups after heavy rain may indicate a major sewer line problem. In these cases, a licensed plumber has access to camera inspection equipment, professional-grade augers, and city-specific expertise to identify root causes and perform necessary repairs safely. The Unclog Drain Team recommends not proceeding beyond your comfort level when symptoms persist after your first attempt. Your safety and the health of your home come first.
Preventive maintenance to minimize future main line clogs
Regular maintenance can help prevent future main line clogs. Consider periodic professional inspections, watch what you flush, and avoid putting grease or fibrous materials down the drain. Install strainers in all drains to catch hair and solids before they enter the main line. If your yard has trees nearby, monitor roots and consider root barriers or routine root maintenance in older properties. A small amount of proactive maintenance goes a long way toward preserving the integrity of your main sewer line, saving you time and money in the long run.
Tools & Materials
- Manual or power drain auger (plumber's snake)(14-25 ft for main line access; longer if you know the blockage is farther away)
- Protective gloves(Heavy-duty nitrile or rubber; long cuffs preferred)
- Safety goggles(Eye protection against splashes and debris)
- Bucket and old towels(Catch water and protect flooring; keep extra towels handy)
- Flashlight or headlamp(Improve visibility inside the cleanout and pipes)
- Plunger (cup or bell-type)(Useful for loosening debris near the opening)
- Adjustable wrench(Optional for removing caps or fittings if needed)
- Sealant tape or duct tape(Temporary seal for minor seal issues during work)
Steps
Estimated time: 60-90 minutes
- 1
Prepare and safety-check
Shut off the main water supply if accessible. Put on gloves and eye protection, and clear the area. Gather your auger and cleaning supplies, and lay down towels to catch spills. This reduces risk and makes the process smoother.
Tip: Double-check the shutoff valve location before you begin. - 2
Access the main line cleanout
Locate the cleanout plug near where the main line enters the home. Place a bucket underneath and loosen the cap slowly to relieve pressure. Inspect the interior for visible debris and plan your entry path.
Tip: If the cap is stubborn, apply steady, even pressure with a wrench rather than striking it. - 3
Insert the auger and start feeding
Carefully insert the auger into the cleanout and begin turning clockwise while pushing forward. Feed the cable gradually to reach the blockage without forcing it through resistance.
Tip: Keep the cable as straight as possible to avoid kinking. - 4
Break up the blockage
Continue to twist and push, allowing the auger’s head to engage the clog. When you feel debris loosen, retract slightly and pull the cable back to extract material. Repeat as needed until you sense relief.
Tip: Avoid applying excessive torque to prevent pipe damage. - 5
Flush and test
Remove the auger and run hot water through nearby fixtures to help purge the line. Test by running water in several fixtures simultaneously; observe for smooth drainage and the absence of backups.
Tip: If drainage remains slow, reinsert the auger for a brief final pass. - 6
Clean up and reseal
Wipe down the area, disinfect if necessary, and reseal the cleanout cap. Dispose of any debris properly and store tools safely. This step reduces lingering odors and contamination risk.
Tip: Take a photo of the cleared area for reference if you need to explain the issue to a pro later. - 7
Escalation considerations
If you encounter persistent resistance, sewer gas, or backups in more than one fixture, stop DIY work and contact a licensed plumber. Complex blockages may require professional camera inspection and equipment.
Tip: Document symptoms and the steps you took to help the pro diagnose faster.
Common Questions
What are the signs of a main line clog?
Common signs include multiple fixtures backing up, toilets overflowing, gurgling sounds in drains, and slow drainage throughout the home. If these occur together, the main line is likely involved. Stop and assess safety before trying any DIY fixes.
If you notice several fixtures backing up at once and gurgling sounds, that usually points to a main line clog. Pause and assess safety before attempting any fixes.
Can I unclog a main line myself, or should I call a pro?
DIY unclogging is feasible for straightforward blockages near the cleanout with proper safety measures and tools. If your backup persists, you smell sewer gas, or you’re unsure about the blockage’s location, contact a licensed plumber for camera inspection and professional equipment.
You can try a basic DIY unclogging if the blockage is near the cleanout, but call a pro if symptoms persist or sewer gas is present.
What tools do I need for main line unclogging?
Essential tools include a drain auger, protective gloves, safety goggles, a flashlight, a bucket, and towels. A plunger and wrench can help for initial loosening, but the auger is the main device for deeper clogs.
You’ll want a drain auger, gloves, goggles, a flashlight, a bucket, and towels—the auger is the key tool for a main line.
Is using chemical drain cleaners safe for main line clogs?
Chemical cleaners are not recommended for main line clogs. They can damage pipes, fail to reach the block, and create hazardous fumes in closed spaces. Opt for mechanical clearing with an auger or professional services when needed.
Chemicals aren’t recommended for main lines. They can harm pipes and aren’t reliable; use an auger or call a pro.
How long does it take to unclog a main line?
Time varies with the blockage’s location and complexity. A simple near-cleanout clearance may take under an hour, while deeper blockages or root-related problems can require more extensive work or professional intervention.
It depends on the blockage, but simple cases can take under an hour, while tougher ones may need more time or professional help.
What should I do after the clog is cleared?
Flush all fixtures, monitor drainage for 24–48 hours, and consider preventive steps like strainers and mindful disposal of grease and hair. If issues recur, schedule a professional inspection to check for root intrusion or pipe damage.
Flush and monitor for a day or two, then take preventive steps to avoid future clogs and consider a professional inspection if it recurs.
Watch Video
Key Points
- Identify and access the main cleanout safely.
- Use a drain auger to break blockages without forcing damage.
- Flush thoroughly and verify drainage across fixtures.
- Call a professional if backups persist or sewer gas is present.
- Incorporate preventive measures to reduce future clogs.