Jetters to Unclog Drain: A Comprehensive DIY Guide
Learn how to use a jetter to unclog drains safely and effectively. This DIY guide covers nozzle choices, setup, step-by-step jetting, and maintenance for kitchen, bathroom, and outdoor drains.

A jetter can clear stubborn clogs by delivering high-pressure water into the drain and blasting debris away. This guide explains how to select the right jetter, prepare the system, and execute safe, effective passes to restore flow in kitchen, bathroom, and outdoor drains.
What is a jetter and when to use it
Jetters are high‑pressure water tools designed to break up stubborn clogs inside pipes. They push a hose with a nozzle down the drain, delivering bursts of water to scour away grease, mineral buildup, and compacted debris. A jetter is especially useful for long runs or clogs that resist plungers and cables, and it can be used on kitchen, bathroom, outdoor, and sewer lines. According to Unclog Drain, jetters perform best when you select the right nozzle type and follow a cautious setup to protect pipes and fixtures. Start by identifying the pipe material, the likely clog cause, and the access point. If the drain runs slowly after basic snaking, or you suspect roots or a damaged pipe, a jetter may be the right tool—use it with care and follow safety steps.
How jetters work: nozzles, pressure, and flow
A jetter uses a hose and a nozzle to deliver a focused jet of water into the pipe. The nozzle shape, distance, and orientation influence how the water scours the walls and dislodges debris. Operators control the flow by starting at a low pressure or limited distance and gradually advancing where safe. The goal is to break up the clog and push debris downstream rather than forcing it into branches or past traps. Use only equipment rated for the pipe diameter and material; plastic pipes require gentler passes, metal pipes tolerate more but can be damaged by a too‑strong blast. After each pass, back flush the line by reversing the flow to clear the debris and observe flow.
Safety first: PPE and workspace
Before you power up a jetter, assemble a safety zone around the work area. Wear splash‑proof goggles, chemical‑resistant gloves, and sturdy footwear. Keep pets and children away, and protect nearby fixtures from overspray with towels or plastic sheeting. Check that the electrical outlet or generator is separate from the wet area, and never use a jetter near live electrical components. A calm, methodical approach reduces the risk of injury or accidental pipe damage.
Nozzle selection and hose length considerations
Nozzle type matters as much as pressure. A rotating or cone‑shaped nozzle helps break up stubborn residues, while a flat or fan nozzle covers a wider area when you’re flushing a long, straight run. Match the nozzle to the pipe material and diameter to avoid scraping the interior walls. Hose length should comfortably reach the clog with some slack for handling, plus extra length to maneuver around bends. If you’re unsure about the pipe layout, start with the shortest practical run and work your way deeper.
Preparing the system and checking for leaks
Begin with a visual inspection of all connections, hoses, and fittings for wear or damage. Clear the work area so you can move freely as you feed the hose into the drain. Attach the jetter to a clean water source and open the supply slowly to check for leaks. If you notice any dripping or flexing hoses, stop and replace worn connectors before continuing. A well‑prepared setup minimizes mess and prevents unintended water damage.
Step-by-step technique at the clog
- Prepare PPE, connect the jetter, and test a short, low‑pressure burst near the drain entrance. 2) Feed the nozzle slowly into the drain until you encounter resistance, then back off slightly. 3) Push forward with short bursts while watching the flow and listening for changes in the pipe. 4) If the water clears a portion of the line, back off and flush to observe fresh flow before continuing. 5) When the clog yields, gently retract the nozzle and perform a final flush to push debris downstream. 6) Run water through the line to confirm full drainage before reassembling.
Common mistakes and how to avoid them
Avoid using excessive pressure at the outset—start gently and increase only if required. Don’t crank the nozzle past resistance without backing off; this can push debris into traps or cause pipe damage. Never jet near electrical outlets or exposed wiring. If you see signs of hardened roots, pipe cracks, or collapsed sections, stop and call a pro. Document any strange sounds or sudden water surges so you can explain the issue clearly if you seek professional help.
Maintenance and cleanup after jetting
After you finish, thoroughly rinse the hose and nozzle with clean water to remove debris. Dry fittings and store the equipment in a dry area to prevent rust or mold. Inspect the trap and accessible pipe sections for residual material and clean as needed. Keep a log of the drainage performance over the next few days to track improvements or recurring issues. A well‑maintained jetter works better and lasts longer.
When to call a pro and cost considerations
If you encounter persistent blockages after a few passes, or if you suspect tree roots, a crushed pipe, or sewer line problems, contact a licensed plumber. Jetting may be effective, but some scenarios require specialized equipment and expertise beyond home use. Costs vary by region and problem complexity, so weigh renting, buying, or hiring a pro based on frequency of use and the potential risk to your plumbing.
Real-world scenarios: kitchen, bathroom, and outdoor drains
Kitchen drains often accumulate grease and food particles; a jetter can break the buildup but may require careful nozzle choice to avoid trap issues. Bathroom drains handle hair and soap scum; rotating nozzles can help dislodge tangled debris. Outdoor drains deal with organic matter and sediment; ensure outdoor lines have a clear access point and are not connected to indoor traps. In all cases, avoid aggressive pushing, and monitor flow after every pass to adjust technique as needed.
Buy vs rent vs pro: making the right choice
If you’re a frequent DIYer, owning a basic jetter and a few nozzles can be practical, provided you have space to store and maintain it. For one‑off projects, renting a unit with guidance from staff may be more economical and safer. If the clog is recurrent or involves roots or structural pipe problems, hiring a pro with hydro‑jetting and camera inspection is usually the best option. The choice depends on your confidence, the pipe material, and the expected maintenance needs.
Tools & Materials
- Jetter machine (electric or hydraulic)(Ensure it is rated for residential use and appropriate for your pipe size.)
- Hose and reel(Long, non‑kinking hose; check for wear and flexibility.)
- Nozzles (flat, rotating/conical, and specialty options)(Have at least two nozzle types suitable for your pipes (PVC, ABS, metal).)
- Water supply with sufficient pressure(A clean, stable supply such as a garden hose or dedicated line.)
- Safety gear (goggles, gloves, boots)(Protect eyes from splash and feet from slipping hazards.)
- Pliers or adjustable wrench(For securing fittings and clamps.)
- Buckets, towels, rags(Use to catch spills and keep the work area clean.)
- Flashlight or headlamp(Illuminates dark drain openings and helps inspect lines.)
Steps
Estimated time: 60-90 minutes
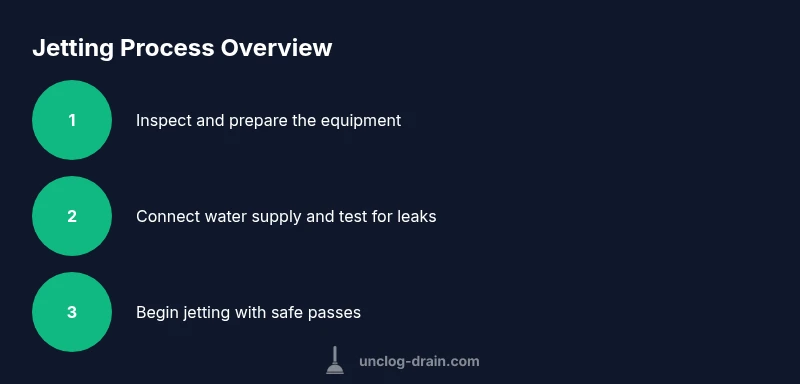
- 1
Inspect equipment and safety gear
Put on PPE, inspect hoses and fittings for wear, and choose the nozzle type based on pipe material. Verify the jetter is clean and ready to operate. Ensure the work area has adequate lighting and space to maneuver.
Tip: Always start with a visual check to prevent leaks or accidental spills. - 2
Connect water supply and test for leaks
Attach the hose to a clean water source and slowly open the supply. Check all connections for leaks and tighten as needed before proceeding. If you detect a leak, stop and replace the faulty part.
Tip: A slow, controlled water test avoids a sudden spray that could spray you or damage nearby fixtures. - 3
Select nozzle and verify compatibility
Choose a nozzle suited to the pipe material and clog type. Attach the nozzle securely to the hose and ensure the connection is watertight. Do a quick run‑through in a safe area to confirm no obstructions block the nozzle.
Tip: Use multiple nozzles if you’re unsure about the clog; switch during the process to optimize results. - 4
Feed nozzle into the drain
Gently feed the nozzle into the drain until you feel resistance, then back off slightly to avoid pressurizing a tight bend. Avoid forcing the nozzle past a possible trap or bend without checking the line geometry.
Tip: Keep the hose aligned with the pipe axis to prevent scraping the interior walls. - 5
Begin jetting with short bursts
Start with small bursts of water and observe the effect on the clog. If flow improves, pause to observe before continuing. If the flow stalls, rotate the nozzle or switch to a different angle.
Tip: Never hold the jet against one point for too long; drifting the nozzle helps avoid damage. - 6
Advance nozzle gradually with monitoring
Slowly push the nozzle further into the line as the clog begins to loosen. Monitor the return flow and listen for a clearer tone indicating debris clearing. If you encounter a persistent blockage, back up and try another approach.
Tip: Document any changes in flow so you can describe the outcome to a professional if needed. - 7
Reverse flow and flush debris
When you sense debris breaking free, reverse briefly to flush loosened material toward the main line. Then feed forward again with short bursts to continue clearing. Repeat several cycles as needed.
Tip: Reversing helps prevent debris from packing into a trap or vent line. - 8
Retract nozzle and perform final flush
Gently retract the nozzle while continuing a light flush to clear the entry area. Once the tube is out, run water through the entire length to confirm consistent flow. Stop when the drain runs freely and clean up any spills.
Tip: A final flush confirms the clog is fully cleared before reassembling. - 9
Inspect and reassemble
Inspect traps and access points for signs of remaining debris. Reassemble any disassembled components and test the drain again with steady water flow. Record results for future reference.
Tip: If drainage remains poor, escalate to a professional evaluation rather than forcing another jetting pass.
Common Questions
Can I use a jetter on a toilet drain?
Jetting a toilet line is generally not recommended for DIY homeowners due to the risk of cracking the porcelain and disturbing the trap. Use a toilet auger or call a professional for toilet‑specific clogs. If you decide to attempt, proceed with extreme care and never point the nozzle directly at the rim or sewers.
Jetting a toilet is risky for DIYers. Use a toilet auger or hire a professional for toilet clogs.
Is renting a jetter better than buying for a home project?
Renting a jetter is often the most practical option for a one‑time project, especially if you don’t have a dedicated workspace or storage. Buying makes sense if you anticipate frequent use and can manage maintenance and safe storage.
Rent a jetter for one‑time projects or buy if you expect regular use.
What safety precautions should I take during jetting?
Wear eye protection, gloves, and non‑slip footwear. Keep bystanders away and ensure the work area is dry and well lit. Never operate a jetter near electrical lines or outlets, and always follow manufacturer guidelines for nozzle selection and pressure.
Wear PPE and keep the area safe. Don’t operate near electricity.
Will a jetter clear tree roots in a drain?
A jetter can clear minor roots, but heavy or spreading root intrusion often requires professional hydro‑jetting, camera inspection, and possibly pipe rehabilitation. If roots are advancing, schedule a pro evaluation rather than relying on DIY jetting alone.
Jetting can help with small roots, but major root intrusion needs a pro.
Can I use chemical cleaners with a jetter?
Avoid mixing chemical cleaners with jetting. Chemicals can create hazardous fumes and react unpredictably with pressurized water. Rinse the line thoroughly before and after jetting, and use mechanical methods to clear debris when possible.
Don’t mix chemicals with jetting; stick to mechanical clearing.
Watch Video
Key Points
- Start with the right nozzle for your pipe type
- Protect yourself with proper PPE and a safe workspace
- Use controlled bursts and monitor flow to avoid pipe damage
- Call a pro if roots or structural issues are suspected