Drain Unclog Guide: Fast DIY Fixes for Drains and Sinks
Master safe, practical steps to unclog drains and sinks quickly. This DIY guide covers essential tools, repeatable techniques, troubleshooting tips, and prevention strategies to keep your plumbing flowing.

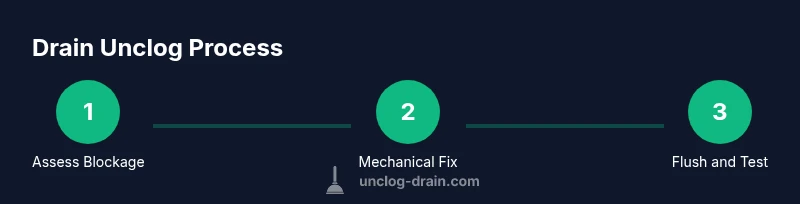
Drain unclog basics: this guide helps homeowners fix common clogs safely using proven DIY methods. You’ll inspect the trap, try a plunger or plumber’s snake, and consider enzymatic cleaners before dialing a pro. The steps emphasize safe techniques, patience, and prevention to restore steady drainage and reduce future clogs. Whether you’re tackling a kitchen sink, bathroom drain, or shower stall, this approach minimizes mess and chemical exposure while teaching you when a professional is needed.
Why DIY Drain Unclog Matters
Clogs are a common home annoyance, but they’re also a signal that the drainage system is under stress. The ability to drain unclog using safe, proven techniques reduces mess, minimizes chemical exposure, and helps you learn how your plumbing behaves. According to Unclog Drain, most residential clogs originate in the trap or the lower portion of the line, where hair, grease, soap, and mineral buildup accumulate over time. This means a thoughtful, methodical approach—rather than a single aggressive action—will usually restore flow. In addition, understanding whether the problem is isolated or part of a shared drain system informs your next steps and whether you should involve a professional. Safety comes first: wear gloves, eye protection, and keep kids and pets away from the work area. If you notice sewage backup, foul odors, or multiple fixtures affected, stop and seek professional help promptly.
Understanding the root cause also shapes prevention. A slow-draining kitchen sink might hinge on grease buildup in the trap, while a bathroom drain often suffers from hair and soap scum accumulating in the trap or pipe turns. The Unclog Drain team emphasizes that addressing both the symptom (the clog) and the cause (ongoing buildup) yields the best long-term results. By diagnosing correctly and acting with care, you reduce the risk of leaks, pipe damage, and repeated clogs. This guide blends mechanical methods, safer cleaners, and preventive habits to help you drain unclog efficiently and confidently.
Tools and Safety Essentials
Before you begin, assemble a simple toolkit and ensure you understand safety basics. A well-chosen set of tools reduces mess and increases your chances of success without resorting to harsh chemicals. Start with a sturdy plunger with a flange for sinks and a straight plunger for shower bases. A drain snake or hand auger is invaluable for deeper obstructions. Rubber gloves, eye protection, and a bucket or tray to catch water are essential for cleanliness and safety. If you plan to use buffers like baking soda and vinegar, keep them separate from any chemical cleaners, and never mix cleaners as that can release hazardous fumes. Finally, a flashlight helps you see into the drain and traps more clearly. The goal is to work cleanly and steadily, staying patient as you test drainage at each stage. According to Unclog Drain Analysis, safety and preparation significantly improve outcomes and reduce mess, so take a moment to set up properly before touching the drain.
Step-by-Step Mechanics: Mechanical Solutions
Enzymatic Cleaners and When to Use Them
P-Traps, Vents, and Hidden Issues
Prevention: A Simple Routine to Keep Drains Clear
Safety, When to Call a Pro, and Clean-Up
Authority sources and Additional Reading
Tools & Materials
- Plunger with flange (sink)(Use a proper flange plunger for the best seal in a sink. Have a backup large cup plunger for showers.)
- Drain snake / auger (hand-held)(Choose a hand-crank model; a 3-6 ft length is typical for most residential drains.)
- Bucket or tray(Catch water and debris when you open traps.)
- Rubber gloves and eye protection(Protect skin and eyes from splashes.)
- Towels or rags(Contain spills and keep the workspace clean.)
- Enzymatic drain cleaner (optional)(Safer alternative to chemicals, used for organic buildup.)
- Old towels and flashlight(Improve visibility and contain mess.)
- Pipe wrench (optional)(Only if you need to loosen accessible fittings.)
Steps
Estimated time: 60-120 minutes
- 1
Shut off water and prepare the area
Begin by turning off the water supply to the affected drain to prevent overflow. Place towels around the area and set a bucket ready to catch any spilled water. This initial safety step reduces mess and protects your workspace.
Tip: If you can’t locate a shut-off valve, turn off the main water supply temporarily and plan to complete the work quickly. - 2
Remove the drain cover or strainer
Carefully lift the cover or strainer and clear any visible debris by hand. If the debris is stubborn, use a gloved finger or small tool to extract it without pushing it further into the pipe.
Tip: Work over the bucket so you don’t drop loose debris into the drain again. - 3
Inspect and clean the P-trap
Place a bucket beneath the trap, then loosen the slip nuts and remove the trap. Clean out hair, gunk, and mineral buildup from the inside of the trap and the connecting pipes before reassembling.
Tip: Reassemble with new washers if the old ones are damaged or worn. - 4
Try the plunger properly
Set the plunger to seal around the drain opening. Use firm, vertical strokes without lifting the plunger out of the seal. If water is present, keep plunging until a steady flow resumes or the water level drops.
Tip: Ensure there’s enough water to cover the plunger’s cup for an effective seal. - 5
Use a drain snake to reach deeper
Insert the snake into the drain and rotate the handle while feeding it forward. Stop if you feel resistance and pull back slowly to dislodge the obstruction.
Tip: Avoid forcing the snake; gentle, steady pressure at each turn works best. - 6
Flush with hot water and gentle cleaners
Boil water and slowly flush the drain to wash away loosened debris. If you used baking soda and vinegar, let it fizz, then flush with hot water to clear the residue.
Tip: Do not mix chemical cleaners with baking soda or vinegar in the same drain. - 7
Re-test drainage and inspect for leaks
Run water and observe the drainage rate. Check for leaks around the trap and connections; tighten fittings if needed.
Tip: If drainage remains slow, repeat the snake or plunger steps rather than abandoning the effort. - 8
Consider enzymatic cleaners for maintenance
If organic buildup is likely, an enzymatic cleaner can help over time. Use it as a maintenance step after mechanical clearing to reduce future clogs.
Tip: Allow the cleaner to sit as directed on the label and avoid flushing with harsh chemicals afterward. - 9
Reassemble and clean up
Replace the trap and drain cover securely. Wipe down the area, dry surfaces, and return tools to storage. Ensure the area is dry to prevent mold growth.
Tip: Label the trap location for future maintenance and note when you last cleared the drain. - 10
Document and monitor for changes
Keep a simple log of what you did and when. If clogs recur, consider scheduling a professional inspection to identify underlying issues in your plumbing.
Tip: A quick weekly check during high-use periods helps catch problems early.
Common Questions
What is the safest first step when a drain clogs?
Start with turning off the water and using a plunger. If that fails, move to the drain snake rather than immediately resorting to chemical cleaners. Never mix cleaners as this can create hazardous fumes.
Turn off the water, try the plunger, then move to the snake if needed. Avoid chemical mixtures and call a pro if the clog persists.
Can enzymatic cleaners fix clogged drains?
Enzymatic cleaners can be helpful for routine maintenance and organic buildup, but they are usually slower and may not clear a solid blockage immediately. They are best used as a preventive measure after a mechanical clear.
Enzymatic cleaners work well for ongoing maintenance but aren’t a fast fix for a stubborn clog.
When should I call a plumber?
Call a licensed plumber if the clog recurs after multiple attempts, if you notice sewage odors, or if several fixtures drain slowly at once. These signs may indicate venting problems or a sewer line issue.
If the clog keeps returning or you smell sewer gas, it’s time to call a plumber.
Is hot water safe for grease clogs?
Hot water can help with loose grease but may not dissolve a thick grease blockage. Use hot water in combination with mechanical methods and avoid relying on hot water alone for stubborn clogs.
Hot water helps with some grease, but it isn’t a guaranteed fix for stubborn clogs.
Can I use chemicals to unclog drains?
Chemical drain cleaners can damage pipes and pose safety hazards. Use mechanical methods first and save chemicals as a last resort only if the blockage is significant and you have proper ventilation.
Be careful with chemical cleaners; they can harm pipes and people. Try mechanical methods first.
Key Points
- Identify the blockage source before starting
- Prioritize mechanical methods over harsh chemicals
- Inspect and clean the P-trap for easy fixes
- Test drainage after each method and safety-check fittings
- Prevent future clogs with routine maintenance