Unblock Toilet with Plunger: A Practical DIY Guide
Learn a safe, step-by-step method to unblock a toilet with a plunger. This guide covers tools, technique, and troubleshooting for DIY homeowners.

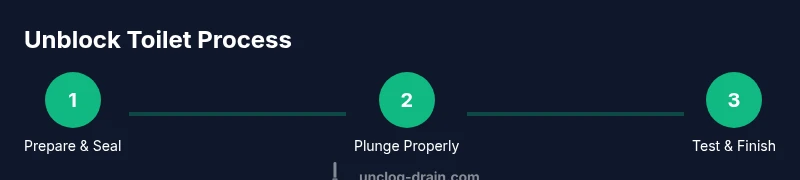
Goal: unblock a toilet with a plunger using a standard method. You’ll seal the drain, apply steady pushes and pulls, and test by flushing. Gather a flange plunger, gloves, towels, and a bucket. Use controlled movements to break the clog, then re-test and clean up. Keep the area dry and avoid splashes.
Safety-first mindset when unblocking a toilet
A clogged toilet can be a messy situation, but safety should always come first. Begin by turning off the water supply to the toilet and removing the tank lid if you need to inspect for obvious issues. Wear rubber gloves and keep a bucket and towels nearby to catch splashes. According to Unclog Drain, a calm, prepared setup reduces risk and speeds results. The goal is to create a tight seal around the drain and apply deliberate pressure; rushing often makes matters worse. If overflow occurs, stop, mop, and reassess. This approach minimizes mess, protects your floors, and keeps you in control as you attempt to unblock toilet with plunger.
Tools and plunger choices for the job
The right plunger makes a big difference. A flange plunger is designed for toilets and forms a better seal on curved drain openings than a standard cup plunger. Always have a backup cup plunger on hand in case you need a different seal. Prepare the plunger by ensuring the flange fits snugly into the drain and that the bell is fully submerged in water. The Unclog Drain team recommends starting with a flange plunger for most toilets and switching to a cup plunger only if required. Gloves, towels, and a bucket remain essential to keep the area clean and dry while you work to unblock toilet with plunger.
The core technique: seal, plunge, and test
The secret to success is a tight seal combined with steady pressure. Position the flange so the rim covers the drain opening completely and ensure the plunger is submerged. Begin with slow, deliberate thrusts to build suction, then push with authority while maintaining the seal. Do not lift the plunger out between strokes; instead, alternate between pushing and pulling in a consistent rhythm. After 8–12 cycles, flush to test whether the blockage has cleared. If water drains slowly, repeat the plunging cycle and test again. With patience, you can unblock toilet with plunger using this method.
Handling overflow and stubborn clogs
If water rises toward the rim, stop immediately and remove excess with towels or a bucket. Check for air leaks around the seal, then re-submerge and refocus your plunging technique. If you still don’t see improvement after several cycles, consider adding a toilet auger or calling a plumber. Handling overflow calmly prevents splashing and reduces the risk of exposure to wastewater. The goal remains to unblock toilet with plunger while maintaining cleanliness and safety.
Aftercare, sanitation, and prevention
When the clog clears, sanitize the plunger and surrounding surfaces, then run a quick flush to confirm normal operation. Clean and dry the area to prevent mold and odors. To reduce future clogs, practice responsible flushing and avoid flushing non-flushable items. Small habits—like using less toilet paper and disposing of wipes properly—can prevent repeat blockages. The Unclog Drain team emphasizes that prevention is easier than remediation, and consistent maintenance helps you keep drains flowing smoothly.
When to escalate: signs a plumber is needed
Not all clogs respond to plunging. If plunging fails after several attempts, or if you notice recurring draining problems, it may signal a deeper issue in the sewer line or blocked main line. In such cases, a licensed plumber can assess the system, clear the blockage with specialized equipment, and inspect for leaks. Remember, safety first: avoid forcing a solution that could damage plumbing.
Tools & Materials
- toilet flange plunger(Choose a plunger with a flange for best seal)
- rubber gloves(Non-latex if possible; protect skin)
- old towels(Absorb spills and protect floor)
- bucket(For removing excess water)
- flashlight(Inspect under rim and trap if needed)
- newspaper or plastic sheet(Contain waste during cleanup)
Steps
Estimated time: 30-45 minutes
- 1
Prepare the area and gear
Clear the area, put on gloves, and bring towels. Turn off the water supply and, if needed, remove the tank lid to inspect. This setup reduces splash risk and makes plunging more effective.
Tip: Keep a bucket handy to capture water and wipes for quick cleanup. - 2
Check the water supply and shut-off valve
Ensure the toilet’s shut-off valve is fully closed to limit water flow during plunging. If there’s no valve or water keeps rising, skip to the cleanup instructions. This helps you avoid overflow and provides a stable work environment.
Tip: A controlled start prevents mess and makes plunging more efficient. - 3
Position the plunger for a solid seal
Place the flange into the drain opening and ensure the rim is fully sealed against the funnel of the toilet. Submerge the bell so the plunger is surrounded by water, which improves suction. A proper seal is critical for the plunging sequence to work when you unblock toilet with plunger.
Tip: If air leaks, add water to the bowl to maintain a seal. - 4
Plunge with measured rhythm
Push straight down with even pressure, then pull up slowly to lift the clog away. Maintain the seal on every stroke and avoid lifting the plunger off the drain between strokes. Do 8–12 cycles and monitor the water level for improvement.
Tip: Rushing decreases suction and can push water out of the bowl. - 5
Test and repeat if needed
Release the plunger and flush to test drainage. If the water level remains high, re-seal and repeat the plunging sequence. Persistent clogs may require additional cycles or switching to an auger.
Tip: Let the toilet settle briefly between cycles for best results. - 6
Finish with cleanup and sanitation
Wash hands, sanitize tools, and wipe down the bathroom surface. Store the plunger upright in a ventilated area away from food prep spaces. This final step reduces odors and prepares the space for normal use.
Tip: Air-dry surfaces to prevent mold growth.
Common Questions
What kind of plunger should I use?
A toilet flange plunger creates a better seal for toilets. Use it first before switching to a standard cup plunger if necessary. Avoid using a plunger not designed for toilets.
Use a toilet flange plunger first for the best seal, and switch to a cup plunger if needed.
Why isn’t it draining after plunging?
Ensure the seal is tight and there’s enough water to submerge the plunger. If not, refill the bowl and try again. If it still drains slowly, the clog may be deeper or more resistant.
Check seal and water level, then try a few more cycles.
Can chemical cleaners help?
Chemical cleaners are not recommended as a first step and may damage pipes. Mechanical methods like plunging or augering are usually safer and more effective.
Chemicals can be risky; mechanical methods work best.
How long should I plunge before testing again?
A typical cycle lasts 15–20 seconds. Pause briefly between cycles and test by flushing after several cycles.
Try several 15-20 second plunges, then flush to test.
When should I call a plumber?
If plunging fails after multiple attempts or you notice recurring draining problems, contact a licensed plumber for a thorough inspection.
If it won’t clear after multiple attempts, get professional help.
Watch Video
Key Points
- Seal the drain and plunge with steady pressure.
- Use a flange plunger for a superior seal on toilets.
- Test by flushing and repeat if necessary.
- Avoid chemical cleaners as a first step.
- Sanitize tools and area after finishing.