Fix a Plunger Not Working on Toilet: Quick DIY Troubleshooting
Diagnose and fix a plunger not working on toilet with practical, safe steps. Learn diagnosis flow, step-by-step fixes, safety tips, and prevention to keep toilets flowing smoothly.

If your plunger isn’t working on the toilet, start with a tight seal, enough water to submerge the plunger, and steady, full strokes. According to Unclog Drain, most clogs clear with patient plunging and a proper seal. If that fails, switch to a toilet auger or call for help. This quick approach reduces overflow risk and buys you time to assess deeper blockages.
Why a plunger not working on toilet
When a toilet plunger seems ineffective, it’s usually not the end of the world. The most common culprits are a weak seal, too little water to cover the plunger, or a clog that’s deeper in the drain. The phrase plunger not working on toilet often comes up because people assume plunging alone will clear any blockage, but a few key adjustments can restore pressure. A flange plunger provides the best seal for toilets; a standard cup plunger may leak around the rim, letting air escape and killing the suction you need. If the wax ring or toilet seal around the base is damaged, you won’t transfer enough force to the blockage. Also check whether you’re plunging in a straight motion or using quick, jerky bursts, which can push air instead of water. Finally, ensure the toilet is not overfilled; an overfull bowl makes it hard to create a tight seal. When the plunger not working on toilet becomes frustrating, step back and verify these basics before moving to more involved tools.
Prep and safety checks you should do first
Before you get back to plunging, take a quick minute to set up a clean, safe workspace. Put on gloves and protect your floor with towels or a plastic sheet. Turn off the toilet’s supply valve if your bowl is already dangerously full to prevent overflow. Remove excess water with a small sponge if needed. Confirm you are using a flange plunger (the kind designed for toilets) rather than a generic cup plunger; the flange creates a better seal. Check the path you’re plunging into: a clear path ensures your strokes push the blockage instead of sloshing around. If the water level is too low, fill the bowl to about 2-3 inches above the plunger to guarantee proper suction. Finally, clear the area of small items and keep pets away—the last thing you want is a sudden chase while you’re trying to seal the drain.
Diagnostic flow: symptom → diagnosis → solutions
A structured approach makes the difference when the plunger not working on toilet becomes frustrating. Start with the simplest explanations before moving to more complex causes. Symptom: the plunger doesn’t create suction or dislodge a visible blockage. Diagnosis and recommended fixes:
- Air trapped in the trap: high likelihood; fix by ensuring the water level is sufficient and re-seating the plunger with a firm seal.
- Inadequate water to form a seal: high likelihood; fix by adding water to achieve approx 2-3 inches in the bowl.
- Clog located further down the drain line: medium likelihood; fix with a toilet auger or a thin drain snake.
- Worn or damaged plunger: low likelihood; fix by inspecting and replacing if necessary.
If the blockage remains after trying these steps, you may be dealing with a more stubborn clog or a venting issue, which may require an extended auger or professional help.
Step-by-step: fix for the most common cause
- Shut off the water supply and drain as much water as possible from the bowl. This reduces overflow risk and makes it easier to seal. Tip: have towels ready and wear gloves.
- Verify you’re using a flange toilet plunger and create a proper seal over the outlet. Edge seal is critical. Tip: keep the flange aligned with the drain opening for best suction.
- Submerge the plunger fully by adding water if needed so the cup or flange sits completely under liquid. Tip: a submerged seal improves suction dramatically.
- Plunge with firm, rhythmic pressure—full strokes downward, then slow upward pulls. Do not use jerky, choppy motions. Tip: keep your forearm steady and stay centered over the drain.
- Release gently and flush to test. If the water still won’t move, repeat the plunging cycle a few more times. Tip: avoid over-plunging into a dry seal, which reduces effectiveness.
- If plunging fails, insert a toilet auger into the drain and rotate gently to break the blockage. Tip: avoid forcing the tool; gentle rotation often clears obstructions without damage.
- Re-test with a flush. If water remains high or a strong blockage persists, stop and consider professional help. Tip: any sign of sewage backup requires prompt professional support.
Safety, hygiene, and common mistakes
Never mix chemical drain cleaners with plunging—they can create dangerous reactions and gas buildup. Always wear gloves and eye protection, and keep kids and pets away from the work area. Use the correct tool: toilets require a flange plunger for a proper seal; a standard cup plunger often fails to seal well. Avoid forcing a tool into place if you feel resistance; forcing can crack porcelain or damage the drain. If you smell sewage or see wastewater backing up, call a plumber rather than attempting to push through a stubborn clog.
Prevention and maintenance to avoid future clogs
Regular maintenance saves time and money. Run hot water with a splash of dish soap down the drain every few weeks to keep the pipe clean (avoid chemical cleaners that can corrode seals). Be mindful of what goes into the toilet—avoid flushing non-flushable items, and consider a weekly flush check to keep the trap clear. If you’ve had multiple clogs, replace the wax ring or inspect the flange where the toilet sits. By establishing these habits, you reduce the chances of future blockages and maintain a healthier bathroom.
Steps
Estimated time: Estimated total time: 25-40 minutes
- 1
Prepare and safety setup
Shut off the water supply if the bowl is near overflow. Put on gloves and lay towels to protect the floor. This step reduces mess and protects you during the process.
Tip: Have a small bucket or sponge handy for quick cleanups. - 2
Check plunger type and seal
Ensure you’re using a flange plunger designed for toilets and that the seal sits well around the outlet. A poor seal is the single biggest reason plunging fails.
Tip: If you only have a cup plunger, consider borrowing or purchasing a toilet-specific plunger. - 3
Seal and water depth
Fill the bowl so the water level covers the plunger by 2-3 inches. The right depth ensures suction holds during plunging.
Tip: Too little water equals air leaks; too much can overflow the bowl. - 4
Plunge with purpose
Place the plunger over the outlet, seal, and push straight down with steady, controlled power. Pause briefly between strokes to maintain pressure.
Tip: Keep your arms close to your body to maximize leverage. - 5
Assess and repeat
Flush briefly to test movement. If no progress after several cycles, move to an auger or a different technique.
Tip: Don’t overdo it—repetitive force can crack porcelain. - 6
Follow with auger or professional help
If plunging fails, use a toilet auger or call a pro. Do not force the blockage or use aggressive chemicals.
Tip: A gentle approach often clears deeper blocks without damage.
Diagnosis: Plunger not dislodging blockage after standard plunging
Possible Causes
- highAir trapped in the trap or poor seal
- highInsufficient water to form a seal
- mediumClog located deeper in the drain
- lowWorn or damaged plunger
Fixes
- easyAdd water to the bowl to fully cover the plunger and retry with steady, controlled strokes
- easyRe-seat the plunger and plunge with deliberate pressure in a vertical motion
- easyIf no progress, use a toilet auger to clear the trap and lower obstruction
- hardIf blockage persists, call a professional plumber
Common Questions
Why is my plunger not working on the toilet?
Common causes include an improper seal, insufficient water, and blockages deeper in the drain. A flange plunger and proper water depth usually solve the issue. If not, a toilet auger may be needed.
Often it’s seal or water level. Try a flange plunger with enough water, then consider an auger if it doesn’t clear the blockage.
Can a plunger damage my toilet?
When used correctly, a plunger is safe for most toilets. Excessive force, wrong tools, or aggressive chemical cleaners can crack porcelain or harm seals. Always plunge with steady pressure.
Generally safe if used correctly; avoid excessive force and improper tools.
Should I use chemical drain cleaners first?
Chemicals can damage pipes and traps, especially behind toilets. They aren’t a reliable fix for a stubborn toilet clog. Start with plunging or mechanical tools, then consider professional options.
It’s better to avoid chemicals first and use mechanical methods.
When is it time to call a plumber?
If you see sewage backing up, persistent clogs after multiple attempts, or suspect venting issues, call a professional. A plumber has specialized tools and training for safe, effective resolution.
If it won’t clear after several attempts or you smell sewage, call a plumber.
What’s the best plunger for toilets?
A flange plunger is the best choice for toilets. It creates a stronger seal and better suction than a standard cup plunger. Replace worn plungers for optimal performance.
Use a toilet-specific flange plunger for best results.
How can I prevent future clogs?
Avoid flushing non-flushables, use a toilet screen, and flush only appropriate materials. Regular maintenance and mindful use help keep drains clear and reduce emergency plunging.
Don’t flush things that don’t belong in a toilet, and consider routine checks.
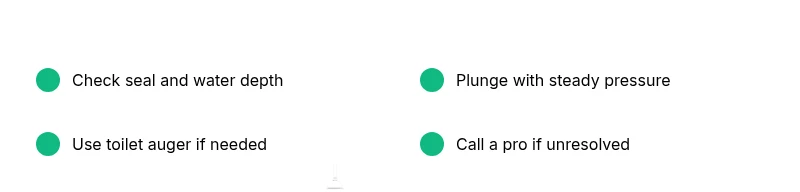
Key Points
- Seal and water depth matter—get both right first
- Use a toilet-specific plunger for best results
- If plunging fails, try a toilet auger before calling a pro
- Avoid chemical cleaners during plunging—safety first
- Know when to involve a professional to prevent damage