Toilet Clog Fix: Step-by-Step Troubleshooting Guide
Urgent, expert guide to diagnose and fix a stopped up toilet plunger not working, with safe steps, common fixes, and prevention tips from Unclog Drain.

If your toilet is clogged and the plunger won't budge, the most likely causes are a block in the trap or a misfit seal. Start with a standard plunger technique, then move to a toilet auger or alternative methods before calling a plumber. This quick guide from Unclog Drain outlines a safe, logical flow.
Why a stopped up toilet plunger not working happens
If you're dealing with a stopped up toilet plunger not working, you're not alone. The issue often begins when a blockage sits deeper in the trap or drain line, or the plunger seal isn’t forming a tight seal against the bowl. According to Unclog Drain, a proper seal and flange are essential for effective plunging. The blockage can also involve a buildup of toilet paper, feminine hygiene products, or foreign objects wedged in the trap arm. A misfit plunger or an oversized/undersized flange can prevent the suction needed to move water and solids. The toilet’s internal path includes the wax ring, trap, and vent line; if the clog lies beyond the trap, or the vent is partially blocked, you may feel little to no movement, even with persistent plunging. Water level matters as well: too much water loses suction, too little reduces force. Some clogs are caused by multiple partial blockages that behave like a dam. The Unclog Drain team emphasizes a calm, methodical approach and using the right tool for your toilet type (standard vs elongated) to identify where the blockage sits and choose the best next step with confidence.
Safety first: what not to do and how to prepare
Safety should come before any plunging attempt. Do not mix chemical drain cleaners with plungers — splashes or fumes can harm you or damage porcelain. Wear gloves and eye protection, and keep the area dry with towels or a shallow bucket. If you suspect a sewage backup or a gas odor, stop and call a professional. Turn off the toilet’s water supply to prevent overflow, and drain the tank into the bowl first; then shut off the shutoff valve behind the toilet to minimize water in the bowl. Gather tools: flange plunger, toilet auger, flashlight, and disposable rags. Check the seal by pressing the plunger around the rim for air leaks. If you don’t have a flange plunger, a standard cup plunger is less effective on toilets; a flange supports a tighter seal. With safety covered, you’re ready to proceed with a calm, measured approach.
Step-by-step pre-plunge prep and initial plunging technique
Begin with safety and prep: ensure the water supply is off and the area is clear. Start by removing as much water as possible from the bowl using a sponge or towels to concentrate suction at the blockage. Insert the flange into the drain opening and press down firmly to form a tight seal, then perform a few slow, controlled plunges to push air out of the trap. Keep your wrist straight and apply steady pressure; avoid sharp jabs that could loosen the seal or splash water back. If you hear bubbling or feel a pop, you’re engaging an air pocket behind the blockage—pause, adjust grip, and resume. After 15–20 seconds of plunging, pause to re-evaluate water level and movement. If there’s no progress after several cycles, switch to the next approach. Never apply excessive force that could crack the porcelain; if water rises toward the rim, remove excess water to prevent overflow. Patience and technique improve your odds of success without chemicals.
Using an auger or alternative tools
A toilet auger can reach past the trap to physically break up or snag the blockage. Feed the cable slowly while maintaining light tension on the handle, and rotate the crank gently when you encounter resistance to avoid kinking. If you dislodge the blockage, plunging again can help confirm flow. Some clogs respond to a combined approach: plunge, then auger, then plunge again. For stubborn blockages, the auger can retrieve objects lodged in the bend. If you cannot advance the cable or the water remains still after an auger attempt, stop and consider professional help. Sanitize the auger after use and wash your hands thoroughly.
When to call a professional and potential costs
If repeated attempts fail or you notice sewage backing up into other fixtures, cease DIY efforts and contact a licensed plumber. A professional has camera inspection tools to identify the exact blockage and can clear deep obstructions without damaging the pipes. Costs vary by region and blockage severity; ask for an upfront estimate and scope of work. If you detect sewage odor, leaks, or gurgling in other fixtures, it’s a clear sign to escalate. The Unclog Drain team emphasizes safety and advises homeowners not to delay when simple methods fail or when the problem involves complex plumbing. A pro may also identify vent stack issues or shared sewer line problems that DIY methods cannot fix.
Prevention tips to avoid future clogs
Routine maintenance reduces the odds of future clogs. Flush only toilet-safe items and avoid flushing non-flushables. Regularly inspect the wax ring and replace it if you notice leaks. Keep a flange plunger and a toilet auger accessible for quick responses. A quarterly preventive routine helps: pour hot water with a small amount of dish soap after heavy use, then flush once to clear minor buildup. For homes with septic systems, avoid flushing large amounts of solids and fibers that can accumulate in the septic line. By staying proactive—mindful flushing, timely seal checks, and having the right tools ready—you keep drains flowing smoothly and reduce emergency calls.
Steps
Estimated time: 30-45 minutes
- 1
Shut off water and prep area
Turn off the water supply and clear the area. Protect floors with towels; this prevents overflow and keeps the work area clean. You’ll need a flange plunger, toilet auger, flashlight, and towels ready before you start.
Tip: Have a bucket handy for any overflow and wear gloves for hygiene. - 2
Remove excess water from the bowl
Scoop out water to concentrate suction at the blockage. A dry bowl helps the plunger seal better and improves pressure transfer during plunging.
Tip: Work steadily; avoid removing too much water at once to prevent splashing. - 3
Position the plunger correctly
Insert the flange into the drain, press down to create a tight seal around the rim, and ensure there are no air leaks. A good seal is essential for a powerful pull.
Tip: If you can see air around the seal, reposition the plunger for a firm fit. - 4
Plunge with a steady rhythm
Push and pull with consistent pressure for 15–20 seconds, then pause to observe. Keep your wrist straight and avoid short, rapid jabs that waste energy.
Tip: If you hear bubbling, you’re moving air—continue with controlled pressure. - 5
Repeat and assess
Return to plunging and recheck after several cycles. If you see movement of water or debris, stop and test by flushing. Do not force beyond the seal.
Tip: Take short breaks between cycles to reassess water level. - 6
Try the auger if plunging fails
Insert the auger slowly; rotate as you advance to navigate bends and trap arms. Stop when you encounter resistance; don’t force it.
Tip: Sanitize the auger afterward and wash hands thoroughly. - 7
Test flush and clean up
Once the blockage clears, run a few full flushes with hot water to verify flow. Clean the area, restore the water supply, and monitor for leaks.
Tip: Keep a stash of towels for future cleanups and store tools properly.
Diagnosis: Toilet not draining or water rises without flushing
Possible Causes
- highBlockage near trap or drain line
- mediumInadequate plunger seal or wrong plunger type
- lowVent stack blockage or partial sewer backup
Fixes
- easyRe-seat the plunger with a proper flange seal and retry plunging
- easyUse a toilet auger to reach and break/block the blockage; avoid forcing the auger past resistance
- mediumIf blockage persists or you smell sewage, contact a licensed plumber for deeper clearing
Common Questions
What should I do first when my toilet won’t unclog?
Turn off the water supply, remove excess water from the bowl, and check your plunger for a proper seal. Then try a controlled plunge or use a toilet auger if needed.
First, shut off the water and remove excess water, then check the seal and try a controlled plunge, or use an auger if needed.
Is using chemical drain cleaner safe before plunging?
Avoid chemical cleaners before plunging. They can splash back and may react with your plumbing or cause fumes. If you must use chemicals, leave the area and ventilate before proceeding with other methods.
Don’t rely on chemical cleaners before plunging; they can splash back and cause fumes. Ventilate and opt for mechanical methods first.
When should I use a toilet auger?
Use a toilet auger after a failed plunge or when you suspect a blockage beyond the trap. It reaches deeper into the drain to clear or retrieve the blockage.
Use an auger after plunging fails or if you think the clog is deeper; it can reach past the trap.
Why does my plunger not seal properly?
A poor seal is usually due to the wrong plunger type or an uneven bowl rim. Ensure you have a flange plunger and press firmly around the rim to form a tight seal.
Seal issues come from using the wrong plunger and an uneven seal. Use the flange plunger and press firmly.
Can a DIY fix cause damage to my toilet?
Yes, forcing plungers or using excessive pressure can crack porcelain or dislodge seals. If you’re unsure, or if you hear leaks, stop and call a professional.
DIY fixes can damage the toilet if done forcefully; stop if you’re unsure and call a pro.
Watch Video
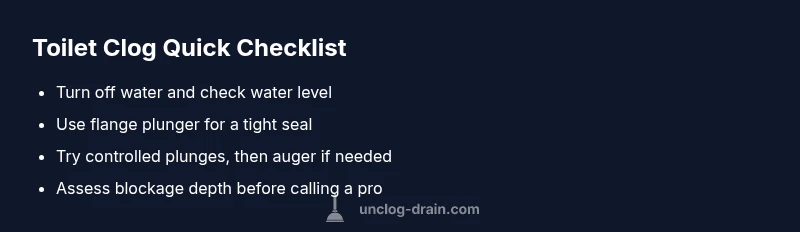
Key Points
- Start with the right plunger seal and steady plunging rhythm.
- Use a toilet auger for deeper blockages after plunging fails.
- Call a professional if you smell sewage or see backups in other fixtures.
- Prevent clogs with mindful flushing and regular maintenance.