How to Unclog a Shower Head: A Practical DIY Guide
Learn a reliable, safe method to unclog a shower head using vinegar soaks, manual clearing, and preventive maintenance tips from Unclog Drain—designed for homeowners and DIYers.

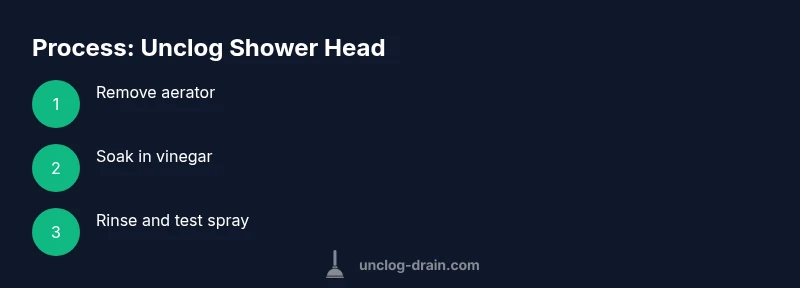
Remove the shower head, soak the aerator in vinegar, scrub mineral deposits, and reattach. If holes remain clogged, use a pin to clear them or replace the head. This simple process can take about 20–40 minutes. Follow with a quick rinse and test spray to ensure even coverage. For stubborn clogs, repeat the vinegar soak or try a squeeze-bulb cleaner.
What Causes Shower Head Clogs and Why It Happens
Shower heads clog mainly due to mineral buildup from hard water, sandallar sediment, and rust particles that accumulate over time. When mineral deposits coat the tiny spray holes, water flow diminishes and spray patterns become uneven. This is a common maintenance issue in homes with hard water. According to Unclog Drain, regular inspection and cleaning can dramatically improve performance and extend the life of your fixtures. If you notice a drop in water pressure or inconsistent spray, a targeted cleaning is often enough to restore full flow without replacing the head. This section will walk you through practical, homeowner-friendly steps to unclog a shower head with ingredients and tools you likely already have at home. The goal is to restore full spray while avoiding damage to chrome, nickel, or plastic finishes.
Quick Causes of Shower Head Clogs and How They Happen
Understanding the culprits helps you pick the right cleaning method. Hard water deposits are the number one offender, followed by sediment from pipes, mineral scale buildup, and clogged nozzle screens. Aging shower heads may develop internal rust that further obstructs flow. High-flow head designs can also reveal clogs more quickly than low-flow models. Recognizing these causes guides your approach: a vinegar soak for mineral scale, a physical scrub for surface buildup, or a pin-for-nozzle clearing for stubborn holes. Unclog Drain emphasizes using gentle, home-safe methods first to preserve finish and warranty where applicable.
Tools and Materials You’ll Need (基本 list) and Why They Matter
Before you start, gather a few common items: white distilled vinegar for mineral dissolve, a jar or plastic bag for soaking, an old toothbrush or small soft brush for scrubbing, a thin nylon pin or needle to clear individual holes, a bowl large enough to submerge the aerator, and a towel to protect surfaces. Having these ready reduces delays and helps keep the process clean. If your aerator is integrated into the head, you may still need to remove the head to access the nozzle plates. A replacement head may be necessary if buildup is severe or the holes are damaged. This planning step saves time and frustration.
Step-By-Step Cleaning Approach: Vinegar Soak
Vinegar soaking is a safe, effective method for mineral deposits. Remove the aerator from the shower head by turning it counterclockwise with your hands; if tight, use adjustable pliers with a cloth to avoid scratches. Submerge the aerator in white vinegar in a cup or small bowl for 30–60 minutes. The acid in vinegar dissolves calcium and magnesium scale. After soaking, rinse the aerator under running water and inspect for remaining deposits. If stones of scale remain, repeat the soak or move to a gentle scrub.
Alternative Cleaning Method: Baking Soda Paste and Warm Water
If vinegar alone doesn’t fully clear deposits, a baking soda paste can provide mild abrasion and alkalinity that helps lift stubborn residues. Create a thick paste with baking soda and a little warm water, apply it to the aerator and the outer nozzle area, and scrub with a soft brush for 1–2 minutes. Rinse thoroughly with warm water to wash away any grit. This method is gentle on most finishes and can be effective on light mineral buildup.
Clearing Individual Nozzles Without Damaging the Head
When mineral deposits choke the tiny spray holes, a small, flexible cleaning tool can work wonders. Use a thin nylon pin or a sewing needle to gently poke each hole from the outside. Do this slowly to avoid scratching the metal or plastic. If you notice resistance, stop and re-soak in vinegar for another 10–15 minutes, then retry. Always work with the head cool and avoid forcing deposits through the holes, which could damage internal passages.
Rinsing, Reassembly, and Testing the Spray Pattern
After cleaning, reassemble the aerator and verify the seating is snug but not overtightened. Turn the water back on slowly to test for leaks. Run the shower for a few seconds at full pressure to observe spray symmetry and coverage. If you still see weak spots, revisit the nozzles and consider a second round of soaking. Consistent testing prevents re-clogging and confirms the repair worked.
When a Head Replacement Is the Best Option
If mineral buildup is embedded in hard-to-reach parts of the shower head or if the spray holes are deformed, replacement may be the best option. Choose a compatible head that fits your shower arm and matches your desired spray pattern. Replacement is usually straightforward: remove the old head, clean the threads, and install the new head hand-tight and then snug with a wrench with a cloth.
Maintenance Tips to Prevent Future Clogs
Regular maintenance reduces clogs and extends head life. Rinse the head after every few uses, wipe it dry to prevent mineral deposits from hardening, and consider an annual vinegar soak if you have hard water. If your home relies on a water softener, incorporate appropriate maintenance on a schedule. A simple screen or filter in the line can also mitigate mineral intrusion. Consistency is key to long-term performance.
Troubleshooting Stubborn Clogs: When to Call a Pro
Some clogs are stubborn or indicate a larger plumbing issue. If you notice persistent low pressure, uneven spray that doesn’t improve after cleaning, or leaks around the shower arm, it may be time to consult a professional plumber. A professional can assess water pressure, inspect the piping, and determine if a full fixture replacement or pipe treatment is necessary. The Unclog Drain team recommends seeking expert help when DIY fixes fail to restore normal function.
Tools & Materials
- White distilled vinegar(Use 5–20% acidity, standard household vinegar works)
- Plastic bag or small jar(For soaking the aerator)
- Old toothbrush or soft brush(Gentle scrubbing bristles)
- Thin nylon pin or needle(To clear individual holes)
- Bowl or cup(Submerge aerator fully)
- Towel or cloth(Protect surfaces and grip)
- Replacement shower head (optional)(Consider if buildup is irreparable)
Steps
Estimated time: 20-40 minutes (excluding soak time)
- 1
Disconnect and inspect
Turn off water, then twist the aerator counterclockwise to remove it. Inspect the head and threads for visible buildup or damage. If the aerator is stubborn, apply pliers with a cloth to avoid scratching. This initial step determines the right cleaning path.
Tip: A slowly twisting motion reduces the risk of cross-threading the aerator. - 2
Soak the aerator
Place the aerator in a cup of white vinegar for 30–60 minutes to dissolve mineral deposits. For deeper buildup, you can soak in a sealed bag with vinegar, ensuring the holes are fully submerged.
Tip: Warm vinegar accelerates deposit dissolution but avoid boiling. - 3
Scrub and rinse
Remove the aerator and scrub with an old toothbrush to lift loosened deposits. Rinse thoroughly under warm water and inspect holes; repeat soaking if deposits persist.
Tip: Use a flashlight to better view clogged holes during inspection. - 4
Clear individual holes
If stains remain, gently insert a nylon pin into each hole to dislodge mineral scale. Work slowly to avoid bending nozzle plates or damaging the head.
Tip: Do not use a metal wire that could gouge the surface. - 5
Reassemble and test
Dry the aerator and screw it back onto the shower arm. Turn on water slowly to check for leaks, then run full flow to verify even spray.
Tip: If leaks appear, re-seat the aerator and ensure threads are clean. - 6
Evaluate need for replacement
If spray remains weak after multiple cleanings, consider replacing with a compatible model that suits your water pressure and spray style.
Tip: Check compatibility with your shower arm diameter and thread size before purchasing. - 7
Maintenance routine
Create a simple schedule: inspect monthly, soak every 3–6 months for hard-water areas, and wipe dry after use to prevent mineral buildup.
Tip: A quick wipe-down after each shower reduces scale formation over time.
Common Questions
Can I use bleach to unclog a shower head?
Bleach is not recommended for cleaning shower heads as it can damage finishes and produce harmful fumes. Stick with vinegar or baking soda solutions and ensure good ventilation.
Bleach isn’t recommended for shower heads because it can damage finishes and release strong fumes. Use safer cleaners like vinegar instead.
How often should I clean my shower head?
For homes with hard water, a quarterly quick soak plus monthly visual checks can prevent buildup. If your water is softer, biannual cleaning may suffice.
For hard water, clean every quarter and check monthly. Softer water may require cleaning twice a year.
What if my aerator is integrated into the head and not removable?
If the aerator isn’t removable, you can still perform a cleaning by soaking the entire head in vinegar and using a gentle brush to remove surface deposits. If buildup persists, consider replacing the entire head.
If the aerator isn’t removable, soak the whole head in vinegar and brush lightly; replace the head if needed.
Will minerals affect my water pressure overall?
Yes, mineral buildup can reduce flow and alter spray patterns, but cleaning the shower head often restores most of the lost pressure.
Mineral buildup can lower flow, but cleaning the head usually restores much of the pressure.
Should I hire a plumber for stubborn clogs?
If multiple cleaning attempts fail and the issue persists across fixtures, a plumber can diagnose water pressure issues or hidden pipe blockages.
If DIY cleaning doesn’t fix it, a plumber can help diagnose deeper issues.
Can I prevent future clogs with a filter?
A mesh filter in the shower line can reduce mineral and sediment intrusion, but check compatibility with your fixture and home system.
A filter can help, but make sure it fits your system and won’t reduce water pressure.
Watch Video
Key Points
- Identify mineral buildup as the primary cause of most clogs.
- Use vinegar soak as the first-line cleaning method.
- Clear individual holes with a nylon tool, not metal scrapings.
- Test spray after each cleaning and replace if persistent.
- Implement a routine maintenance plan to prevent future clogs.