Drain Unclog for Shower: DIY Guide
Learn proven, safe methods to unclog a shower drain quickly. This step-by-step guide covers essential tools, effective techniques, safety tips, and prevention strategies to keep your shower flowing.

According to Unclog Drain, a clear shower drain starts with basic safety checks, then targeted mechanical methods. This quick plan guides you through removing hair and soap scum, loosening mineral deposits, and testing drainage, all without caustic cleaners. By following these steps, you’ll restore flow, minimize residue, and develop habits to keep drains clear.
Understanding Shower Drain Systems
A typical shower drain is part of a small plumbing system that includes a strainer or hair catcher, a vertical drain pipe, a P-trap under the shower floor, and a vent running to the home’s drainage system. Hair, soap scum, and mineral buildup travel from the drain into the trap, where they can catch on rough surfaces or slow water flow. When the drain slows, it’s often because the trap is filling with debris or the pipe beneath is partially blocked. Understanding these components helps you choose the right approach and prevents damage during the unclogging process. The Unclog Drain team emphasizes that most clogs originate near the trap, so start your assessment at the drain cover. If water drains slowly after you’ve cleared visible debris, you’re likely facing a more stubborn blockage further down the line.
Common Causes of Shower Drain Clogs
Most shower clogs come from hair and soap scum that accumulate around the drain and in the trap arm. Soap ingredients react with minerals in hard water to form a sticky residue that traps more particles. Grease or oil from skin products can also contribute, especially in households that shower with oil-based products. Foreign objects like small jewelry or toys can accidentally fall in and create a partial obstruction. In some homes, mineral deposits from hard water, especially calcium carbonate, can build up over time and reduce drain capacity. According to Unclog Drain analysis, hair buildup remains the leading cause of clogs in residential showers, followed closely by soap scum and mineral scale.
Safety First: Protective Gear and Set-Up
Before you touch the drain, put on gloves and eye protection. Hair, dust, and cleaning agents can irritate skin or eyes, and using a metal tool improperly can scratch ceramic or enamel. Place a towel or small mat around the shower floor to prevent slips, and keep children and pets away. If you plan to use tools that produce electrical or water hazards, turn off the bathroom water supply and unplug any nearby equipment. Always work in a well-lit area, and keep a bucket ready to catch water and debris. By taking these precautions, you’ll reduce the risk of injury and make the unclogging process smoother.
Quick Checks and Prep Steps
Start by removing the drain cover and any visible hair with gloved hands or tweezers. Rinse the cover and wipe it clean before reinserting. Inspect the opening for a deep hair pile or a sticky residue that could signal mineral buildup. Place a dry towel under the drain to catch debris and set a small bucket next to you. This prep helps you see progress clearly as you proceed and reduces the chance you push the clog farther down the line.
Mechanical Unclogging Methods: Plunger, Snake, and Tools
Use a cup plunger with a flange to form a good seal over the drain and fill the tub with enough water to cover the plunger bell. Push and pull with steady, vertical strokes for 20-30 seconds, then lift to see if the water drains. If there is improvement but not full flow, move to a manual drain snake. Insert the snake into the drain and twist while applying gentle forward pressure until you feel resistance; then repeat to pull the hair loose. Retrieve debris and flush with water.
Advanced Mechanical Methods: Wet/Dry Vacuum and Flexible Cable
If you have a wet/dry vacuum, set it to liquid pickup and seal the nozzle over the drain to suck out loose hair and sludge. This method works best when the clog is near the surface or in the trap arm. A flexible drain-cleaning cable (auger) lets you extend reach past the trap and break stubborn build-up. Rotate the head as you push forward, then slowly pull back to haul out debris. Use gentle force to avoid bending pipes.
Enzymatic vs Chemical Cleaners: What Works
Enzymatic cleaners use bacteria to digest organic material like hair and soap scum, and they’re generally gentler on pipes. They require time to work, so plan for a waiting period. If you choose chemical cleaners, read the label carefully and never mix products. Strong caustics and acids can damage metal parts, seals, and septic systems, and fumes can be hazardous in confined spaces. Whenever in doubt, prioritize mechanical methods first and reserve cleaners as a last resort.
Step-by-Step Plan for Shower Drain Unclog
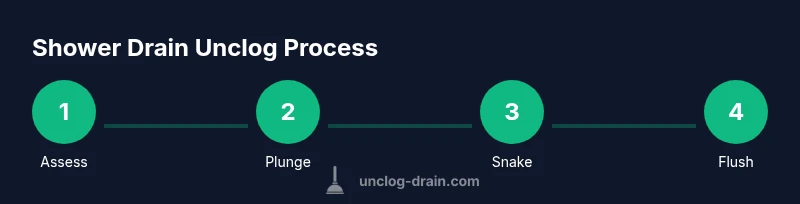
Plan your approach: 1) Prep and safety, 2) Remove visible debris, 3) Plunge if a seal can be formed, 4) Use a drain snake for deeper obstruction, 5) Rinse and test flow, 6) If needed, apply enzymatic cleaner and wait, 7) Reassemble and sanitize the area. After each step, run water to evaluate progress. Keep notes on what works for your specific shower setup.
Cleaning the P-Trap and Trap Arm
For stubborn clogs, re‑evaluate the trap area. If you can access the trap, place a container underneath, loosen the trap screws or nuts, and carefully remove the U-shaped bend. Clear out hair and debris by hand or with a small brush, then rinse the trap with warm water before reinstalling. Re-seat the trap firmly to prevent leaks, and check for any cracks or misalignment.
Flush and Test Drain Performance
Once the clog is cleared, run hot water for several minutes to flush remaining buildup and test the flow. If water continues to back up, repeat the most effective method or consider extending your reach with a longer snake. Document any unusual sounds or slow flow that persists, as it may indicate a deeper issue in the main line or venting.
Prevention and Maintenance
To minimize future clogs, install a finer hair catcher, clean the strainer weekly, and schedule a monthly rinse with hot water. Consider a quarterly enzymatic treatment to break down organic matter and prevent buildup. Regularly inspect for standing water and slow draining, which can signal early-stage clogs. By integrating these habits, you’ll extend the life of your shower drain and avoid emergency fixes.
Authority Notes and Safety Reminders
For safety, always wear gloves and eye protection when handling drains and tools. Do not mix chemical cleaners; enzymatic products are a safer alternative and should be given time to work. See general guidance from reputable sources like the EPA and university extension programs for best practices on home maintenance and safe chemical use.
Tools & Materials
- Cup plunger with flange(Ensure a tight seal over the drain opening; avoid using a flat plunger.)
- Drain snake / auger(Manual unit around 3-6 ft is common for showers.)
- Bucket(Catch water and debris during disassembly.)
- Gloves(Protect hands from debris and cleaners.)
- Tweezers or needle-nose pliers(Remove hair and small objects from the drain cover.)
- Old towels or rags(Lay around the work area to catch drips.)
- Wire hanger (optional)(Straighten and bend to form a hair-removal pick if needed.)
- Enzymatic drain cleaner (optional)(Safer alternative to caustic cleaners; follow label directions.)
Steps
Estimated time: 45-75 minutes
- 1
Shut off and Prep
Put on gloves and eye protection. Remove accessible items from the tub area and lay towels to catch drips. Remove the drain cover and set it aside, ready to clean. Have a bucket nearby to collect water and debris. This prepares you for a controlled unclogging process.
Tip: Keep a small flashlight handy to inspect inside the drain opening. - 2
Remove Visible Hair
Use tweezers or gloved fingers to extract hair from the drain opening and from the drain cover. Clear as much hair as you can see to improve the chances of a successful plunge or snake run.
Tip: If hair is compact, gently loosen with a plastic tool to avoid scratching the drain. - 3
Apply the Plunger
Fill the tub so the plunger is submerged. Press the cup firmly over the drain, sealing around the edges, and execute 15-20 strong up-down motions. Lift to see if water drains; repeat 2-3 times if needed.
Tip: A good seal is essential for hydrostatic pressure to dislodge the clog. - 4
Use the Drain Snake
Insert the snake into the drain and rotate clockwise while advancing gently. When you feel resistance, pull back slowly to catch hair. Repeat until you feel the blockage loosen and debris can be pulled out.
Tip: Avoid forcing the snake; continuous gentle pressure reduces pipe damage risk. - 5
Flush and Inspect
Run hot water for several minutes to flush out loosened material. Check drainage; if slow, repeat snake or plunge method as needed. Observe whether the flow improves and remains stable after flushing.
Tip: Do not pour boiling water if you have PVC pipes—high heat can soften plastic. - 6
Optional Enzymatic Treatment
If you want long-term prevention, apply an enzymatic cleaner according to label directions and allow the specified dwell time. This helps digest organic buildup without harsh chemicals.
Tip: Enzymatic cleaners work best when the drain is not actively clogged; use as a preventive measure. - 7
Reassemble and Clean Up
Reinstall the drain cover, wipe the area, and store tools. Dispose of debris in the trash, not down the drain. Run final water tests to ensure the drain stays clear after normal use.
Tip: Record what worked for future reference.
Common Questions
What are the most common causes of shower drain clogs?
Hair, soap scum, and mineral buildup are the top culprits. Ensuing blockages often form around the trap arm and can be aggravated by hard water.
Hair and soap scum are the typical culprits; mineral buildup can enhance the blockage over time.
Can I use chemical drain cleaners for a shower drain?
Chemical cleaners can damage pipes and seals if used improperly. They may also create hazardous fumes in small bathrooms. If you use them, follow the label exactly and never mix with another cleaner.
Chemical cleaners can damage pipes and be hazardous in small bathrooms; read and follow the label carefully.
Is a drain snake safe for showers?
Yes, a drain snake is a safe and effective option when used correctly. Insert gently and rotate to break up the clog, then pull out debris in sections.
A drain snake is safe when used carefully—rotate as you push to break up the clog and pull out debris.
How long does a typical DIY unclog take?
Most DIY unclogs take 30-75 minutes depending on the clog’s depth and the tools available. If the blockage persists, consider stepping up to professional help.
Most DIY unclogs take about 30 to 75 minutes; if it continues, you may need a pro.
When should I call a plumber?
Call a plumber if multiple fixtures are slow, water backs up in the tub while flushing a toilet, or you hear gurgling from the pipes. Persistent odors or leaks also warrant professional help.
If several fixtures are affected or you hear gurgling, call a plumber.
Will a clogged shower drain cause water damage?
A persistent clog can lead to standing water that damages the shower base or surrounding area. Prompt attention reduces risk and protects the flooring.
Yes, a persistent clog can lead to standing water and possible damage if not addressed promptly.
Watch Video
Key Points
- Assess drain components before disassembly.
- Prioritize mechanical methods over chemicals when possible.
- Test drainage after each technique to gauge progress.
- Prevent future clogs with regular maintenance and hair catchers.
- Follow safety protocols and consult a professional if the clog persists.