Unclog Shower Drain: A Practical DIY Guide
Learn how to unclog a shower drain safely with practical, non-chemical methods, step-by-step instructions, and preventive tips to keep your bathroom draining smoothly.

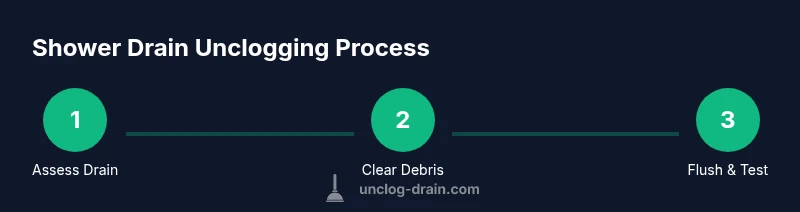
In this guide you will learn how to unclog shower drains using safe, practical methods. You’ll start with simple steps like removing hair from the drain cover, then use mechanical methods (plunger or snake) and non-chemical flushes (hot water, baking soda and vinegar). The goal is a fast, reliable fix with minimal mess.
Understanding why the unclog shower drain clogs
Shower drains clog for a mix of hair, soap scum, shampoo residue, and mineral buildup that forms a tacky, stubborn blockage over time. The goal of this guide is to help homeowners address common clogs safely and effectively without resorting to harsh chemical cleaners. Regular maintenance reduces the frequency and severity of clogs, keeping water flowing freely and avoiding expensive repairs. The Unclog Drain team emphasizes that most bathroom clogs are mechanical in nature and can be resolved with basic tools and a methodical approach.
Assessing your shower drain setup
Before you dive in, inspect the drain and surrounding area to identify what you’re dealing with. Look for a removable drain cover, a visible hair pile, or a trap beneath the shower pan. Some units have an accessible P-trap; others require lifting the cover and inspecting the immediate piping. Understanding whether you’re dealing with a simple surface hair clog or a deeper buildup helps you choose the right method and reduces the risk of pushing debris further into the pipe.
Safety and prep before you begin
Put on gloves and, if possible, eye protection. Clear the work area of slippery items and lay down towels to catch any mess. If you’re removing a drain cover, keep track of screws or fasteners. Never mix methods haphazardly; plan to try mechanical methods first, then move to non-chemical flushes if needed. Having a bucket, towels, and a flashlight handy makes the process smoother and safer.
Choosing the right tool: plunger vs snake
A cup plunger creates a seal and can dislodge shallow blockages, while a plumber’s snake can reach deeper into the line to pull hair and gunk. Start with the plunger if the blockage is near the surface and visible. If plunging doesn’t clear the drain after several attempts, switch to a snake for deeper reach. Using the right tool reduces damage and increases the likelihood of a successful clearing.
Step-by-step: plunging and snaking basics
Begin by removing the drain cover and any visible hair. Place a cup plunger over the drain and push down to form a tight seal. Plunge with short, firm motions for 15-30 seconds, then lift the plunger to see if water drains. If water still backs up, insert the snake into the drain and twist while advancing slowly until you feel resistance. Retrieve and clear debris, then pull the snake out and flush with water.
Baking soda and vinegar: a safe flush option
This non-chemical approach uses natural reactions to break up grime and hair. Pour 1/2 cup baking soda into the drain, followed by 1 cup vinegar. Let the fizzing action work for 15-30 minutes, then flush with hot, not boiling, water. This method can help loosen minor buildups without damaging pipes when used periodically.
Hot water flush and maintenance flush
After any mechanical work, flush the drain with plenty of hot water to carry away loosened debris. Periodic hot-water flushes (a few times per month) prevent soap scum and oil residues from assembling into thicker clogs. If your pipes are older or PVC, avoid boiling water in a way that could warp piping; use hot tap water instead.
Removing and cleaning the drain trap (if accessible)
If your shower setup includes an accessible trap or trap cover, carefully remove it to inspect for trapped hair and debris. Clean the trap thoroughly and reinstall with the gasket or seal intact. Reassemble the cover and test the drain by running water. A clean trap helps prevent future clogs by stopping solids from moving farther into the system.
Enzymatic cleaners: maintenance-friendly options
Enzymatic cleaners use bacteria to digest organic material and can be useful as a preventive measure. Use enzymatic products after you have cleared a blockage to maintain flow and reduce buildup. Do not rely on them as your sole solution for a stubborn clog; they work best as part of an ongoing maintenance routine.
Preventive maintenance checklist
Create a simple routine: keep a hair catcher in place, clean the cover weekly, run a hot water flush weekly or monthly, and perform a baking soda-vinegar flush every few months. Regular maintenance reduces the likelihood of future clogs and saves time and labor in the long run.
Troubleshooting persistent clogs and when to call a pro
If water continues to drain slowly after trying these methods, you may have a more serious obstruction or a partial blockage in the main line. Stop attempting aggressive methods that could damage piping and call a licensed plumber if water backs up into other fixtures or emits a foul odor. Professional tools and expertise can safely clear deeper blockages without damaging pipes.
Tools & Materials
- Rubber gloves(Nitrile preferred; protect hands from debris and cleaners.)
- Drain cover removal tool or screwdriver(Flathead screwdriver or suitable tool to lift cover.)
- Cup plunger(Flat-bottom style for a good seal on shower drains.)
- Plumber’s snake / auger (3-6 ft)(Choose length based on drain depth and elbow joints.)
- Bucket(To catch water and debris underneath the drain.)
- Old towels or rags(Protect floor and absorb spills.)
- Kettle or pot for hot water(Use hot water for flushing, not boiling if pipes are PVC.)
- Baking soda(About 1/2 cup for the flush method.)
- White vinegar(About 1 cup for the fizzing flush.)
- Boiling water (careful with PVC pipes)(Optional for an aggressive flush if your pipes tolerate it.)
- Enzymatic drain cleaner(Optional maintenance product for ongoing prevention.)
- Flashlight(Helpful for inspecting under the drain cover.)
Steps
Estimated time: 60-90 minutes
- 1
Remove drain cover and inspect
Use the screwdriver to lift the cover and clear visible hair or debris with your fingers (gloved) or a stiff brush. This initial step gives you a clear view of the blockage and prevents pushing debris deeper into the pipe.
Tip: Take a photo of the cover’s configuration if you think you’ll need it later for reassembly. - 2
Test the drain with a plunger
Place the cup plunger over the drain to form a solid seal. Push and pull with steady pressure for 15-30 seconds, then lift to check if water begins to drain. Repeat 2-3 times if needed.
Tip: Ensure there’s enough water to cover the plunger cup for effective suction. - 3
Advance with a plumber’s snake
Insert the snake into the drain and rotate while pushing forward slowly until you feel resistance. Pull back to bring up hair or debris and repeat until the obstruction loosens.
Tip: Rotate the snake slowly to avoid damaging the pipe walls. - 4
Flush with hot water
Run hot water for 1-2 minutes to wash away loosened debris. If you have PVC pipes, avoid boiling water—use hot tap water.
Tip: Keep a container ready in case you need to pour water into the drain bowl for better flow. - 5
Try baking soda and vinegar flush
Pour 1/2 cup baking soda into the drain, followed by 1 cup white vinegar. Let fizz for 15-30 minutes, then flush with hot water.
Tip: Do not mix chemicals; pour in sequence and wait for fizzing to finish before adding water. - 6
Remove and clean the trap (if accessible)
If your shower has a trap you can access, remove it, clean out hair and gunk, and reinstall securely.
Tip: Check for wear on seals and replace if necessary. - 7
Consider enzymatic maintenance
If blockages recur, apply an enzymatic cleaner after manual clearing to digest organic matter and slow future buildup.
Tip: Follow product instructions and avoid mixing with other cleaners. - 8
Reassemble and test again
Reattach the drain cover, run water, and observe drainage. If water still stands, repeat steps or proceed to professional help.
Tip: Ensure all fasteners are snug but not overtightened. - 9
Document maintenance routine
Record the date and method used for future reference. This helps track what works best for your drain.
Tip: Set a reminder for regular maintenance, e.g., monthly checks. - 10
Escalate when needed
If you notice sewer odor, multiple fixtures backing up, or persistent slow draining, stop DIY attempts and call a pro.
Tip: A professional can check for main line issues and clean the system safely. - 11
Prevent future clogs
Install a hair catcher, trim hair before showering, and perform routine flushes to keep the drain clear.
Tip: Small habits prevent larger problems over time. - 12
Final safety and cleanup
Wipe surfaces, dry the area, and store tools safely. Dispose of waste responsibly and wash your hands.
Tip: Don’t leave tools within reach of children or pets.
Common Questions
What causes shower drains to clog most often?
Hair, soap scum, and mineral buildup are common culprits. Over time these materials accumulate and form a stubborn blockage that slows drainage. Regular maintenance helps prevent these build-ups.
Hair and soap scum are the usual culprits that slow down shower drainage; regular cleaning helps prevent it.
Can baking soda and vinegar really unclog a shower drain?
Baking soda and vinegar can loosen light clogs and are a safe, chemical-free option for maintenance. For stubborn clogs, combine with mechanical methods like plunging or snaking and flush with hot water.
Yes, baking soda and vinegar help loosen buildup and work best when used with plunging or snaking.
When should I use a plumber’s snake?
Use a snake when plunging doesn’t clear the clog or when you suspect a deeper blockage. Insert slowly and rotate as you push forward to reach hair and gunk farther down.
Use a snake if plunging fails or you suspect a deeper blockage.
Are chemical drain cleaners safe for shower drains?
Most experts advise avoiding chemical cleaners in showers due to pipe and seal damage and potential hazards. Safe alternatives are mechanical methods and non-chemical flushes.
Chemical cleaners can hurt pipes and seals; safer methods are recommended.
How often should I maintain my shower drain?
Perform a quick routine monthly: remove the cover, clear obvious debris, and flush with hot water. Do a more thorough baking soda–vinegar flush every few months.
Do a quick monthly check and a deeper flush every few months.
What if water backs up into the tub or sink?
Water backing up suggests a larger drain issue or a clogged main line. Stop DIY attempts and seek professional help to prevent pipe damage.
Backups could mean a bigger problem; contact a plumber.
Watch Video
Key Points
- Unclog shower drain using safe, non-chemical methods first
- Plunger and snake are often effective on common bathroom clogs
- Hot water and baking soda–vinegar flushes can help clear minor buildups
- Regular maintenance reduces future clogs and keeps drains flowing
- Call a professional for persistent or suspected main-line issues