How to Unclog a Laundry Drain: Step-by-Step DIY Guide
Learn a safe, thorough method to unclog a laundry drain with step-by-step actions, essential tools, and maintenance tips to prevent future backups in your laundry room.

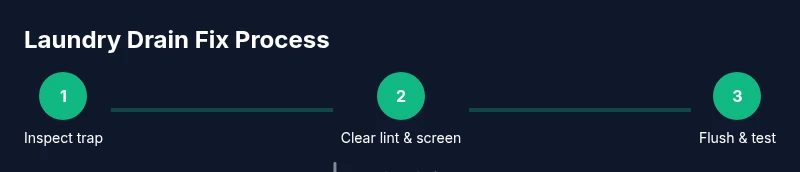
Unclog laundry drain by first identifying the clog, then clearing the trap, using a plunger or hand auger, and flushing the line with water. Gather basic tools, wear gloves, and avoid chemical drain cleaners. This DIY approach works for most washer and laundry-tub drains and helps prevent future clogs with simple maintenance.
Understanding the common causes of laundry drain clogs
Laundry drains clog primarily due to lint and soap scum accumulating in the P-trap and pipes where the washer discharges. Small fabric fibers shed from clothing, towels, and sheets, plus mineral deposits from hard water, combine with soap to form a gummy residue that sticks to the pipe walls. Over time, this buildup narrows the passage and traps more debris, slowing drainage. In homes with older plumbing, corroded metal pipes or installed bends can exacerbate clogs, creating stubborn partial blockages. A clogged laundry drain often presents as slow draining water during the wash cycle or a backup into the utility sink or laundry tub. If you notice a gurgling sound, unpleasant odor, or water backing up after a rinse, plan a thorough inspection. Regular maintenance can reduce these occurrences; the key is to address the trap, remove visible lint, and keep the discharge line clear. According to Unclog Drain analysis, routine checks lower clog risk when performed seasonally, especially after heavy laundry loads. For households with large families or frequent bulky loads, pay extra attention to the lint screen and pipe access points.
Safety first: protect yourself and your home
Before you dive in, put safety first. Unplug the washing machine or switch off the dedicated circuit, and shut off the hot and cold water valves to prevent leaks. Work in a dry area and wear rubber gloves and eye protection. Keep a bucket and towels handy for spills. Avoid mixing chemical drain cleaners with other cleaners or with bleach, which can create dangerous fumes. If you are dealing with a septic system, do not pump harsh chemicals into the drain. Ventilate the space and take breaks if you feel fatigued. A calm, methodical approach reduces the risk of accidents and makes the job more efficient.
Tools and materials you’ll need
Prepare these essentials before you start:
- Bucket, 1–2 gallons, for catching water and holding debris
- Rubber gloves and eye protection to stay clean and safe
- Plunger with a flat, wide seal for a strong pump on pipes
- Hand auger or plumber’s snake capable of reaching the trap or sewer line
- Adjustable wrench or pliers to loosen trap caps
- Flashlight to inspect dark corners and pipe joints
- Old towels or rags for cleaning up spills
- Mild detergent or dish soap for rinsing
- Optional: a small bottle brush to scrub the trap screen
Having these on hand keeps you ready for a thorough, efficient unclogging process and reduces mid-task trips to the toolbox.
Step-by-step overview: from trap to drain
The unclogging process generally begins with a quick inspection of the trap, then moves to the screen or lint filter, and finally clears the drain line itself. The trap is the first choke point where debris collects, so a clean trap restores steady flow. If the trap is clear but the line remains slow, you’ll proceed to deeper methods such as using a plunger, a hand auger, or both in combination. The goal is to remove the blockage without damaging pipes or trap components. After clearing the obstruction, you should flush the line with warm water and observe drainage during a test load. In many homes, a simple trap-cleaning and gentle flush resolves the issue; in others, you may need to extend the effort with a snake. The key is patience, careful inspection, and proper tools to avoid making the clog worse. This section supplements the detailed STEP-BY-STEP guide that follows, focusing on the rationale behind each action.
Cleaning the trap and screen
Begin by locating the trap or cleanout near the washer drain or laundry tub. Place the bucket beneath it and remove the trap cover with a wrench if needed. Use gloved hands or needle-nose pliers to pull out lint, hair, fabric fibers, and soap scum. Rinse the components with warm water and inspect for cracks or corrosion. If the trap is deeply clogged, avoid forcing it; instead, remove the entire trap, clean it thoroughly, and reassemble. This step often yields immediate improvements in drainage and reduces the load on the rest of the line. Keep the trap area dry and clean to prevent future buildup, and consider wiping down the pipe to remove residual soap film.
Clearing the drain line deeper with a plunger and auger
If the trap is clear but drainage remains slow, use a plunger to create suction in the standpipe or drain line. Seal the drain with the plunger and pump several times, then release to observe water movement. If there is resistance or no improvement, insert a hand auger into the pipe and rotate while advancing slowly to grab and break up the clog. Pull back debris gradually and repeat as needed. When using a snake, go slowly to avoid bending thin pipes. Always keep the auger tip clean and avoid applying excessive force that could damage fittings. After you feel the obstruction loosen, flush with hot water to carry debris through the system.
Flush, test, and verify a successful unclog
With the trap clean and the line cleared, reassemble all components, reconnect hoses, and restore power. Run a short, low-load wash cycle and watch the drain closely. Look for a steady flow of water and no backflow into the tub or sink. If water still pools or slows significantly, repeat the auger and plunger steps, but avoid forcing the system. For best results, finish with a larger test load to ensure the drain handles typical laundry volumes. Document the outcome to guide future maintenance.
Maintenance to prevent future clogs
Prevention is easier than repeated repairs. Regularly clean the lint screen or filter after each heavy laundry cycle and wipe soap residue from the trap area. Use a high-efficiency detergent that produces less suds and consider a monthly flush with hot water to clear minor buildup. A protective plan includes periodic inspection of hose connections, trap seals, and pipe joints for leaks or corrosion. If you have hard water, an occasional vinegar rinse can reduce mineral buildup. Keep a routine schedule so you don’t forget to check the drain, and store your tools for quick future fixes.
Troubleshooting stubborn clogs and when to call a pro
Some clogs resist DIY methods due to deeply blocked pipes, tree roots in the main line, or aging sewer lines. If you have attempted trap cleaning, plunger, and auger without success, or if you notice sewage backing up beyond the laundry room, contact a licensed plumber promptly. Refrain from using harsh chemical cleaners, as these can damage pipes and septic systems and may fail to resolve the problem. If your home relies on well water or you suspect a septic problem, seek professional assessment to prevent further damage. Regular maintenance, done early, is often the best defense against recurring clogs, and a pro can advise on pipe material and the best preventive plan.
Next steps and when to revisit
This section focuses on practical follow-up actions to keep the laundry drain healthy. Record the date of your fix, schedule a quarterly lint-screen check, and set a reminder to perform a brief flush every 4–6 weeks during heavy laundry periods. If you notice recurring slow drains, reassess trap access points and consider upgrading to a finer lint screen or softer detergents. For persistent problems, rely on professional guidance to rule out main-line issues or pipe damage.
Tools & Materials
- Bucket(1–2 gal for catching water and debris)
- Rubber gloves(Protect hands from grime and potential chemical splashes)
- Plunger(Flat, wide seal for best suction on standpipe or tub drain)
- Hand auger / plumber’s snake(1/4–1/2 inch cable; long enough to reach trap or deeper line)
- Adjustable wrench or pliers(Loosen trap caps or hose fittings as needed)
- Flashlight(Inspect dark corners and pipe joints clearly)
- Old towels or rags(Catch drips and keep work area clean)
- Mild detergent or dish soap(Rinse and flush the trap area if needed)
- Screwdriver(Remove trap caps or access panels if required)
Steps
Estimated time: 60-90 minutes
- 1
Power down and prep
Unplug the washer and shut off water valves to prevent leaks. Move the machine slightly to access the drain area. Have your bucket, towels, and tools within arm’s reach.
Tip: Safety first: confirm the area is dry and avoid standing water. - 2
Access the trap or cleanout
Locate the trap or cleanout. For a laundry tub, unscrew the cap; for a standpipe, detach the drain hose and position it over a bucket.
Tip: Keep screws and caps in a labeled container so they don’t get lost. - 3
Clear visible lint/obstructions
Remove the trap cover and pull out lint, hair, and soap scum with gloves or pliers. Rinse with warm water to gauge flow.
Tip: Don’t force items; gentle removal reduces damage risk. - 4
Use a plunger on the drain line
Seal the drain and plunge to create suction. Pump several times, then check water flow. Repeat as needed.
Tip: A good seal makes the plunger far more effective. - 5
Try a hand auger for deeper clogs
Insert the auger into the pipe and rotate while pushing forward to break up the clog. Retrieve debris gradually.
Tip: Keep the auger tip clean to prevent re-clogging. - 6
Flush the line with hot water
Run hot water through the drain to wash away loosened material. Add a mild detergent if needed, but avoid boiling water for PVC pipes.
Tip: Hot water is generally safe, but never use boiling temps on plastic pipes. - 7
Reassemble and test
Reconnect the trap, reattach hoses, restore power, and run a short cycle to test drainage.
Tip: If backflow occurs, stop the cycle and reassess the trap and lines. - 8
Document and clean up
Wipe surfaces, store tools, and note the date of the fix for future maintenance.
Tip: A simple maintenance log helps prevent future clogs.
Common Questions
What causes a laundry drain to clog?
Lint, hair, soap scum, and mineral buildup commonly clog laundry drains. Regular lint-screen cleaning and careful detergent use help reduce buildup over time.
Clogs are usually caused by lint and soap scum building up in the drain over time.
Can I use chemical drain cleaners on a laundry drain?
Chemical cleaners can damage pipes and septic systems and may not resolve the clog. Prefer mechanical methods like pliers, plunger, or a hand auger.
Chemical cleaners aren’t usually the best option for laundry drains; mechanical methods work better.
How often should I clean the lint trap and drain?
Inspect the trap monthly and clean visible lint after heavy laundry days. Consider a quarterly flush to remove minor buildup.
Check the lint trap every month and clean it as needed.
What if water backs up after cleaning?
Stop and reassess the trap and lines. If backups persist, repeat the steps or consider calling a plumber.
If water still backs up after cleaning, repeat the process or call a pro.
Is it safe to use a plunger on a laundry drain?
Yes, as long as you seal the drain properly and don’t force the blockage. Use moderate, steady pressure.
A plunger can help if used correctly, but don’t force it.
When should I call a plumber?
If you’ve tried the DIY steps and the drain remains sluggish or sewage backs up beyond the laundry area, contact a licensed plumber.
If the clog won’t budge after trying DIY steps, call a pro.
Watch Video
Key Points
- Identify lint/soap-scap buildup as a primary clog cause
- Use trap cleaning, plunger, and auger before chemicals
- Flush with hot water after clearing to verify flow
- Reassemble and test with a small load to confirm fix
- Maintain lint screens and regular flushes to prevent recurrence