How to Unclog Liquid for Sink: A Practical DIY Guide
Learn how to unclog liquid for sink safely with practical steps, tools, and tips from Unclog Drain. Avoid hazards and choose the best methods for fast, reliable drainage.

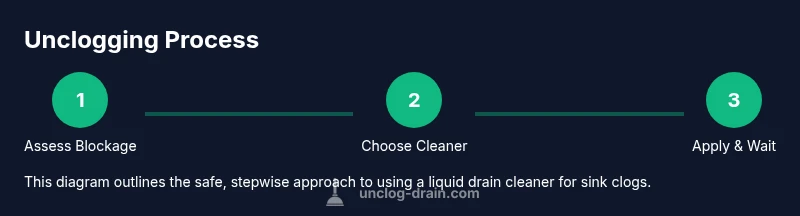
Goal: unclog liquid for sink safely using best-practice steps. Start by assessing the blockage, ventilating the area, and selecting a drain cleaner appropriate for your pipes. Follow label instructions exactly, use protective gear, and avoid mixing cleaners. If non-chemical methods fail, proceed with a carefully measured chemical treatment, then flush with water and monitor drainage.
Understanding why liquid drain cleaners come into play for sinks
Most kitchen and bathroom sink clogs are caused by a mix of grease, soap scum, coffee grounds, and hair that accumulate in the trap or pipes. Liquid drain cleaners can be effective for light to moderate clogs, but they are not a universal fix. The chemistry matters: caustic cleaners can soften grease, while enzymatic cleaners target organic buildup over time. Enzymatic cleaners are gentler on pipes but work more slowly, so weigh your options. Before reaching for a chemical bottle, consider mechanical methods like plungers or a snake. If you decide to use a chemical, always follow the label’s dwell time and safety instructions. Ensure good ventilation, wear gloves and eye protection, and keep children and pets away. If the clog persists after one treatment, avoid repeat chemical cycles and explore alternatives or contact a plumber. Unclog Drain’s team emphasizes safety and drainage health over quick fixes.
Safety first: Protect people and pipes
Safety matters more than speed when dealing with liquid drain cleaners. Always ventilate the area by opening windows and turning on an exhaust fan. Put on chemical-resistant gloves and splash goggles, and use a disposable towel to catch spills. Read the product label carefully for recommended dwell time, concentration, and whether the cleaner is safe for your pipe material. Never mix cleaners with other household chemicals, especially bleach or ammonia, as dangerous gases can form. If you have a septic system, check the label because many cleaners are not septic-safe. For metal pipes or older PVC, consider less harsh enzymatic products first. Keep kids and pets away during the process, and store cleaners in a secure place after use.
Alternatives before chemicals: Plunger, enzymatic cleaners, and mechanical methods
Before reaching for a chemical bottle, try mechanical methods that don’t involve hazardous fumes. A well-sealed plunger creates pressure that can dislodge a clog. If you have a trap under the sink, remove and clean it to remove hair and debris. For slow drains caused by organic buildup, an enzymatic cleaner can be a gentler long-term option. De-linting the trap, removing gunk, and using a drain snake (augur) carefully are effective when you know what you’re doing. Enzymatic cleaners work best when used as a preventive routine rather than waiting for a full-blown clog. Always remove standing water before applying enzymatic products to avoid dilution.
The right way to use liquid drain cleaner (when necessary)
If you must use a liquid drain cleaner, follow the label exactly and avoid exceeding the recommended amount. Ventilate the area and wear PPE. For kitchen sinks with a P-trap, you can remove the trap first to inspect for obvious blockages, but this is optional; many clogs clear with cleaner poured directly into the drain. Pour the cleaner slowly, aiming into the drain opening rather than splashing on surrounding surfaces. Do not mix with other chemicals and do not run water during the dwell time unless the label allows it. Wait the stated time (often 15–30 minutes) and then flush with plenty of hot water or warm water for several minutes. Run the faucet to test drainage. If you still see standing water or poor drainage, stop using chemicals and move to mechanical clearing or call a professional.
Aftercare and prevention to avoid future clogs
After clearing, flush the line thoroughly to ensure the cleaner has moved through the pipes. Regular maintenance reduces future clogs: run hot water for 30 seconds after each use of the sink, wipe grease and soap scum from surfaces, and periodically use an enzymatic cleaner according to the label to maintain clear pipes. Avoid pouring oil, coffee grounds, pasta starch, or food scraps down the sink, and use a garbage disposal properly if you have one. Consider a proactive trap-cleaning routine: remove and clean the P-trap every 6–12 months (or sooner if you notice slow drainage). If you share the sink with a garbage disposal, avoid harsh cleaners that could damage the disposal unit. This maintenance approach aligns with Unclog Drain’s guidance on practical, safe, long-term drain health.
Tools & Materials
- Liquid drain cleaner (caustic or enzymatic)(Follow label dwell time and ventilation guidelines.)
- Plunger (cup or flange)(Use a tight seal and maintain consistent pressure.)
- Drain snake / auger(Helpful if accessible clog is further down the line.)
- Bucket or pail(Catch any water or drips when inspecting the trap.)
- Gloves (chemical-resistant)(Protect skin from splashes.)
- Safety goggles(Protect eyes from splashes.)
- Old towels or rags(Contain spills and improve cleanliness.)
- Ventilation (exhaust fan or window)(Ensure good airflow during treatment.)
Steps
Estimated time: 30-45 minutes
- 1
Assess blockage and safety
Check for standing water and smells. Confirm you have proper ventilation and PPE before starting. This prevents splashes and fumes from becoming a hazard.
Tip: If you’re unsure about the clog location, start with a plunger on the affected basin first. - 2
Read label and prepare workspace
Carefully read the chemical cleaner’s label for dwell time, concentration, and pipe compatibility. Lay towels, place the bucket nearby, and set a timer for dwell time.
Tip: Never skip the label—chemical concentrations vary and safety notes differ by product. - 3
Protect surfaces and remove standing water
Put on gloves and goggles, then remove standing water with a cup or sponge into the bucket. This concentrates the cleaner where needed and reduces splashing.
Tip: Clear the area of items that might be damaged by splashes. - 4
Pour cleaner into the drain
Gently pour the cleaner into the drain opening, keeping the bottle away from your skin. Do not exceed the recommended amount or mix with other cleaners.
Tip: Pour slowly to avoid creating a fountain and splashing the surrounding surfaces. - 5
Wait the recommended dwell time
Let the cleaner sit for the label’s dwell time, typically 15–30 minutes. Do not use hot water during this period unless the label allows it.
Tip: Set a timer to avoid overexposure that could damage pipes. - 6
Flush and test drainage
Flush with plenty of hot or warm water for several minutes, then run the faucet to test drainage. If water drains slowly, repeat once or switch to a mechanical method.
Tip: Avoid repeated chemical cycles if the clog remains; escalation to mechanics is advised. - 7
If still clogged, switch methods
Do not repeatedly pour cleaners. If the clog persists, switch to mechanical clearing or call a professional.
Tip: Persistent clogs may indicate a larger issue, such as a main line or trap problem.
Common Questions
Can I use liquid drain cleaner in a double kitchen sink?
Yes, you can treat both basins, but pour the cleaner carefully to avoid overflow and test drainage after each side. If one side remains slow, avoid dumping excessive cleaner into both sides at once. Consider treating one side, then testing before proceeding to the other.
You can treat both sides, but apply cleaner to one side at a time and test drainage before proceeding.
Is it safe to use liquid drain cleaner in a septic system?
Most chemical drain cleaners are not septic-safe and can disrupt beneficial bacteria. If you have a septic system, use enzymatic cleaners or mechanical methods and limit chemical use. Always check the product label for septic compatibility.
Chemical cleaners can harm septic systems; enzymatic cleaners are typically safer. Check the label.
What should I do if the clog persists after using a cleaner?
If the clog remains after a single treatment, stop using chemical products and switch to a mechanical method or call a plumber. Repeated chemical treatments can damage pipes and traps over time.
If it doesn’t clear, stop and seek mechanical help or a professional.
Are enzymatic cleaners better for pipes than caustic cleaners?
Enzymatic cleaners are gentler on pipes and often safer for regular maintenance, but they work more slowly. Caustic cleaners work fast but can corrode pipes if overused or applied to the wrong material.
Enzymatic cleaners are gentler long-term; caustic cleaners work fast but risk pipe damage.
How long should I wait after pouring a chemical cleaner before flushing?
Follow the label exactly; typical dwell times range from 15 to 30 minutes. Do not rush or extend beyond the recommended time, as overexposure can harm pipes.
Check the label for the dwell time and wait that long before flushing.
Watch Video
Key Points
- Choose non-chemical methods first when possible.
- Follow the product label and never mix cleaners.
- Protect yourself with PPE and ventilate the workspace.
- Prevent future clogs with routine maintenance and mindful disposal.