i unclog the sink: How to Clear a Clogged Sink Drain Yourself
Learn safe, proven methods to unclog a sink drain without harsh chemicals. Step-by-step tips, tools, and preventative strategies from Unclog Drain.

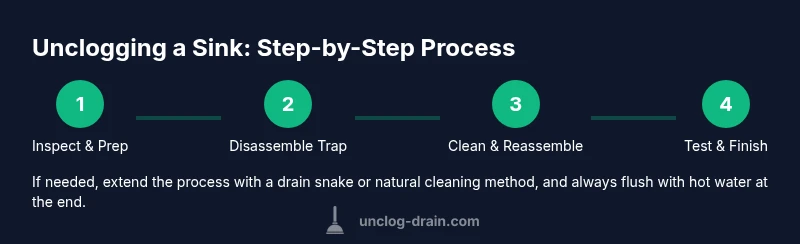
Goal: unclog the sink safely using proven, DIY methods. Start by inspecting the stopper, gathering basic tools, and choosing a plan: disassemble the P-trap and remove debris, use a plunger or drain snake, and finish with a hot-water flush. Avoid harsh chemical cleaners as a first option to protect pipes and the environment.
Why a clogged sink happens
Debris such as hair, soap scum, grease, and food particles can accumulate in the drain over time. In kitchen sinks, grease and food waste are common culprits; in bathroom sinks, hair is frequent. When the trap or the pipe lines collect gunk, water backs up or drains slowly. Another factor is a clog deeper in the drain line, where surface remedies fail. For homeowners, understanding the main causes helps decide which method to try first and reduces the risk of damaging pipes. The expert team at Unclog Drain emphasizes that recognizing the blockage is the first critical step. Common signals include standing water after a quick drain, reduced flow, and gurgling sounds from the pipes. By adopting a calm, methodical approach you can often restore full drainage without calling a plumber. The goal is to keep your plumbing healthy, avoid unnecessary chemical cleaners, and prevent future clogs through mindful habits and routine maintenance.
Safety first: when to call a pro
Most sink clogs you can handle safely, but certain situations demand professional help. If you notice sewage odors, water backs up in multiple fixtures, or there is a sudden loss of water pressure, stop and call a licensed plumber. Do not attempt to disassemble pipes behind walls or near electrical outlets; avoid hot chemical cleaners that can splash back or corrode pipes. For homeowners who prefer DIY, wearing gloves and eye protection reduces the risk of contact with dirty water or sharp edges. In addition, never mix household cleaners, as dangerous fumes can form. If your first attempts fail after 30-40 minutes of careful work, consult a professional—an experienced pro will diagnose deeper blockages, venting issues, or sewer line problems. Unclog Drain’s guidance is to escalate only when your safety or the plumbing is at risk.
Quick checks you can do before disassembling
Before touching the pipes, perform a few quick checks to avoid unnecessary disassembly. Check whether your sink has a pop-up stopper and whether it is fully open. Test the water flow by running warm water for a few seconds and listening for drainage cues. Inspect the visible parts of the drain trap for sticky buildup, hair, or soap scum. If the stopper is removable without tools, note its orientation for reassembly. By performing these non-invasive checks first, you may identify a simple fix that preserves your fittings and seals. Finally, consider placing a towel or mat under the work area to catch spills and keep the area clean. This approach aligns with Unclog Drain’s philosophy: respect your pipes and your workspace while solving the problem.
Techniques overview: plunger, trap cleaning, auger, and natural methods
There are several paths to clear a sink, and your choice depends on the clog’s location and your comfort with basic plumbing. A plunger can dislodge minor surface blockages quickly when a good seal is achieved. If the blockage is deeper, removing the P-trap to inspect and clean it directly is often the most reliable method. A drain auger or snake can reach through bends to reel out hair and debris. For greener homes, baking soda and hot water provide a mild, mechanical-cleaning effect without harsh chemicals, though results vary. Finally, avoid relying on chemical drain cleaners as your sole solution; they can damage seals and pipes, and they may not reach truly stubborn clogs. Unclog Drain recommends starting with mechanical methods and saving chemistries as a last resort.
Common mistakes and how to avoid them
Rushing the process can cause more issues than it solves. Over-tightening slip nuts on the P-trap can crack fittings; under-tightening causes leaks. Using metal tools that scratch the chrome finish or plastic parts can lead to cracks. Another frequent error is flushing with cold water after removing the trap; warm water helps carry out debris and reduce residue. When using a drain snake, be gentle to avoid bending the tool or damaging the pipe. If your trap clogs again within days after cleaning, the issue might be deeper in the main drain line, which requires a plumber. By adopting a careful, patient approach and keeping a cleanup plan, you’ll protect your plumbing and save money over time.
Everyday maintenance to prevent future clogs
Prevention saves time and frustration. Regularly clean the sink screens and the trap, and collect hair or food waste in a compost bin rather than the drain. Run hot water periodically to wash away soap scum and oils, especially in kitchen sinks. Consider a stainless-steel screen to reduce debris entering the pipes. If you have a garbage disposal, run it with plenty of cold water and avoid putting fibrous or starchy items down the drain. By implementing these habits, you’ll extend the life of your plumbing, reduce the need for aggressive fixes, and keep your home running smoothly. Unclog Drain’s approach emphasizes practical, low-cost maintenance you can perform without professional help.
Tools & Materials
- Plunger (cup or flange)(Wide rubber cup works best for sinks)
- Bucket(To catch wastewater and debris)
- Rubber gloves(Protect hands from grime)
- Old towels or rags(Keep area dry and clean)
- Adjustable wrench(Loosen P-trap nuts)
- Channel-lock pliers(Useful if nuts resist turning)
- Drain snake/auger(Reach deeper clogs if needed)
- Permanent stopper removal tool or small screwdriver(Remove stopper if needed)
- Hot water(Hot tap water for flushing)
- Baking soda(Natural mild cleaner option)
- White vinegar(Natural cleaning option)
- Flashlight(Better visibility under sink)
Steps
Estimated time: 45-75 minutes
- 1
Remove the stopper and prep the area
Identify the stopper type and carefully detach it from the drain. If it’s a lift-out style, yank it straight up; if it’s a pop-up, release the linkage first. Clear any visible debris around the opening with a cloth, and set aside for cleaning.
Tip: Take a quick photo of the stopper’s orientation for reassembly. - 2
Place bucket and towels under the P-trap
Position a bucket directly beneath the P-trap to catch water and debris when you loosen the nuts. Lay towels to absorb splashes and protect your cabinet.
Tip: Have a second towel ready to wipe drips from your hands and tools. - 3
Loosen and remove the P-trap nuts
Using an adjustable wrench, back off the slip nuts on the trap’s inlet and outlet. If you meet resistance, apply steady, even pressure and avoid twisting the pipe itself.
Tip: Keep the trap aligned with the wall so it doesn’t twist when you remove it. - 4
Inspect and clean the trap
Take the trap apart and inspect for hair, grease, or food buildup. Rinse all parts with warm water and a brush. Refit clean parts if they’re in good condition; replace any cracked gaskets or washers.
Tip: Dispose of the gunk in the trash, not down the sink. - 5
Reassemble the trap and test
Reattach the trap, ensuring all nuts are snug but not overtightened. Run warm water to see if the drain clears. If water still pools, proceed to the next step.
Tip: Check for leaks after reassembly; tighten further if needed in small increments. - 6
If the clog persists, use a drain snake
Insert the snake into the drain and rotate to grab or break up the clog. Extend it slowly and pull out debris, then run water.
Tip: Never force the snake; if you meet resistance, back off and try a different method. - 7
Optional natural flush with baking soda
Pour 1/2 cup baking soda into the drain, follow with a cup of hot vinegar, and cover the drain for 5-10 minutes. Rinse with hot water to flush loosened debris.
Tip: This method is gentler on pipes but less effective for stubborn clogs. - 8
Final check and cleanup
Run hot water for several minutes to confirm full drainage. Wipe the area, reassemble the cabinet, and store tools properly.
Tip: Document what you did for future reference and maintenance.
Common Questions
What is the safest way to unclog a sink without a snake?
Start with a plunger to dislodge surface clogs. If that fails, inspect and clean the P-trap. Use a drain snake only if you’re comfortable and don’t force it.
Begin with plunging, then check the trap; use a snake only if you’re confident.
Will baking soda and vinegar fix a clog?
For minor, recent clogs, baking soda and vinegar can help, but results vary. It’s a gentle option that’s worth trying before harsher methods.
Baking soda and vinegar may help mild clogs, but aren’t a guaranteed fix.
Can I use chemical drain cleaners in a kitchen sink?
Chemical cleaners can damage seals or disposals and may not reach deep clogs. They’re best avoided as a first line of attack, especially in homes with disposals or septic systems.
Avoid harsh chemicals first; they can damage pipes and disposals.
How long does a typical sink unclogging take?
For most minor clogs, expect about 30-60 minutes. Deeper blockages or multiple fixtures can take longer or require professional help.
Most DIY fixes take about an hour; tougher clogs may need more time.
When should I call a plumber?
Call a plumber if the clog recurs after multiple attempts, if sewage is involved, or if you notice leaks, foul odors, or water backing up in several fixtures.
If simple fixes fail or you smell sewage, get a professional.
Key Points
- Start with simple checks before disassembly
- Disassemble the trap only if needed to inspect for a clog
- Mechanical methods outperform chemical cleaners for most sinks
- Test drainage after every major step