How to Unclog a Sink with an Amazon Sink Plunger: DIY Guide
Learn to unclog a sink quickly with an amazon sink plunger in this practical, step-by-step guide from Unclog Drain. Tools, safety tips, and prevention strategies included.

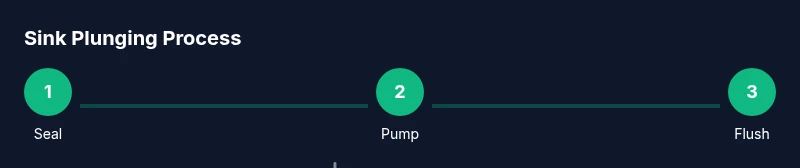
Goal: clear a clogged kitchen or bathroom sink quickly using an Amazon sink plunger. The method relies on a tight seal, steady pumping, and a final flush to push debris through the trap. You’ll need a cup-style plunger, rubber gloves, safety goggles, a bucket, and towels. Follow the step-by-step guidance in the body to succeed.
Why an Amazon sink plunger is a practical choice
When a kitchen or bathroom sink starts to drain slowly or backs up, many homeowners reach for a plunger. For most households, a cup-style plungers sold on Amazon are a practical first tool because they provide a flexible seal, easy storage, and broad compatibility with common sink traps. According to Unclog Drain, the best plungers for standard sinks have a wide, soft rubber cup and a sturdy handle that won’t slip while you pump. This design makes it possible to generate the necessary pressure to dislodge clogs without damaging the drain components.
Using an Amazon sink plunger also supports broader DIY maintenance. A well-chosen plunger can be used for sink, shower, and tub drains, saving you trips to a plumber for minor blockages. The Unclog Drain team has found that many clogs originate in the P-trap or in the immediate drain pipe, where air and pressure help move the clog. In this guide, we’ll cover how to select, use, and maintain a plunger so you can handle routine clogs confidently and safely.
How a cup-style plunger works on sink clogs
A cup-style plunger creates a pressure seal between the rubber cup and the drain opening. When you push and pull, the trapped air and water compress and release, generating a shockwave that can break up soap, hair, food particles, or grease that cause slow drainage. For sinks, the vertical alignment of the trap means you must seal the cup over the standing water and press firmly to eliminate gaps. The key is consistent rhythm: short, strong pumps followed by a moment of pressure release. Over several cycles, most light-to-moderate clogs loosen enough to drain freely again. If the water level drops, add a little water to maintain a seal. If you hear air escaping around the cup, reposition and reseal before continuing.
Choosing the right cup plunger for kitchen sinks
Kitchen sinks benefit from a cup-style plunger with a 3-4 inch rubber cup and a comfortable, grippy handle. Look for a model designed for standard drains (not a toilet flange) and ensure the rubber is flexible and free of cracks. For best results, choose a plunger with a snug, durable boot that can form a solid seal even on slightly curved drain openings. A plunger purchased on Amazon that is marketed for kitchen and bathroom sinks often balances price, materials, and durability. If you have a double-basin sink, two plungers can be helpful, but you can also seal one side at a time with a towel placed to block the other drain.
Safety and prep before you start plunging
Before you begin, put on rubber gloves and safety goggles to protect your hands and eyes from splashes. Clear the area around the sink, place towels on the floor, and have a bucket ready to catch water. If you have a garbage disposal, turn it off and unplug it to prevent accidental activation during plunging. Make sure you have enough standing water in the basin to cover the plunger cup; this helps create a better seal and more effective pressure. Finally, avoid chemical drain cleaners during plunging, as they can create hazardous fumes or react unpredictably with the plunger.
Step-back troubleshooting: when plunging alone isn't enough
If you’ve repeatedly plunged and the sink still won’t drain, the clog may be farther down the line or in the P-trap. Put the plunger away and inspect the trap under the sink: place a bucket underneath, loosen the slip nuts, and remove the trap to check for hair, grease, or food debris. Reassemble tightly and run hot water to flush. If the blockage remains, you might need a drain auger or professional help. Remember, persistent clogs can indicate deeper issues in the drain system.
Techniques to improve seal, rhythm, and debris clearance
Effective plunging hinges on a solid seal and a controlled rhythm. Wet the cup with warm water or a drop of dish soap to improve suction. Place the cup fully over the drain, apply downward pressure to seal, then perform a series of firm, rapid pumps followed by a longer push to push air through the line. Avoid short, weak movements, which waste effort. If air leaks around the seal, adjust position and reseal before continuing. For stubborn clogs, alternate between plunging and a quick rinse to observe changes in drainage.
Post-plunge flush and cleanup to prevent future clogs
Once the water drains, flush the system with hot water to help dissolve residual grease and soap scum. Run the faucet at full pressure for a minute or two, then test by running the tap at normal speed. Clean the plunger with soap and water, dry it thoroughly, and store it in a clean area away from moisture. Regularly empty and rinse sink strainer baskets to prevent hair and debris buildup. A simple habit—keeping the drain covered when not in use—can go a long way toward preventing future clogs.
When to call a professional for stubborn clogs
If multiple attempts fail to clear a clog, or if you notice a recurring backup in the same sink, it may be time to call a professional plumber. Recurrent clogs could indicate pipe damage, a full line blockage, or issues with the sewer lateral. A licensed plumber can perform a diagnostic and use tools like a drain snake or camera inspection to identify the root cause and provide safe, lasting solutions.
Maintenance habits to keep kitchen and bathroom sinks flowing
Adopt simple maintenance that reduces the frequency of clogs. Use a sink strainer to catch solids, avoid pouring grease or oil down the drain, and periodically flush lines with hot water. A small amount of baking soda followed by hot water can help neutralize odors and slow buildup. If you frequently experience slow drainage, consider scheduling a routine drain check and cleaning to keep your lines clear.
Common mistakes to avoid with plungers
Avoid using a plunger on a drain that is completely dry; lack of water makes sealing ineffective. Do not mix chemical cleaners with plungers, as fumes can be dangerous and reactions unpredictable. Do not rush the pump action or over-pressurize the line, which can dislodge seals or damage the trap. Finally, never plunge a drain that has a loose seal or visible cracks in the rubber cup; replace the plunger to prevent leaks and poor performance.
Tools & Materials
- Cup-style sink plunger(Choose a 3-4 inch cup with flexible rubber and a sturdy handle.)
- Bucket(To catch water and debris during plunging.)
- Rubber gloves(Nitrile recommended; protects hands from grime.)
- Safety goggles(Protect eyes from splashes and debris.)
- Towels or old rags(Place to absorb spills and keep the area dry.)
- Dish soap(Optional; helps wet the cup for a better seal.)
- Hot water(Not boiling; hot tap water or warmed water helps flush debris.)
- Flashlight (optional)(Helpful for inspecting under-sink areas or P-trap.)
Steps
Estimated time: Total time: 20-45 minutes
- 1
Prepare area and protect surfaces
Clear the area around the sink. Put on gloves and safety goggles, place towels on the floor, and position a bucket to catch water. If you have a disposal, switch it off to avoid accidental activation. Gather your tools so you don’t interrupt the process.
Tip: Having everything within reach reduces the chance of a spill and helps maintain focus. - 2
Seal the drain
Place the cup of the plunger squarely over the drain opening and press down to create a tight seal. If air escapes, reposition the plunger and reseal until you feel solid resistance.
Tip: Wet the cup with warm water or a touch of dish soap for a stronger seal. - 3
Pump with a steady rhythm
Push down firmly, then pull up with equal force in a smooth, controlled motion. Repeat this cycle multiple times to build pressure behind the clog. Avoid rapid, erratic pumping which wastes energy and reduces effectiveness.
Tip: Count the pumps to maintain a consistent pace and avoid over-pumping. - 4
Pause and inspect
After several cycles, lift the plunger briefly to see if the clog has moved. If the water starts to drain, continue with another set of pumps. If nothing changes, check for air leaks and reseal.
Tip: If you hear a hiss, the seal isn’t tight enough; re-seal before continuing. - 5
Flush and test
Run hot water from the faucet to flush the line and observe whether the water drains smoothly. If the water backs up again, repeat the plunging sequence once more before trying alternate methods.
Tip: Avoid pouring boiling water into plastics that may warp; test with hot tap water first. - 6
Clean up and store
Wipe down the area, dry the plunger and store it in a dry place. Check the sink strainer to ensure it’s clean, and replace any worn gaskets or seals as needed.
Tip: Regular storage in a dry area extends the life of the rubber cup.
Common Questions
Can I use a chemical drain cleaner with an Amazon sink plunger?
No. Do not mix chemical drain cleaners with a plunger. The combination can create hazardous fumes and damage pipes. Use mechanical methods first and consult a professional for persistent clogs.
No. Do not mix chemicals with plungers; mechanical methods are safer and more reliable for most household clogs.
Will plunging damage pipes?
When used correctly on standard drains, plunging is generally safe. Avoid excessive force and ensure a good seal to prevent strain on joints and traps.
Plunging is safe when done correctly; use steady pressure and a proper seal.
What if the clog is in the P-trap?
If you suspect the P-trap is blocked, place a bucket underneath, loosen the nuts, and clear debris by hand with gloves. Reassemble tightly and test drainage.
Check the P-trap by removing it and clearing debris with gloves.
How often should I plunge a sink clog?
Plunge a few times if needed and observe. If slow drainage recurs, investigate deeper issues or consider preventive maintenance.
Plunge a few times, then reassess. If it keeps happening, it may be a bigger problem.
Can I plunge a garbage disposal or a double-basin sink?
For disposals, turn off the unit before plunging. For double basins, seal the other side with a rag or use a dedicated plunger for each basin.
Yes, with proper precautions for disposals and multi-basin setups.
Are there alternatives to plungers for stubborn clogs?
Yes. A drain auger or snake can clear deeper blockages, enzyme-based cleaners (pipe-safe), or a professional evaluation. Avoid relying solely on chemical cleaners.
Other options include a drain auger or professional help if needed.
Watch Video
Key Points
- Choose a cup-style plunger with a wide rubber cup for kitchen sinks.
- Create a tight seal and use steady, strong pumps.
- Flush with hot water after plunging to clear remaining debris.
- Inspect the P-trap if plunging fails to clear the clog.
- Prevent future clogs with proper strainer use and routine maintenance.