Plunger to Unclog Sink: A DIY Guide
A practical DIY guide on using a plunger to unclog a sink. Learn plunger selection, technique, safety, and maintenance to keep drains flowing and avoid backups.

This guide shows you how to clear a sink clog using a plunger. You’ll learn the right plunger type for sinks, how to create a proper seal, and the step-by-step plunging technique. It also covers safety, post-cleanup, maintenance, and when to escalate to a drain snake or professional help. Following these steps helps prevent messy backups and keeps drains flowing.
Why sink clogs happen and when a plunger is effective
Sink clogs are typically caused by a buildup of hair, soap scum, grease, and food particles that accumulate over time in the drain trap and pipes. A plunger can be an effective first-line fix when the clog is near the drain opening and creates a water seal. Plunging works best for gravity-based blockages and is less effective for solid or mineralized obstructions or when the clog is far down the line. For most household clogs, using a sink-appropriate plunger with proper technique resolves the issue without special tools. According to Unclog Drain, understanding the clog’s location and choosing the right plunger type dramatically increases your odds of success. If you’re unsure about the clog’s depth, start with the simplest method and escalate only if needed.
Practical takeaway: start with the least invasive method and monitor results. If water remains stagnant after several plunges, consider a drain snake or seeking professional help. This approach minimizes mess and keeps DIY spirits intact while protecting plumbing components.
Quick tip: For a kitchen or bathroom sink, always confirm there’s no standing water deeper than a few inches before plunging. If the sink is already full, you’ll have a better seal once the water reduces.
According to Unclog Drain, the common clog culprits are hair and soap scum in bathroom sinks and food particles or grease in kitchen sinks. Identifying the likely culprit helps tailor your approach and prevents unnecessary force or repeated plunges.
Tools & Materials
- Cup plunger (sink-friendly)(Use a flat rubber cup designed for sinks; avoid toilet plungers.)
- Bucket(To catch spills and catch any splashes.)
- Old towels or rags(Lay around the sink to protect the countertop.)
- Rubber gloves(Keeps hands clean and dry.)
- Flashlight(Optional for better visibility inside the drain.)
- Drain snake (hand auger)(Helpful for stubborn clogs beyond the trap.)
- Dish soap (optional)(A few drops can help lubricate the seal.)
- Safety glasses(Eye protection against splashes.)
Steps
Estimated time: 30-45 minutes
- 1
Prepare the workspace
Clear the area around the sink and place towels to catch splashes. Put on gloves and glasses for protection. If you have a garbage disposal, switch it off to avoid accidental activation during plunging.
Tip: Keep a bucket nearby to catch water that backs up during the process. - 2
Choose the right plunger
For most sinks, a cup plunger is ideal because it forms a better seal on flat drains. Avoid toilet plungers, which aren’t designed for sinks and can slip. Ensure the plunger is clean and free of debris before use.
Tip: Test the seal on the drain before applying force to confirm it sits flush. - 3
Block the overflow (if present)
If your sink has an overflow hole, cover it with a damp cloth or seal to prevent air from escaping and to improve suction. This helps the plunger push water down the drain rather than around the sides.
Tip: A damp cloth is enough; avoid large gaps that break the suction. - 4
Fill the sink to cover the plunger
Add enough water to submerge the rubber cup of the plunger. A water-filled basin creates a stronger seal, allowing pressure to push the clog downward rather than around the edges.
Tip: If the sink is already full, you can let some water out to a bucket first and then refill to cover the cup. - 5
Position the plunger and form a seal
Place the plunger squarely over the drain, ensuring full contact with the drain surface. Press down firmly to squeeze out any air pockets and create an airtight seal.
Tip: A tight seal is more important than the amount of water; pause briefly if air keeps escaping. - 6
Plunge with steady, controlled strokes
Push straight down and pull up with a consistent rhythm for 15–30 seconds per cycle. Maintain pressure without twisting the plunger away from the drain.
Tip: Start with several quick tugs to prime the suction, then slow, deliberate pushes. - 7
Check progress and repeat if needed
Lift the plunger to see if water starts draining. If the water drops, repeat the plunging cycle a few times. If there’s no movement after several cycles, move to a drain snake or other method.
Tip: Don’t force additional plunges if you feel unusual resistance; reassess the blockage type. - 8
Flush and test the drain
After you see signs of improvement, run hot water down the drain for 1–2 minutes to clear remaining debris. Test by running tap water and observing flow.
Tip: Avoid boiling water if you have PVC pipes; hot water is safer and often effective. - 9
Escalate if the clog persists
If plunging doesn’t clear the clog after a series of cycles, consider a hand auger or snake the drain. Severe or recurring clogs may indicate a deeper blockage or sewer line issue requiring a plumber.
Tip: Document what you tried and when, so the next steps are clear for a professional.
Common Questions
Can a plunger damage the sink or pipes?
Used correctly, plunging won’t harm most sinks. Avoid excessive force and never plunge a drain with chemical cleaners present.
Plunging is safe if done gently and with no cleaners in the drain; don’t force it or mix cleaners.
What if plunging doesn’t work?
If the clog remains after several cycles, move to a drain snake or hot water flush, and consider calling a plumber for deeper blockages.
If plunging doesn’t clear it after a few tries, try a snake or call a professional.
Should I use a chemical drain cleaner after plunging?
Do not mix plunging with chemical cleaners. If you use cleaners, flush thoroughly with water before attempting to plunge again and follow label directions.
Don’t combine plunging with chemical cleaners; follow the product’s instructions and rinse well.
Can I plunge a double sink?
For a double sink, seal the other basin and plunge the clogged side to focus suction. If both sides are blocked, you may need to address each side separately.
Seal the other basin and plunge the clogged side first.
When should I call a plumber?
If clogs recur after multiple attempts or you detect sewage smells or water backing up, a professional plumber should assess the system.
Call a plumber if clogs keep coming back or you smell sewage.
Is a plunger different for kitchen vs bathroom sinks?
Use a cup plunger for sinks; toilet plungers are not ideal. For stubborn bathroom clogs, a small flange plunger may help in some setups.
For sinks, stick with a cup plunger; avoid toilet plungers.
Watch Video
Key Points
- Choose the correct sink plunger to form a proper seal.
- Block overflow and fill water to create suction.
- Plunge with steady, controlled strokes and test frequently.
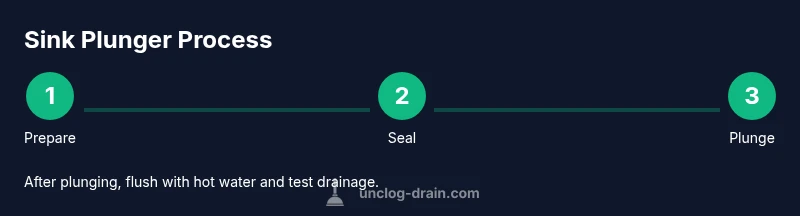
- Flush with hot water after clearing the clog.
- Escalate to a snake or pro if unresolved.