My Garbage Disposal Is Clogged: Fast DIY Fixes
Urgent, practical steps to unclog your garbage disposal fast. Unclog Drain guides you from quick checks to DIY fixes, safety tips, and prevention ideas.

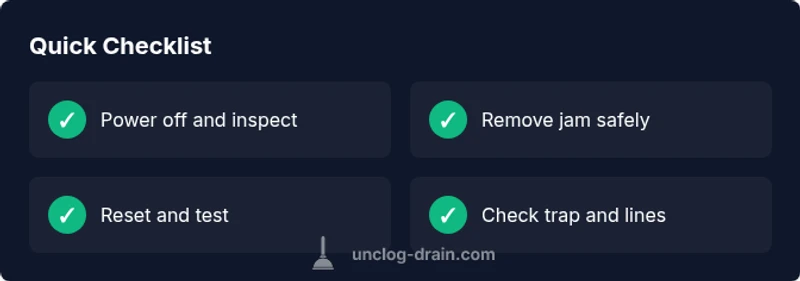
If your garbage disposal is clogged, start with simple checks: turn off power, inspect for obvious jams, and remove them with tongs. Reset the unit and test with a small amount of water. If the jam persists, use a disposal wrench or plunger to dislodge it. According to Unclog Drain, this quick sequence solves most kitchen clogs.
Quick, non-invasive checks you can start with
Dealing with a clogged garbage disposal can feel urgent, but most problems are resolved with safe, simple steps. According to Unclog Drain, the fastest fixes begin with a power shutdown, a visual inspection, and careful debris removal. First, locate the wall switch and turn off the disposal, then switch off the corresponding circuit breaker to be absolutely sure the unit cannot start while you work. Use a flashlight to peer inside the grinding chamber and at the drain opening for obvious obstructions like utensils, bones, pits, or coffee grounds that should not be there. Do not place your hands into the grinding chamber; instead, grab long-handled tongs or needle-nose pliers and extract whatever you can reach. If you can safely remove a visible item, restore power and run cold water while briefly turning the unit on to test progress. If the unit remains stubborn and stalls, you likely have a jam or a stalled motor. In that case, consult the subsequent steps or use a disposal wrench to try to free the blades. Safety comes first: never put your hands down the disposal when it is powered.
Understanding why disposals clog
Garbage disposals clog for several common reasons: fibrous vegetable scraps (celery, onion skins), coffee grounds that compact, potato peels that wrap around blades, eggshells that don’t break down well, or inadvertently disposing of fats, grease, or hard shells. Overloading the unit with large portions at once also increases the risk of jams. If you’ve been rinsing lots of scraps down at once, try feeding smaller amounts and allowing the motor to rest between batches. Another frequent culprit is a blocked drain line or P-trap, which can back up water even after the jam is cleared. By understanding these patterns, you can tailor your fixes and prevention approach. Unclog Drain’s analysis shows that many clogs arise from improper disposal rather than a faulty motor, so changing habits is often enough to restore flow.
Tools and safety gear you’ll need
Having the right tools on hand makes the job safer and faster. You’ll want: (1) sturdy gloves to protect your hands, (2) a flashlight to inspect inside the unit, (3) long tongs or needle-nose pliers to grab debris, (4) an Allen wrench (usually 1/4 inch) if your unit has a hex port for manual blade rotation, (5) a bucket or towel to catch water, and (6) a dishwasher-safe disposal wrench or plier to coax a jam loose. Avoid using chemical drain cleaners in a disposal; those chemicals can damage the unit and pipes and create hazardous fumes. If you don’t have these tools, consider borrowing from a neighbor or purchasing a basic kit. Always unplug the disposal or switch off the circuit breaker before touching any moving parts. When in doubt, call a professional.
Diagnostic flow: symptom → diagnosis → solutions
- Symptom: The disposal won’t start, or the sink drains slowly alongside noises from the unit.
- Diagnosis: Likely a jam or obstruction inside the grinding chamber, or a clogged drain line.
- Solution: Remove jam, reset, and test drainage. If drainage remains slow, inspect the P-trap and drain line for blockages.
- Symptom: The unit makes a humming sound but won’t grind.
- Diagnosis: The impellers are stuck by a jam, sometimes with an internal obstruction.
- Solution: Depress reset button, rotate the impellers with an Allen wrench if available, and clear obstruction.
- Symptom: Water backs up into the sink after running.
- Diagnosis: Clogged drain line or P-trap requiring snaking or further plumbing.
- Solution: Clear trap, run the snake through the drain, and ensure the trap is clean.
Step-by-step: fix the most common cause
This section walks through freeing a jam and restoring function when your disposal is clogged due to a stuck object.
Prevention and safe maintenance habits
Even after you clear a jam, adopting consistent habits helps prevent future clogs. Always run cold water while grinding, feed in small batches, and never push hard objects, grease, or fibrous materials down the disposal. Periodically inspect the sink trap and drain line for slow drainage and clean them as needed. A quick quarterly reset and inspection can extend the life of your unit and protect your plumbing.
When to call a professional
If you’re uncomfortable performing any of the steps or if the unit is leaking, smells unusual, or continues to clog after multiple attempts, it’s time to call a professional. A licensed plumber can diagnose hidden issues such as a worn motor, damaged impellers, or a blocked main sewer line and provide safe, lasting solutions.
Common mistakes to avoid
Avoid pouring chemical drain cleaners into a disposal; they can corrode metal parts and create hazardous fumes. Don’t insert metal objects or fingers into the grinding chamber, even when powered off. Don’t ignore signs of leaking around the unit or persistent jams that resist basic troubleshooting. Following a careful, systematic approach will reduce risk and increase your chances of a successful fix.
Steps
Estimated time: 45-60 minutes
- 1
Power down and secure
Unplug the unit or switch off the circuit breaker. Confirm there is no power flowing to the disposal by attempting a brief test with the reset button. This keeps you safe from unexpected starts during the procedure.
Tip: Double-check the breaker in the main panel to ensure a complete cut of power. - 2
Visual inspection for jams
Using a flashlight, look into the grinding chamber and remove any obvious debris with tongs. Do not insert fingers. A single stubborn object may be the entire blockage.
Tip: If you see a jam but cannot reach it, do not force it; proceed to step 3. - 3
Manually free the jam
If your unit has a hex socket in the bottom, insert an Allen wrench and rotate the impellers to loosen the jam. Clear the object with tongs once the blades can move freely.
Tip: Turn the wrench gently; forcing it can damage internal components. - 4
Reset and test
Press the red reset button on the bottom or side of the disposal. Restore power and run cold water with the unit on for a brief test. Listen for the motor and a normal grind sound.
Tip: If you hear buzzing without grinding, this may indicate a more serious motor issue. - 5
Check the drain and trap
If drainage is still slow, inspect and clean the P-trap under the sink. Remove any buildup, reassemble, and run water through the disposal again.
Tip: Place a bucket beneath the trap to catch water and avoid a messy spill. - 6
Final test and cleanup
Run the disposal with a small amount of cold water to ensure consistent flow. Clean the area around the disposal and wipe up any spills. Replace the access panel if it was removed.
Tip: Document any persistent issues for a professional if needed.
Diagnosis: Disposal won’t start or drains slowly with grinding noises
Possible Causes
- highjammed object in grinding chamber
- mediumblocked drain line or P-trap
- lowmotor reset needed
Fixes
- easydisconnect power, remove visible debris, and manually rotate the impellers using an Allen wrench if accessible
- easyreset the disposal by pressing the red reset button and test with cold water
- mediumsnakes or pliers to clear a clogged P-trap or drain line; disassemble trap if needed
- easyinspect electrical outlet/breaker; restore power and test; call a professional if outlet or wiring seems faulty
Common Questions
What is the first thing I should do if my garbage disposal is clogged?
Power down the unit, remove any visible debris with tongs, and check for jams. If you can safely remove the jam, reset the disposal and test with cold water.
First, unplug the unit and clear visible debris with a tool. Then reset and test with cold water.
Can I use chemical cleaners to fix a clogged disposal?
Chemical drain cleaners are not recommended for disposals; they can corrode metal parts and damage seals. Use mechanical clearing methods instead.
No, avoid chemical cleaners; use manual removal and flushing with water instead.
Why does my disposal clog even after I cleaned it?
Repeated clogs are often due to recurring improper waste disposal or a blocked drain line. Revisit habits and check the P-trap and drain periodically.
If clogs recur, look at waste habits and inspect the drain line and trap.
When should I replace my garbage disposal?
Consider replacement if jams persist after professional repair, the unit is old (typically over 10-12 years), or leaks and frequent motor issues appear.
If it keeps clogging or leaking, it may be time to replace.
Is it safe to use a plumber’s snake on the disposal?
A plumber’s snake can help reach the drain, but avoid forcing it into the disposal chamber. If you’re unsure, call a professional.
A snake can help the drain, but don’t push it into the disposal itself; call a pro if uncertain.
What maintenance can prevent future clogs?
Run cold water, feed small portions, avoid fibrous or hard foods, and clean the sink trap regularly. Consider a quarterly checklist to keep things flowing.
Use cold water, feed small amounts, and clean the trap regularly.
Watch Video
Key Points
- Power down before inspection and removal
- Identify jams by visual check and careful loosening
- Reset and test with cold water after clearing debris
- Inspect the drain line and P-trap if drainage remains slow
- Call a pro if the unit leaks or won’t reset