Garbage Disposal Not Draining: Troubleshooting Guide
Urgent step-by-step guide to diagnose and fix a garbage disposal clogged not draining. Learn safe checks, quick fixes, troubleshooting flow, and when to contact a professional.

A jam or buildup inside the garbage disposal is the most common reason it won’t drain. The fastest fix is to power off the unit, remove visible obstructions with tongs, then reset and rotate the impeller to free the jam. If the disposal still won’t drain after these steps, proceed through the diagnostic flow to check downstream drains and safety switches.
Why the Garbage Disposal Not Draining Happens
If your garbage disposal is clogged not draining, the most common culprit is a jam or buildup inside the unit. Food particles can bind to the blades, reduce the impeller’s ability to spin, and trap water in the sink. Over time, this can create a stubborn clog that blocks the discharge into the tailpiece or the drain line. According to Unclog Drain, most clogs start here when users grind fibrous materials or push too much food at once. It’s important to act quickly to prevent a full backflow or foul odors. When you hear grinding noises or see water pooling around the unit, treat it as a warning sign that a jam is developing. The key is to act methodically, not forcefully, to avoid damaging the components. By understanding the common failure points, you’ll save time and reduce the risk of water damage in the cabinet.
Keep in mind this scenario is not just about turning the unit on; it’s about whether the water can actually move through the discharge path. If the jam is severe, you may notice a sluggish drain or a distinct odor. For homeowners, the quickest route to a reliable fix is to follow a proven flow: safety first, inspect for obvious obstructions, clear the jam, and then verify the downstream drainage. The goal is to restore normal flow without creating new leaks or backups.
Quick safety checks you can perform safely
Before you dive into the disposal, do a quick safety sweep. Unplug the unit at the wall outlet or switch off the dedicated circuit breaker to avoid any electric shock. Next, press the reset button on the bottom or side of the unit; you should hear a click if it’s tripped. With the power off, use a flashlight to peek into the disposal and splash guard for any obvious objects or blockages.
While safety is the priority, you’ll also want to verify that the sink and under-sink area are dry. Check the area around the disposal for signs of water leakage. If the unit is older, inspect the wiring and accessibility to ensure there are no frayed cables. If you have a GFCI outlet nearby, test it with a small lamp to confirm power stability. If the power is not reaching the unit, nothing will work—not even a correct jam clearance—so resolving the electrical issue takes precedence. Remember: never put your hands into the disposal while it is plugged in or powered on.
Inspect the disposal for jams and obstructions
With power isolated, remove the splash guard and look for any obvious obstruction lodged in the blades or the grind ring. Use long-nose pliers or tongs to extract foreign objects—never use your fingers. If you can’t see a blockage, insert a blunt tool (like a wooden handle) and gently rotate the impeller to feel for resistance. A steady, careful twisting motion can free a jam without causing damage. If the impeller turns, try to run water and the disposal briefly to wash away loosened debris. If you encounter resistance that won’t yield, stop and move to the next diagnostic step. The goal is to clear enough space for water to flow freely through the discharge.
Check downstream drain and the P-trap
Even a perfectly clear disposal can fail to drain if the downstream drain line is clogged or the P-trap is blocked. With the power still off, place a bucket beneath the P-trap and loosen the fittings to inspect for standing water and debris. Clear any buildup you find, then reassemble carefully and run hot water through the system to flush the line. If water still pools or backs up after the disposal drains, the problem is likely beyond the unit itself. In that case, you’ll need to address the drain line or call a professional. Downstream blockages are a common reason for a disposal that won’t drain, and diagnosing them early saves time and frustration. The takeaway is simple: don’t assume the disposal is the only component involved in drainage.
When the disposal runs but the sink won’t drain
If you hear the motor running but water isn’t draining, that’s a telltale sign the jam is cleared but the drain path is blocked. In this situation, repeat the jam-clearing steps to ensure there’s no smaller obstruction. Next, focus on the drain’s exit pathway: remove the trap, inspect for hair, soap scum, or mineral buildup, and rinse thoroughly. If the drain flow improves after cleaning, test again with cold water and run the disposal briefly to confirm stable operation. If water still won’t drain, a blockage in the main lines or a venting issue may be present, which typically requires professional help. Acting quickly minimizes the risk of foul odors and sewer gas exposure.
Common mistakes to avoid
- Pushing fibrous vegetables (celery, corn husks) or starchy scraps (potato peels) down the unit in bulk. These create dense clogs.
- Using chemical drain cleaners that can damage seals and gaskets inside the disposal.
- Ignoring a non-working reset button or a tripped circuit breaker. Electrical issues can mimic clogs.
- Forcing objects through the disposal with metal tools. This can nick blades or fliers and worsen the problem.
- Relying on a single fix. If the problem persists after jam clearance, check the downstream drain and call a professional if needed.
Final checks and moving forward
By now you should have a disposal that drains normally or you’ll have identified a downstream issue. If the jam is cleared and draining is restored, perform a few light tests to ensure there are no leaks and that the unit remains quiet when running. If you still face trouble, don’t hesitate to reach out to a professional plumber. The Unclog Drain team recommends documenting the steps you took and the results, so a technician can quickly assess the situation. Regular maintenance—like running cold water during and after grinding, avoiding overloading the unit, and cleaning the splash guard—helps prevent future clogs and keeps your kitchen running smoothly.
Steps
Estimated time: 60-90 minutes
- 1
Power down safely
Unplug the unit at the outlet or switch off the circuit breaker. Confirm the power is off by testing the outlet with a small device. This prevents accidental activation while you work.
Tip: If you have a GFCI outlet nearby, test that it’s functioning before you power back on. - 2
Inspect for jams
Remove the splash guard and look for obvious obstructions. Use long-nose pliers to pull out debris; do not insert hands. If you feel resistance, do not force it—move to step 3.
Tip: A flashlight helps you spot hidden objects under the grind ring. - 3
Free the impeller
With the power still off, insert a wooden handle or hex key into the grinding area and carefully rotate the impeller to dislodge the jam. Stop if you meet strong resistance.
Tip: A controlled twist is safer than brute force; avoid bending blades. - 4
Reset and test
Reconnect power, press the reset button, and run cold water through the sink. Turn the disposal on briefly to check if it drains properly. Listen for grinding noise that indicates normal operation.
Tip: If you smell burning, stop immediately and seek professional help. - 5
Evaluate downstream drain
If the disposal runs but water remains in the sink, the issue may be downstream. Inspect the P-trap and drain line; clear out any clog and re-test.
Tip: Always have a bucket handy to catch water when removing the P-trap. - 6
Confirm and prevent
Run several short tests with different foods to ensure consistent drainage. Establish a small, safer maintenance routine to prevent future clogs.
Tip: Avoid dumping large quantities of fibrous or starchy waste at once.
Diagnosis: Garbage disposal clogged not draining
Possible Causes
- highFood waste jam or buildup inside the disposal impeller/flywheel
- mediumDrain or P-trap clogged downstream from the disposal
- lowElectrical issue or reset button tripped, causing no grinding or drainage function
Fixes
- easyUnplug the unit and use a flashlight to locate the jam; use tongs or pliers to remove any obstruction; rotate the impeller manually with a wooden handle if accessible (never insert hands).
- easyReset the disposal by pressing the reset button after clearing the jam; run cold water and briefly energize the unit to test drainage.
- mediumIf the drain is clogged, use a plunger or drain snake to clear downstream pipes; run water to verify drain flow; reassemble and test.
Common Questions
Why is my garbage disposal not draining even when it runs?
A common cause is a jam or buildup inside the disposal impeller. If the switch is on but water won’t drain, inspect for jams and test the downstream drain.
A common cause is a jam inside the disposal. If it won’t drain while running, check for jams and test the downstream drain.
Can I fix a clogged disposal without a plumber?
Yes, many clogs can be cleared safely with basic tools. Always unplug first and follow step-by-step instructions to avoid injury.
Yes, many clogs can be cleared safely with basic tools. Unplug first and follow the steps.
What should I do if water backs up into the sink?
Stop using the sink, unplug the unit, and inspect for a jam. Check the P-trap for a clog and try clearing the drain with a plunger or snake.
If water backs up, stop and inspect the disposal and drain.
Is it unsafe to put hands in the disposal to remove debris?
No. It’s unsafe to put your hands in the disposal. Use tools and ensure the power is off before attempting any jam removal.
Never put your hands in the disposal; use tools and keep power off.
When should I replace the disposal rather than repair?
If the unit is old, repeatedly clogged, or the motor is weak, replacement is often more economical than repeated repairs.
If the unit is old or continually failing, replacement is often best.
Watch Video
Key Points
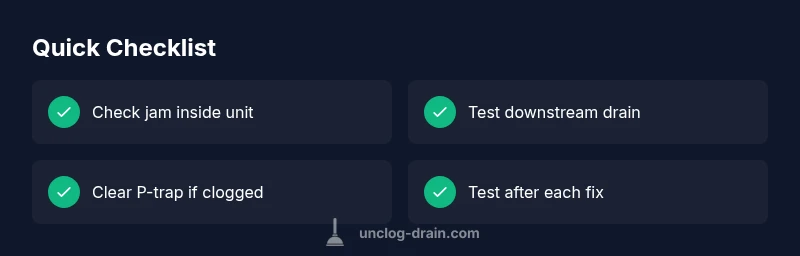
- Identify jam as the primary cause of not draining
- Power off before any inspection or jam removal
- Differentiate between disposal jam and downstream drain issues
- Test after each step and avoid forcing components
- Call a pro if the problem persists