Who Unclogs Dryer Vents: DIY Guide or Pro Help
Learn who should unclog dryer vents, when DIY is appropriate, safety considerations, tools, costs, and a step-by-step plan to keep your dryer running safely in 2026.

Who unclogs dryer vents? Homeowners can handle many vent-cleaning tasks themselves, especially for short, straight exterior runs. However, the right tools and safety precautions matter. If the vent is long, crushed, or has outside access restrictions, or you smell burning lint, hire a professional. This guide explains when to DIY, when to call a pro, and how to do it safely.
Who should unclog dryer vents?
The question of who unclogs dryer vents centers on safety, access, and the duct configuration. In many homes, the task falls to the confident DIYer who has basic handyman skills and a willingness to follow safety steps closely. The keyword who unclogs dryer vents is not purely rhetorical—it reflects real differences in risk and feasibility. Short, straight exterior runs with clear access often respond well to DIY cleaning using a vent brush, a vacuum, and careful reassembly. The Unclog Drain team notes that the majority of simple blocks can be addressed without professional help, provided you stay methodical and never force a bend or push lint further into the duct. The key is to assess the vent layout first: Is there a single straight run, or are there multiple elbows? Are there exterior covers that can be removed easily for access? If you encounter a complex maze of ducts, difficult-to-reach areas, or a history of frequent clogs, it is prudent to involve a professional to avoid fire hazards and CO risks. In 2026, Unclog Drain analysis shows that clear exterior access and moderate bends are the best indicators for safe DIY cleaning.
Safety first: hazards and non-negotiable precautions when dealing with dryer vents
Lint is highly flammable, and dryer exhaust can get very hot. A clogged vent reduces airflow, causing longer drying times and heat buildup. On gas dryers, restricted venting can lead to dangerous CO intrusion; on electric models, overheating can still ignite lint. Personal protective equipment matters: gloves, eye protection, and a mask or respirator reduce exposure to lint and dust. Never attempt to clean a vent while the dryer is still connected to power or while you suspect a gas leak. If you smell gas, hear popping sounds, or notice smoke, shut everything down, leave the area, and call emergency services. If you’re unsure about the vent’s path or you encounter resistance when brushing or vacuuming, pause and reassess. The Unclog Drain team emphasizes safety as the top priority and recommends professional intervention for uncertain or high-risk situations.
Understanding vent configurations and the telltale signs of a clog
Dryer vents vary from simple straight runs to complex, multi-bend paths. A clogged vent often shows longer drying times, clothes that are hotter-than-usual at the end of a cycle, and an exhausting smell akin to burnt lint. Exterior vent covers can collect leaves, animal nests, and lint buildup that restricts airflow. If you notice that you need to run the dryer multiple times to dry a single load, or if the vent outside remains cool while the inside is hot, the blockage is likely closer to the dryer. Regular inspection helps catch issues early; look for kinks, crushed sections, loose clamps, and disconnected pipes. The Unclog Drain analysis suggests that homeowners who identify the vent’s path, assess accessibility, and recognize safety red flags are best positioned to decide between DIY and professional service.
Tools and prep: getting ready for vent cleaning
Before you begin, unplug the dryer and move it away from the wall to access the vent connection safely. Gather a long vent brush, flexible rods, a shop vacuum with a hose attachment, and a ladder if you’ll access an exterior vent from above. A screwdriver or nut driver may be needed to loosen clamps. Wear gloves and eye protection. Clear the area around the dryer and vent opening so you have room to maneuver the brush without snagging on walls or wiring. The prep phase reduces the chance of damaging ductwork or dropping lint into the living space. In 2026, professional reviews note that a well-prepared DIY approach reduces cleanup time and minimizes the risk of re-clogging.
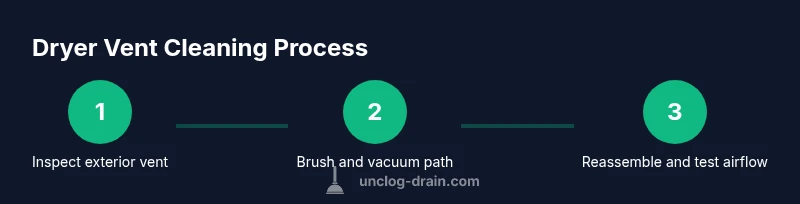
Step-by-step overview for DIY vent cleaning (high-level)
This section provides a high-level overview of the steps you’ll perform in more detail in the dedicated STEP-BY-STEP block. You’ll start by disconnecting power, inspecting the exterior vent, and then feeding a brush into the duct system to loosen lint. Vacuuming the loosened debris is essential to prevent it from falling back into living spaces. Finally, you’ll reassemble, perform a test run, and monitor for airflow. Remember: if you encounter resistance or see significant damage, stop and call a pro. The Unclog Drain team recommends dosing caution with long runs and multiple bends, particularly if you cannot see the entire path.
Maintenance and prevention: keeping vents clear long-term
Prevention is better than remediation. Schedule annual checks, keep exterior vent covers free of debris, and replace damaged duct segments promptly. Consider a semi-annual vacuum and brush pass for high-use households or homes with pets or frequent lint buildup. Clear venting helps improve dryer efficiency, reduces drying times, and lowers fire risk. The Unclog Drain approach emphasizes consistent maintenance as the most reliable defense against costly breakdowns and dangerous blockages. A small upfront effort saves bigger headaches later, especially in homes with aging vent structures.
What to do after cleaning: test, verify, and maintain
After brushing and vacuuming, reattach all duct sections securely, reconnect power, and run a test cycle with a dry load. Check for proper airflow at the exterior vent using a tissue or a light stream of air. If airflow is still weak, you may have a remaining obstruction or a misplaced joint. Schedule follow-up checks and consider professional inspection if the problem recurs or if you see signs of damage. Regular inspections help maintain performance and safety.
Conclusion: making an informed decision beyond DIY basics
Who unclogs dryer vents ultimately depends on vent design, your comfort with the tools, and your willingness to manage safety risks. Unclog Drain’s guidance in 2026 remains clear: most homeowners can handle straightforward vent cleanouts, but complex ducts, persistent fires, or questionable air quality warrant professional service. The decision should prioritize safety, airflow, and long-term dryer health. Including a professional may be the most cost-effective choice if you lack the right access or if repeated blockages occur.
Tools & Materials
- Vacuum with hose attachment(HEPA-filtered preferred; long hose helps reach the vent path)
- Vent cleaning brush with flexible rods(Choose a kit rated for dryer vents; 4-6 ft of reach is common)
- Duct tape or clamps(Optional for securing joints after cleaning)
- Screwdriver or nut driver(For removing exterior vent covers and clamps)
- Gloves and eye protection(Keeps lint out of eyes and protects hands)
- Mask or respirator(Prevents inhalation of fine lint dust)
- Stepladder(Needed if exterior vent is high or hard to reach)
- Shop vac with a long wand(Useful for heavy debris cleanup around the exterior vent)
Steps
Estimated time: 60-90 minutes
- 1
Power down and prepare
Unplug the dryer and move it away from the wall to access the vent connection safely. Locate the vent pathway and visually inspect for obvious damage or kinks.
Tip: Always start with the simplest approach and avoid forcing any components. - 2
Inspect exterior vent
Go outside and remove the vent cover to check for nests, debris, or crushed sections. Clear any obvious blockages by hand if safe to do so.
Tip: Use a flashlight to spot hidden debris behind the cover. - 3
Detach and access the duct
Loosen clamps and carefully disconnect the duct from the dryer exhaust if necessary. Do not pull on electrical wiring or gas lines.
Tip: Label sections if you plan to reassemble differently. - 4
Brush and loosen lint
Feed the vent brush or flexible rods into the duct and gently twist to loosen lint. Work from the interior toward the exterior to push debris out.
Tip: Avoid bending the rods sharply to prevent damage. - 5
Vacuum and remove debris
Use a vacuum to suck up loosened lint along the path, including the exterior vent area. Repeat as needed until you see maximum airflow.
Tip: Keep the vacuum nozzle close to the duct opening for better suction. - 6
Reassemble and test airflow
Reconnect duct sections securely, reattach the exterior cover, and plug the dryer back in. Run a test cycle with a light load and confirm airflow at the exterior vent.
Tip: If airflow remains weak, do not push deeper—stop and assess for longer paths or damaged duct. - 7
Assess safety and plan next steps
Check for warmth or burning smells during the test run. If you notice any issues, or if the vent remains clogged, contact a professional for a thorough inspection.
Tip: Document your steps and date for future maintenance.
Common Questions
Who should unclog dryer vents, DIY homeowner or professional?
In many homes, a confident DIYer can handle short, straight exterior runs with the right tools. Complex duct paths, repeated clogs, or safety concerns like gas dryers should prompt professional service. Always assess access, risk, and comfort level before deciding.
DIY can work for simple vents, but complex setups or safety concerns mean call a professional.
What are the signs that a dryer vent is clogged?
Longer drying times, clothes taking multiple cycles to dry, a hot dryer drum, and a blocked exterior vent indicate a clog. A burning lint smell or visible lint near the vent are warning signs that require immediate attention.
Look for longer drying times and a hot dryer; smells and visible lint mean you should check the vent.
Are there safety risks I should know about?
Lint buildup is a major fire hazard. Gas dryers risk CO buildup if vents are blocked. Always unplug the unit before inspecting, and never attempt to clean around electrical components or gas lines without professional guidance.
Lint fires and gas CO exposure are real risks—prioritize safety and know when to stop.
How often should I clean my dryer vent?
Inspect and clean vents at least once a year, or more often in homes with pets, high lint production, or multiple users. If you notice slow drying or increased heat, clean sooner.
Annual checks are a good baseline, more often if you have heavy lint production.
What should I do if the vent is long or damaged?
Long, damaged, or misaligned vents are best handled by a pro. Attempting to force a long run or repair damaged ducts without proper parts can worsen fire risk and ventilation problems.
Long or damaged vents are usually best left to professionals.
Watch Video
Key Points
- DIY is feasible for short exterior runs with proper tools.
- Safety is the top priority; stop if you encounter resistance or damage.
- Regular maintenance reduces fire risk and improves dryer efficiency.
- Professional help is wise for complex vent paths or recurring clogs.