Unclog Water Heater Drain: A Complete How-To Guide
Learn safe, practical steps to unclog a water heater drain. This guide covers tools, techniques, safety tips, and maintenance to prevent future clogs for reliable hot water.

To unclog water heater drain, safely shut off power, isolate the drain valve, and flush sediment with a hose. This guide gives a clear, step-by-step method, the tools you’ll need, and safety tips to prevent scalding or leaks. By following these steps, you can restore proper drainage, avoid costly repairs, and extend the life of your water heater.
Why unclog water heater drain matters
Maintaining a clear drain on your water heater is essential for efficiency, safety, and longevity. When the drain line or valve becomes clogged, sediment can back up, reduce heating efficiency, and eventually force you to replace the unit. In this guide, the Unclog Drain team walks you through practical steps to unclog water heater drain and prevent future issues. By following the steps, homeowners can restore proper drainage and protect their hot water system. According to Unclog Drain, regular flushing is one of the best DIY maintenance tasks to extend tank life. Keeping the drain clear also reduces the risk of corrosion and sediment buildup that can lead to malfunction or leaks. If you notice reduced hot water pressure, unusual banging, or cloudy water, these can be signs the drain is blocked and needs attention. Remember, a well-maintained drain helps your heater work more efficiently and last longer, saving energy and money over time.
Common causes of water heater drain clogs
Drainage clogs in a water heater are usually sediment-based, especially in areas with hard or mineral-rich water. Over time, minerals settle and form a sludge layer at the bottom of the tank and along the drain line. Rust from old fittings or corroded components can also contribute, as can mineral scale that binds with dirt and debris. A misused chemical drain cleaner can damage the drain valve or piping, and improper winterization can lead to freezing that forces sediment into the line. In many homes, a combination of sediment, rust, and mineral buildup is responsible for sluggish drainage. Recognizing the signs—slow drainage during yearly flushes, gurgling sounds, or visible sediment in the water—helps you act before serious problems arise.
Safety first: when to call a pro
While many homeowners can safely unclog a water heater drain, certain situations warrant professional help. If your unit is gas-powered and you smell gas, or if you notice corrosion around fittings, leaks, or you’re unsure how to safely shut off supply lines, pause and contact a licensed plumber. Gas water heaters pose combustion risks, and electric units have electrical components that must be handled correctly to avoid shocks. If your water heater is under warranty, follow the manufacturer’s guidelines; many warranties require professional service for drainage issues to avoid voiding coverage. When in doubt, prioritizing safety is the best move. The Unclog Drain team recommends seeking professional assistance when you encounter stubborn clogs, persistent leaks, or unfamiliar valve configurations, especially in older homes with complex piping.
What you’ll need before you start
Before diving into the process, gather essential tools and materials to minimize trips to the toolbox. You’ll want a drainage-friendly setup with a bucket or container to catch the water, a garden hose to direct flow, and protective gloves. A wrench or pliers may be needed if you must loosen fittings or valve connections. Keep a flashlight handy to inspect the valve and drain path, and have towels or rags ready for cleanup. If you anticipate heavy sediment, a plumber’s snake can help. Preparing these items ahead of time reduces interruptions and makes the job safer and more efficient.
Preparation and shutdown: setting the stage for a successful unclog
The first practical step is to turn off power to electric water heaters at the breaker panel, or shut off the gas supply and set the thermostat to the pilot/standby position for gas units. Then, close the cold-water supply valve to stop more water from entering the tank. Open a hot faucet somewhere in the house to relieve pressure, which helps prevent scalding when the drain valve is opened. Position a bucket under the drain valve and lay out a hose to a safe drainage area. By setting up correctly, you minimize splashback and keep the area clean. Always verify you’re close to a stable surface and have a clear path for any returning flow.
How to approach the cleaning process: a practical overview
This section provides a high-level view of the cleaning approach. Start by fully opening the drain valve to allow flow into the hose and bucket, then observe the rate and clarity of the water. Sediment will typically drain first; when the flow slows or clears, you may need to pause and reposition the hose. If you can access a drain screen or orifice, gently work sediment free with a long, non-abrasive tool. After the initial flush, progressively reconnect the water supply valve and slowly reopen it to prevent a sudden surge. In hard-water areas, the sediment is often stubborn, and repeating the flush may be necessary. If your system has a by-pass or anti-scald valve, ensure these components are in the correct position to avoid bypassing the filter.
Step-by-step cleaning and clearing the line (overview)
This overview aligns with the detailed steps below. You’ll be combining controlled drainage, mechanical agitation, and thorough flushing to remove sediment. The goal is to restore a steady, clean flow through the drain without introducing pressure surges that can stress the tank or fittings. While the physical task is straightforward, patience matters: rushing can splash water and sediment, spreading dirty water across the work area. A calm, methodical approach reduces the chance of leaks or damage and ensures a safer experience for DIY enthusiasts.
Post-cleaning checks and restarting the system
Once the line runs clear, slowly reintroduce cold water to the tank while monitoring for leaks at the drain valve and fittings. Reconnect the power or gas supply, and set the temperature to a comfortable level—typically 120°F to 140°F (49°C to 60°C) for efficiency and comfort. Check the drain valve again after a brief test run to confirm the line remains clear. If you notice persistent debris or cloudy water, consider repeating the flush or calling a professional. After successful testing, wipe down the work area and dispose of any collected sediment responsibly.
Maintenance and prevention tips to keep drains clear
Prevention is better than cure, and simple maintenance goes a long way toward avoiding costly clogs. Schedule an annual or semi-annual flush for your water heater, especially in areas with hard water. Use a filtration system for incoming water or a water-softening solution if sediment buildup is aggressive. Periodically inspect the drain valve and fittings for leaks, and replace worn gaskets promptly. Keep a small cup of mineral-safe cleaner on hand for routine maintenance, but avoid chemical drain cleaners that can damage the tank or valve. Document the date of your maintenance so you can track performance and plan future service. The Unclog Drain team emphasizes proactive maintenance as the most reliable path to a long-lasting water heater.
Quick reference: visual reminders and checklists
- Turn off power/gas before touching any components
- Close the cold-water supply and relieve pressure
- Direct drainage into a safe area with a hose
- Inspect fittings for leaks and corrosion
- Rebuild seals and test for leaks after restarting
- Schedule a future flush to prevent sediment buildup
- If the drain remains clogged after a couple of attempts, seek professional help
This structured approach helps homeowners stay organized, work safely, and maintain a healthy water heating system over time.
Tools & Materials
- Wrench or pliers(For loosening fittings on the drain valve if needed)
- Bucket(Large enough to hold draining water and sediment)
- Garden hose(Attach to the drain valve and direct flow away from people)
- Rags or towels(Contain drips and keep the area clean)
- Gloves(Protect hands from sediment and sharp edges)
- Flashlight(Inspect drain path and connections in dark corners)
- Screwdriver (flathead/Phillips)(Access panels or valve screws if present)
- Plumber’s snake (auger)(Assist stubborn clogs in tight lines)
Steps
Estimated time: 60-90 minutes
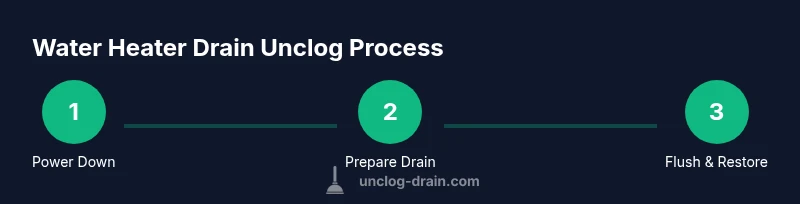
- 1
Power down and shut off the water heater
Turn off the electrical supply at the breaker panel or shut off the gas to the unit. Set the thermostat to pilot/standby if applicable. Close the cold-water supply valve to stop new water from entering the tank. This protects you from shocks or scalding and reduces pressure when you open the drain.
Tip: Double-check that you’ve turned off the correct power or gas control before touching any pipes. - 2
Prepare the drain area
Place a bucket under the drain valve and connect the garden hose. Open a hot faucet somewhere in the house to relieve pressure and help water drain smoothly. Have towels ready to catch splashes and keep the area dry.
Tip: Keep a second container handy in case the first fills quickly. - 3
Open the drain valve slowly
Carefully loosen the drain valve and allow water to flow into the hose. Start with a gentle flow and increase gradually. Observe the water for clarity and sediment. If the flow is very sluggish, pause and check the hose alignment or valve seating.
Tip: Opening too fast can cause splashes; a controlled, slow flow reduces mess and risk. - 4
Use mechanical agitation as needed
If sediment remains, insert a plumber’s snake or a long, stiff brush into the drain line to dislodge buildup. Do not force the tool; rotate gently to minimize the risk of damaging the drain valve or piping.
Tip: Work slowly and stop if you feel unusual resistance or hear cracking sounds. - 5
Flush and monitor the flow
With the valve still open, flush the line with clean water to rinse sediment. Recheck the hose for clarity and measure the flow rate. When the water runs clear and steady, you can proceed to close the drain valve.
Tip: If you see dirty water returning, repeat the flushing cycle once more. - 6
Close the drain and restore service
Slowly close the drain valve, reconnect the cold-water supply, and restore power or gas to the unit. Run hot water from a faucet to pressurize the tank, then check for leaks around the valve and fittings.
Tip: Set the thermostat to a safe, efficient temperature (commonly 120–140°F). - 7
Document and plan maintenance
Record the date of your flush, any observations about sediment, and the condition of valves and fittings. Schedule an annual or semi-annual flush based on water hardness and sediment levels in your area.
Tip: Pair this with a simple maintenance checklist to stay proactive.
Common Questions
Is it safe to unclog a water heater drain myself?
For most homeowners, yes, it's safe if you follow the steps precisely and shut off power or gas first. Avoid working on gas connections if you smell gas and consider professional help for older systems.
Yes, DIY is usually safe when you follow safety steps, shut off power or gas, and avoid working on gas lines if you detect a smell.
How long does a typical drain-unclog process take?
Most flushes take about 60 to 90 minutes, depending on the amount of sediment and whether a snake or extra flushing is needed.
Most flushes take about an hour to an hour and a half, depending on sediment and effort required.
What are common signs of a clogged water heater drain?
Slow drainage, banging noises in the tank, cloudy water, or a visible buildup near the drain valve indicate a clog that needs attention.
Look for slow drainage, noises, or cloudy water as signs of a clog.
Can I use chemical drain cleaners on a water heater drain?
Chemical drain cleaners are not recommended for water heater drains; they can damage the tank lining and valve seals. Mechanical cleaning is safer.
Avoid chemical cleaners; they can harm the tank. Use mechanical cleaning instead.
How often should I flush a water heater to prevent clogs?
Annual or semi-annual flushing is a good baseline, especially in areas with hard water or high sediment.
Flush once or twice a year, more often in hard-water areas.
Do I need a professional if I have a stubborn clog?
If a clog persists after a couple of flush attempts or if you encounter persistent leaks, contact a licensed plumber.
Yes—call a pro if the clog won’t budge or you see leaks.
Watch Video
Key Points
- Shut off power and water before starting.
- Direct drainage safely with a hose and bucket.
- Use mechanical cleaning for stubborn clogs—avoid chemicals.
- Flush until the water runs clear, then test for leaks.
- Schedule regular flushes to prevent future clogs.