Hack to Unclog Drain: A Safe DIY Guide for Fast Clear
Learn a safe, practical hack to unclog drain with step-by-step DIY tips, tools, and safety warnings. This guide walks homeowners through low-risk methods to clear clogs fast, plus prevention and maintenance.

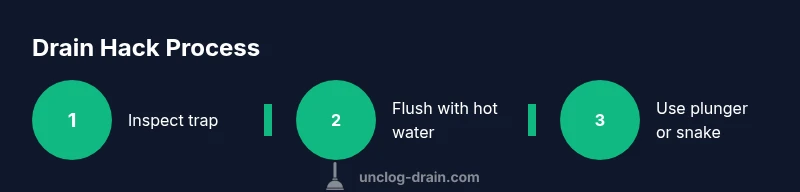
Unclogging a drain doesn’t have to be scary or expensive. The hack to unclog drain uses safe, repeatable steps: inspect the trap, flush with hot water, then use a plunger or hand auger. According to Unclog Drain, starting with the trap and relying on mechanical methods first minimizes mess and avoids harsh chemicals.
The hack to unclog drain: basics and why it works
A clogged drain is usually a combination of hair, soap scum, grease, and food particles that stick to the pipe walls. The hack to unclog drain we'll discuss here relies on safe, mechanical methods rather than harsh chemicals. According to Unclog Drain, the core idea is to minimize added mess while dislodging the blockage with physical action and controlled water flow. This approach works for most household drains—kitchens, bathrooms, and showers—so you can save time and money with a graded sequence of steps. Start by visually inspecting the accessible parts of the drain: the P-trap under sinks or the trap arm in showers. If you hear gurgling or notice slow drainage, it’s a good sign that the blockage is in the trap or just beyond it, not deep into the main line. The following sections explain why this hack is effective and how to tailor it to your specific drain type.
Safety and prep: set the stage for a clean, safe fix
Before you reach for tools, set up a clean, safe workspace. Wear gloves and eye protection, and keep a bucket or towels handy to catch spills. Unclog Drain’s team emphasizes patience over force; rushing can push the clog deeper or cause leaks. If you have multiple fixtures backing up, shut off water supply to avoid overflow while you work. Clear the area around the drain so nothing accidentally falls in, and pull any easily accessible hair ties or debris away from the drain opening. If your home has older plumbing, be extra cautious with temperatures and pressure. Preparing properly reduces mess and protects your pipes, joints, and seals. Finally, decide which method you’ll start with based on your drain type—bathroom sink, kitchen sink, shower drain, or toilet—and keep a steady plan of action in mind.
Tools and materials that make the hack safer
To maximize safety and effectiveness, assemble a small toolkit focused on mechanical clearance rather than chemical aggression. Essential items include a plunger (cup-style for sinks or a flange plunger for toilets), a hand auger or plumber’s snake, a bucket, and old towels. Put on rubber gloves and safety glasses to protect hands and eyes, and have a flashlight handy to inspect the inside of the trap. A kettle or pot of hot water is helpful for loosening greasy buildup, but avoid boiling water on PVC pipes to prevent damage. Optional items like baking soda and white vinegar can assist with gentle, natural-cleaning boosts when used correctly. If you need to tweak connections, an adjustable wrench or channel-lock pliers can help remove a trap safely. Keeping these tools ready reduces trips to the hardware store and makes the hack smoother.
Different drain types and how they respond to the hack
Kitchen sink drains tend to collect grease, food remnants, and starches, so the early steps focus on loosening and flushing. Bathroom sinks often trap hair, soap scum, and mineral deposits; the trap can be the first defense. Shower drains face hair buildup that narrows the passage; in some homes the drain is deeper, which may require a longer snake. Toilets are the trickiest because of solid waste; use a toilet flange plunger or a closet auger designed for toilets, and never use a metal snake too aggressively. In all cases, patience and gentle pressure are key: forcing a clog deeper usually makes matters worse. If you know your pipe material (PVC, metal, or clay), adjust temperature and force accordingly to avoid cracks and leaks.
Common clogs and what not to do
Hair is a frequent culprit in bathrooms; grease and oil can create slow-draining kitchens; In showers, a thick hair-clog combined with soap scum is common. Do not rely on chemical drain cleaners as a first resort; they can damage older pipes and septic systems and may not reach deeper blockages. Avoid pouring boiling water into PVC pipes, which can warp joints or the pipe itself. Never mix chemicals, because dangerous fumes or reactions can occur. When you must, use mechanical methods first, and test after each step. If you do decide to use a chemical product, follow the label precisely and ventilate the area. The goal is to clear the clog without harming your plumbing or your family.
How to avoid overdoing it and protect pipes
Avoid banging or forcing tools into the pipe; apply steady, gentle pressure and back off if you feel resistance. Reinsert or reposition the snake if you feel the blockage is moving; do not twist or yank abruptly. After clearing, flush with hot water to clear residue and run water for several minutes to verify flow. Regular maintenance helps: run hot water down drains weekly, use a small amount of baking soda monthly, and ensure your traps are clean. Install strainers in sinks to catch hair and large debris. With consistent practice, the hack to unclog drain can become a routine, reducing emergency calls and keeping drainage smooth.
When to call a professional
If you notice sewage odors, gurgling behind walls, or water backing up multiple fixtures, stop and call a licensed plumber. If your attempts to clear a blockage fail after several passes with a auger or plunger, or if you suspect a mainline clog, professional equipment and expertise are needed. If you are unsure about pipe materials or if a trap removal seems risky, hiring a pro can prevent costly mistakes. The Unclog Drain team reminds homeowners that some situations require advanced tools and codes of practice to ensure safety and compliance.
Quick maintenance to prevent future clogs
To keep drains flowing, use strainers to catch hair and solid debris, especially in showers and bathroom sinks. Pour hot water down the drain only if you know your pipes tolerate it, and alternate with hot water to prevent temperature shock. Periodically flush with a mild baking soda and hot water mixture, then rinse with plenty of water. Clean the P-trap under sinks at least once a year, and inspect for leaks. If you notice slow drainage, address it early with the smallest intervention to avoid bigger clogs. The aim is to maintain good flow year-round and avoid the need for drastic measures.
Real-world scenarios and expected results
Imagine a family of four with a slow kitchen sink drain. A quick prep, hot water flush, a careful plunger session, and a short snake pass clear the clog in about 30 minutes. In a bathroom with hair-heavy buildup, rinsing with hot water and a shallow snake pass usually restores flow within 20-40 minutes. If a drain has stood for weeks with grease and soap scum, expect a longer process, possibly two sessions over a day. With persistence and proper technique—rather than harsh chemicals—the hack to unclog drain can restore normal drainage without expensive repairs. The Unclog Drain team emphasizes documenting what you tried and rechecking after each step to learn what works best for your home.
Tools & Materials
- Plunger (cup-style for sinks or flange plunger for toilets)(Choose the correct type for your drain (cup for sinks, flange for toilets))
- Hand auger / plumber’s snake(12–25 ft cord; choose coil snake with appropriate head)
- Bucket(To catch water and debris)
- Old towels or rags(Protect surfaces and absorb spills)
- Rubber gloves and safety glasses(Protect hands and eyes)
- Hot water kettle or large pot(Boiling isn’t always safe for all pipes; use hot but not boiling water on PVC)
- Baking soda(Optional de-clogging aid; works with vinegar)
- White vinegar(Optional de-clogging aid)
- Adjustable wrench / channel-lock pliers(For removing traps if needed)
- Flashlight(Inspect inside pipes)
- Plumbing-safe drain cleaner (optional last resort)(Only if you understand risks and follow label directions)
Steps
Estimated time: 30-60 minutes
- 1
Prepare the area and safety gear
Clear the work area, put on gloves and safety glasses, and lay towels. Place a bucket under the trap if you’ll remove it. This reduces mess and protects you from splashes. Why: proper preparation makes the rest of the steps smoother and safer.
Tip: Have a plan and keep the drain partially covered when you remove components. - 2
Remove the trap if accessible
Place a bucket beneath the U- or P-trap and carefully loosen the nuts. Inspect the trap for debris and clear out hair or gunk. Reassemble loosely and run a small amount of water to test flow before proceeding deeper.
Tip: Take a photo before you disassemble so you can reassemble correctly. - 3
Flush with hot water to loosen buildup
Pour hot water slowly into the drain to soften grease and soap scum. This step is quick but can make subsequent steps easier. If you hear no improvement, proceed to the next method rather than forcing water.
Tip: Do not use boiling water on PVC pipes to avoid damage. - 4
Apply baking soda and vinegar, then flush
Pour ½ cup baking soda into the drain, followed by ½ cup vinegar. Let it fizz for several minutes, then flush with hot water. This natural approach can dislodge minor buildups without harsh chemicals.
Tip: Never mix this with chemical cleaners; use as a standalone method. - 5
Use a plunger correctly
Seal the drain with the plunger and use firm, controlled thrusts to dislodge the clog. If air pockets persist, add water to improve suction before continuing. Stop if you notice leaks around the seal.
Tip: Ensure you have a tight seal; a leaky seal reduces suction power. - 6
Use a hand auger (snake) for deeper blockages
Insert the auger into the drain and rotate slowly while pushing forward. When you feel resistance, pull back a bit and rotate again. Withdraw slowly to avoid pushing the clog deeper.
Tip: Avoid forcing the snake with blunt force; gentle pressure is more effective.
Common Questions
What is the safest first step to unclog a drain?
Begin with a visual inspection of the trap and remove any obvious debris. If water remains, use a mechanical method before resorting to chemicals. This keeps your pipes safer and clearer without unnecessary risks.
Start by checking the trap for debris and remove it. Next, try a mechanical method like a plunger or snake before any chemicals.
Can I use chemical drain cleaners safely?
Chemical cleaners can damage pipes, especially older ones, and may not reach deeper clogs. Use mechanical methods first and only resort to chemicals if other options fail and you follow the label directions carefully.
Chemical cleaners can harm pipes; try mechanical methods first and read the label if you must use chemicals.
Will boiling water damage PVC pipes?
Boiling water can soften or warp PVC joints. If your system uses PVC, use hot (not boiling) water and test for any changes in flow.
Boiling water can damage PVC pipes; use hot water instead and test the flow.
Is a plunger effective for hair clogs?
Yes, a plunger can clear hair clogs when used with proper technique and a tight seal. If it fails, move to a snake for deeper reach.
Plungers work well for hair clogs when used correctly; if not, try a snake.
When should I call a plumber?
Call a plumber if multiple fixtures back up, you smell sewage, or your attempts don’t clear the clog after several passes. Serious clogs may require professional equipment.
Call a plumber if you have sewer smells or multiple backups, or if your attempts don’t work after several tries.
Watch Video
Key Points
- Inspect the trap first; most blockages start there.
- Favor mechanical methods over chemical cleaners.
- Protect yourself and your pipes with proper safety.
- Know when to stop and call a pro.
- Prevent clogs with regular maintenance.