How to Unclog a Manual Washing Machine: A DIY Guide
Discover safe, practical steps to unclog a manual washing machine drain. From diagnosing the clog to clearing it with basic tools, Unclog Drain guides you through a DIY-friendly approach.

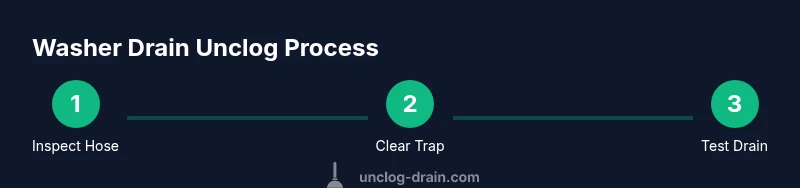
Following these steps, you can unclog a manual washing machine drain safely and effectively. Start by powering off the machine and isolating its water lines, then inspect the drain hose, trap, and pump screen. Use a plunger or a manual snake to clear blockages, clean lint or soap scum, and test the drain before restoring power.
Common causes of clogs in washing machines
Clogs in washing machine drains are common and frustrating. They don’t appear out of nowhere; they accumulate over time as lint, fibers, soap scum, and mineral deposits cling to surfaces inside the drain hose, pump filter, and occasional bends in the pipe. According to Unclog Drain, many clogs start in the pump filter area where stray fibers from towels, socks, and clothing trap soap residue. The result is slow drainage, water backups during the drain cycle, and sometimes a washer that stops mid-cycle. To prevent unnecessary disassembly, identify signs early: slow draining water, a faint moldy odor when clothes finish washing, or a small puddle beneath the washer. In this guide we’ll walk through safe, DIY steps to diagnose and clear these blockages without damaging the appliance.
Safety first: power down and water shutoff
Before touching any live electrical components or moving parts, power down the washer and unplug it. If you can, shut off the house water supply to prevent accidental leaks when you disconnect hoses. Clear the area of rugs and reduce water spillage risk by laying down towels or a shallow bin. Work in a well-lit area, use a flashlight to inspect hoses, and wear gloves to protect skin from residue or sharp edges. If the machine sits on a pedestal or is connected to a pedestal, be mindful of stability when moving or tilting the unit. Remember: never yank wires or pull on hoses with force. The goal is controlled inspection and careful disassembly, not brute force.
Tools and materials you’ll need for a safe unclogging
Prepare a small toolbox of common DIY plumbing tools and household supplies. Essential items include: rubber gloves, a bucket to catch water, rags or towels, a flashlight, and a screwdriver or nut driver to remove access panels if required. A flexible drain auger (hand-crank snake) is a key tool for dislodging clogs in hoses or traps. A plunger and needle-nose pliers are also useful for pulling hair and lint from accessible spots. Depending on your model, you may need a wrench or adjustable pliers to loosen clamps on the drain hose. Optional items: a small amount of mild detergent to flush, vinegar for deodorizing, and a spare hose sleeve for bleed-through prevention.
Step-by-step diagnosis: locate the blockage path
Start by locating the drain path: the washer’s drain hose running to the household drain, the trap (if accessible), the pump filter, and any protective bends. Visually inspect for kinks, cracks, or pinched hoses. If the hose is bent tightly near the back of the unit, gently straighten it to prevent backflow. From the outside, you can often feel resistance when gently pushing air through the hose, which hints at a clog. Do not use brute force; the goal is to identify where the obstruction sits so you can target it. If your model has a removable filter cap near the bottom front, remove it carefully to access the screen.
Remove the lint filter and pump screen (where accessible)
Many washers have a lint filter or pump screen near the bottom front. Remove the access panel according to your user manual. Use pliers or your fingers to extract the screen, taking note of the orientation and any O-rings. Rinse the filter under running water over the bucket, using a soft brush or old toothbrush to loosen trapped fibers. If the screen is stubborn, use a small amount of dish soap to help break down residue. Inspect the interior for sticky soap scum; this is a common contributor to slow drainage. Replace the screen once clean, ensuring any seals or gaskets are seated correctly to prevent leaks.
Clear the drain line with a hand-crank auger or plunger
With the filter removed, insert the flexible auger into the drain line or trap, rotating slowly to avoid snagging delicate plastic components. Push gradually until you feel resistance and then twist to break through the clog. If you cannot access the trap, carefully insert the auger from the drain elbow and work the cable back toward the unit. Use the plunger on the exposed hose end if you can seal around the opening; a few firm plunges can pull the clog free or push it into the main drain. Always withdraw the auger slowly to prevent re-snagging fibers.
Flush and clean: rinse, reinstall, and check leaks
After removing the obstruction, run a short test cycle with the drain hose elevated above the water line if possible. Reconnect any filters, clamps, and hoses you removed. Use warm water and a small amount of detergent to flush the system, checking for leaks along hose connections and at the pump. Wipe down surrounding surfaces to remove residual lint. If you encountered soap buildup, consider running a rinse cycle with hot water to dissolve remaining residue.
Troubleshooting persistent clogs
If the water still backs up after these steps, another blockage may exist deeper in the line or within the household drain. Consider using a longer auger from the service panel side or checking the P-trap under the sink. Do not push a stiff rod into the main sewer line; this can damage pipes. In cases of repeated clogs, there may be an underlying issue such as a blocked vent or a collapsing drain line; this is when professional assessment is warranted.
Maintenance to prevent future clogs
Preventive maintenance is the best defense. Clean the lint filter after each load, avoid overloading the drum, and use only recommended detergents. Run periodic hot-water flushes to dissolve soap scum, especially if you have hard water. Inspect hoses for wear or cracks every 6-12 months and replace damaged sections promptly. Create a simple routine to check for kinks and ensure the trap remains clear.
When to call a professional
DIY fixes solve many clogs, but some situations require expert service. If the drain remains clogged after multiple attempts or you notice pooling water near the machine with strong odors, contact a licensed plumber. In extreme cases, pump failure or broken hoses may necessitate component replacement. The Unclog Drain team advises a cautious approach: know your limits, and don’t risk electrical hazards.
Quick safety recap and next steps
Always unplug the machine and shut off water when in doubt. Keep a clean workspace, comply with local codes, and store tools properly after use. Document what you did for future reference and consider a monthly maintenance routine. By following the steps above, you’ll reduce the chances of recurring clogs and extend the life of your washer.
Tools & Materials
- Rubber gloves(Protect hands from dirty water and sharp edges)
- Bucket(Catch water when hoses detach)
- Rags or towels(Wipe spills and dry surfaces)
- Flashlight(Inspect hoses and filters clearly)
- Screwdriver or nut driver(Remove access panels if required by model)
- Flexible drain auger (hand-crank snake)(Dislodge clogs inside hoses or traps)
- Needle-nose pliers(Grip lint and pull hair from filters)
- Adjustable pliers(Loosen clamps if needed)
- Dish soap (mild)(Help break down residue during cleaning)
- Old toothbrush(Scrub filter screen gently)
Steps
Estimated time: 40-90 minutes
- 1
Power down and disconnect
Unplug the washer from the outlet and shut off the water supply to prevent accidental shocks or leaks. Move the appliance back enough to access hoses without pinching cords.
Tip: Have a towel handy for any unexpected drips. - 2
Inspect exterior hoses
Check the drain hose for kinks, cracks, or crush points. Straighten any sharp bends and secure the hose so it won’t be pressed during testing.
Tip: Do not force bends back into place; replace damaged hoses. - 3
Access the pump screen or filter
Locate and remove the filter cap or access panel per your manual. Retrieve the screen or filter and inspect for lint and fibers.
Tip: Note orientation before removing; reinstall the same way. - 4
Clean the filter and screen
Rinse under running water; use a soft brush to remove stubborn residue. Dry before reinstalling to prevent mold.
Tip: Soap scum can hide in corners—check thoroughly. - 5
Insert the auger or use a plunger
Gently insert the auger into the drain path and rotate to break through the clog. If using a plunger, seal the hose end and plunge firmly a few times.
Tip: Never twist the cable too hard; excessive torque can damage components. - 6
Flush the line
Reconnect the hoses, apply a small amount of detergent, and run a short cycle to flush debris out. Keep an eye on leaks.
Tip: Use warm water to help dissolve residue. - 7
Inspect for leaks
Check all connections during the test run. Tighten clamps if you see any moisture at joints.
Tip: If you smell burning plastic, power down immediately and recheck connections. - 8
Test with a full load
Run a normal wash with water only first, then a small load to confirm proper drainage.
Tip: Observe how quickly water drains; prolonged backup indicates deeper issues. - 9
Reassemble and finalize
Replace any panels, fasteners, or guards you removed. Return the machine to its normal position.
Tip: Take a photo during disassembly to guide reassembly.
Common Questions
What causes clogs in a manual washing machine drain?
Clogs usually form from lint, hair, soap scum, and fabric fibers building up in the drain hose or pump filter. Over time, these materials slow drainage or back up water.
Clogs are usually caused by lint, hair, and soap scum building up in the drain hose or filter.
Do I need to unplug the washer before starting?
Yes. Always unplug the washer and shut off the water supply before inspecting or disassembling any components.
Yes—unplug the washer and shut off water first.
Can I use chemical drain cleaners for a washer clog?
Chemical cleaners can damage hoses and seals and may not reach the clog effectively; use mechanical methods instead.
Avoid chemical drain cleaners; try mechanical methods first.
Is the pump filter accessible on all models?
No. Some models have sealed pumps or integrated filters. Check your manual for access points and model specifics.
Not all washers have user-accessible filters; check the manual.
How often should I inspect the drain hose to prevent clogs?
Inspect monthly during heavy-use periods and clean the drain path every 3-6 months to prevent buildup.
Inspect monthly; clean every few months.
Watch Video
Key Points
- Identify clog location before disassembly
- Inspect and clean filters for ongoing protection
- Use a hand-crank auger or plunger safely
- Flush with detergent and test drainage after reassembly
- Establish a preventive maintenance routine