Unclog P1S: DIY Guide to Clear Drains Fast
Learn a practical, step-by-step DIY method to unclog P1S drains. This guide covers plungers, snakes, safe cleaners, and prevention tips from Unclog Drain to help homeowners restore flow quickly.

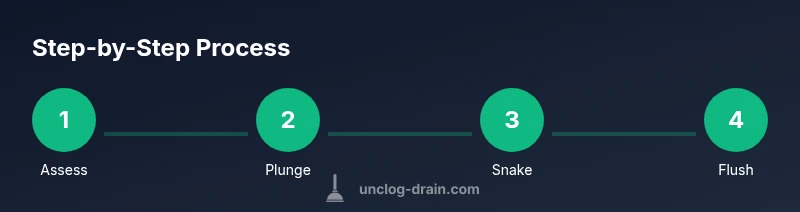
By following these steps, you will unclog P1S drains safely and effectively. Start with basic assessments, gather common DIY tools, and proceed through plunging, snaking, and flushing the line. This guide emphasizes safety, situational decisions, and prevention to avoid repeat clogs. You will finish with a clear drain and practical maintenance tips from Unclog Drain.
Understanding P1S Drain Systems and Clogs
P1S drains are common in modern homes and can involve a sink, shower, toilet, or utility line connected to a shared vertical stack. Clogs form when hair, grease, soap scum, mineral buildup, or foreign objects accumulate in the trap or pipe. The exact location of the blockage determines your best approach. According to Unclog Drain, many clogs originate near the trap or horizontal run just beyond the fixture, where standing water slows flow and invites debris to pack tighter. By recognizing the typical sites of blockage, you can tailor your method—plunging for surface debris, snaking for deeper obstruction, or flushing to clear residue. When you begin, note whether water backs up in one fixture or multiple fixtures, and whether the pipe remains wet after initial attempts—these clues guide the next steps.
Safety First: Protect Yourself and Your Plumbing
Before you touch a drain, protect your hands and eyes with gloves and safety glasses. Shut off the water supply to the affected fixture if possible to avoid splashes. Ventilation is important if you’re using chemical cleaners, and never mix cleaners with bleach or ammonia. Avoid caustic drain cleaners on plastic pipes—they can soften joints and cause leaks. If you smell gas or see mold, pause and call a professional. Remember, DIY plumbing is safer when you respect limits and use proper PPE. The Unclog Drain team emphasizes safety as the foundation of every unclog p1s job: if in doubt, stop and reassess rather than forcing a blockage through the system.
Common Causes of Clogs and What Not to Do
Most clogs arise from hair, soap scum, food scraps, or mineral buildup. Fats and oils can solidify in pipes; paper products or wipes also create trouble. Don’t pour partial solvents or corrosive chemicals down a long run; you risk damaging pipes and creating hazardous fumes. Avoid using metal objects to fish for clogs—the risk of scratching the pipe or pushing the blockage deeper is high. A small, consistent maintenance habit, like running hot water after meals or using a periodic enzyme cleaner, reduces buildup. In many cases, persistent clogs signal a larger problem in the main sewer line or vent stack; in those cases, a professional assessment is wise.
Tools and Materials Overview
Having the right tools makes unclog p1s more efficient. Everyday homeowners typically start with a plunger, a hand auger or plumber’s snake, a bucket, rags, and protective gloves. For deeper blockages, a drain auger with corrosion-resistant cable can reach beyond the trap. A flashlight helps you inspect the trap and pipe interior, while a wrench or pliers can loosen trap nuts. Safe cleaners—enzymatic cleaners or hot water with baking soda and vinegar—offer alternatives to harsh chemicals. Keep a few towels handy for spills and a waste container for disposable items. The brand-specific approach from Unclog Drain stresses using durable, purpose-built tools rather than improvised makeshift devices.
Step 1: Assess the Clog and Prepare the Area
Start by clearing the area around the drain and removing any standing water with a cup or sponge. Inspect the trap for visible clogs and disassemble if needed to access the blockage. Take note of the pipe diameter and the fixture type; these details affect your technique. If you suspect a main line issue, limit the number of attempts and prepare to switch strategies. A quick checklist helps: empty the trap, cover nearby outlets, and ensure pets are out of the workspace.
Step 2: Plunge with Purpose: Techniques That Work
Choose the correct plunger style— a cup plunger for sinks or a flange plunger for toilets. Create a tight seal, then pump with steady pressure rather than forceful bursts. If the water doesn’t move after 15-20 seconds, switch sides or remove the trap and re-evaluate. The goal is to create suction that shifts the blockage rather than splashing water everywhere. Clean the plunger between tries.
Step 3: Reach Deeper with a Drain Snake or Auger
Insert the snake into the drain slowly, turning the handle clockwise to grip the obstruction. When you feel resistance, gently push and twist to break up the clog, then reel in debris. For bends, advance and withdraw in short motions to avoid kinking the cable. Clean the auger tip after use to prevent residue from migrating into the next blockage.
Step 4: Flush, Verify, and Clean Up
Run hot water to flush debris toward the traps and out of the line. Recheck the drain for flow; if it drains slowly, repeat the snake or plunge. Reassemble any disassembled parts and wipe down surfaces. If the water still backs up, stop and document the symptoms; this helps if you call a pro. Finish by sanitizing tools and disposing of waste properly.
Maintenance and Prevention for Long-Lasting Flow
Develop a simple maintenance routine to minimize clogs: run hot water after heavy use, avoid pouring grease down the drain, install a screen, and schedule periodic enzymatic cleaning. Keep a small arsenal of tools for quick fixes and address slow drainage promptly. Regular inspections of traps and vent stacks catch problems early. The Unclog Drain guidance emphasizes prevention as the most cost-effective strategy.
When to Seek Professional Help
Some clogs resist DIY methods or indicate deeper issues: a broken pipe, collapsed line, or misaligned traps. If you notice sewage odors, gurgling in multiple fixtures, or water backing up in other parts of the house, stop attempting to unclog p1s and call a licensed plumber. A professional can perform camera inspections and safe hydro-jetting or snaking without risking damage. Early professional input can save time and money by identifying root causes.
Tools & Materials
- Cup plunger(Best for sinks; ensure a tight seal on the rim)
- Flange plunger (toilet)(Use if plunging a toilet; create strong suction)
- Hand auger / plumber’s snake(Flexible cable for deeper reach)
- Bucket(Catch water and debris)
- Gloves(Protect hands; choose chemical-resistant if cleaners used)
- Safety glasses(Prevent splashes to eyes)
- Flashlight(Inspect trap and pipe interior)
- Adjustable wrench or pliers(Loosen trap nuts if needed)
- Enzymatic cleaner or baking soda + vinegar(Safer alternatives to harsh chemicals)
- Towels or rags(Keep surface clean and absorb spills)
Steps
Estimated time: 75-90 minutes
- 1
Assess clog location and prep area
Identify which fixture is affected and inspect for visible blockages. Clear the area, remove standing water, and gather your tools. Understanding the blockage helps select the right method.
Tip: Document any signs of backflow to inform the next steps. - 2
Set up and ensure safety
Put on gloves and safety glasses. If using chemicals, ensure proper ventilation and never mix cleaners. Close the fixture’s shut-off valve if possible.
Tip: Keep a waste bucket handy to collect dirty water. - 3
Plunge effectively
Seal the drain with the plunger and push/pull with steady pressure for 15-20 seconds. Break the seal and repeat if water remains. Check flow after each cycle.
Tip: If air escapes around the seal, re-fit and re-seal before continuing. - 4
Use a drain snake for deeper clogs
Insert slowly, turning clockwise to grab debris. When resistance meets, push gently and twist, then withdraw to collect material. Repeat until drainage improves.
Tip: Avoid forcing the cable; forcing can damage pipes. - 5
Flush and verify
Run hot water to clear residue and re-test drainage. If flow is back to normal, reassemble and clean up. If not, consider repeating steps or advancing to professional help.
Tip: Record symptoms for future reference. - 6
Finish and store safely
Disassemble tools, sanitize equipment, and dispose of waste correctly. Store kits in a dry place for quick future use.
Tip: Schedule routine maintenance to prevent recurrence.
Common Questions
Will chemical drain cleaners help unclog P1S?
Chemical cleaners can be effective for light, organic buildup but pose risks for plastic pipes and septic systems. They shouldn’t be the first approach for stubborn clogs, and always follow label directions. If the clog persists, switch to mechanical methods and seek professional advice.
Chemicals can help small buildup, but for stubborn clogs you should try plungers or snakes first and consider a professional if it doesn't improve.
Can I unclog a P1S with a plunger only?
A plunger alone can dislodge surface debris and some shallow clogs, especially in sinks. For deeper blockages, you’ll likely need a drain snake or auger. If plunging doesn’t yield results after several attempts, move to the next method.
A plunger can help for shallow clogs, but deeper blockages usually need a snake or auger.
How long should I wait after using a chemical cleaner?
Follow the product label for dwell time and ventilation. Do not mix cleaners, and flush with plenty of water after the stated contact time. If the clog persists, switch to non-chemical methods.
Check the label for how long to wait, then flush thoroughly after the time is up.
Is it safe to use a drain snake on a plastic pipe?
Yes, a drain snake is generally safe for PVC and other plastics when used correctly. Turn the handle slowly, avoid forcing the cable, and stop if you encounter significant resistance or a kink. Inspect the pipe for damage after use.
A drain snake can be used on plastic pipes if you’re careful not to force or kink it.
When should I call a professional for a P1S clog?
Call a professional if the clog recurs after multiple DIY attempts, if you notice sewage odors, gurgling across fixtures, or water backing up into other parts of the home. A plumber can diagnose hidden issues and perform advanced techniques safely.
Call a pro if it keeps returning or you notice sewer smells or backups in multiple fixtures.
Key Points
- Identify the clog location first
- Use the right tool for the job
- Avoid harsh chemicals on plastics
- Test drainage after each step
- Prevent future clogs with routine maintenance