Unclog 360: The Ultimate DIY Drain Fix Guide for Homeowners
Learn step-by-step how to unclog drains with Unclog 360. Safe, practical methods for sinks, toilets, and pipes. DIY guidance for homeowners from Unclog Drain.

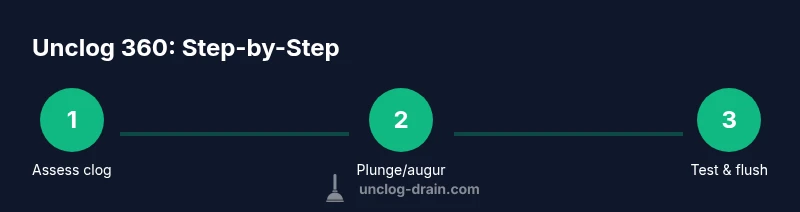
Unclog 360 helps homeowners clear most household drains with a safe, step-by-step plan that emphasizes safety, the right tool choices, and testing before cleanup. You’ll learn when to plunge, when to use a snake, and how to confirm a clog is gone without damaging pipes. By following this structured approach, you can fix many clogs quickly and reduce future problems.
What unclog 360 is and why it matters
In the world of home maintenance, unclog 360 represents a practical, safety-first approach to clearing drains. According to Unclog Drain, this method emphasizes diagnosing the problem, choosing the right tool for the job, and testing the result before closing up. The goal is to restore flow without resorting to harsh chemicals or invasive procedures. When you apply the unclog 360 framework, you gain clarity on the steps needed to tackle sinks, showers, and toilets, and you reduce the risk of making a minor clog into a bigger repair task. You’ll find that the approach scales from a kitchen sink to a tub drain and even a stubborn toilet when performed with care.
A key benefit of this method is predictable outcomes. Rather than guessing which technique will work, you use a prioritized sequence: assess, prepare, attempt, escalate if needed, and verify. This structure helps you stay organized and minimizes mess. As with any DIY project, starting with the right mindset makes the difference: stay patient, work methodically, and clean up as you go. Unclog 360 is not about sheer force; it’s about applying the right technique at the right time.
Safety first: precautions before you start
Before you reach for a tool, protect yourself and your home. Wear nitrile gloves and eye protection, and place towels and a bucket to catch spills. If you have a septic system, avoid harsh chemical cleaners that can upset the balance of beneficial bacteria. Always unplug electrical devices nearby and ensure you aren’t standing in water. Ventilate the area if you use strong cleaners, and never mix cleaners with unknown substances. These precautions reduce risk of injury and damage, keeping the unclog 360 process safe and repeatable across different drains in your house.
Assessing the clog: identify the symptom and likely cause
Start by evaluating the symptom: is the water slow to drain, or is it backing up in multiple fixtures? Does the clog appear in a single fixture, or is it a main line issue affecting several drains? Recognizing whether you’re dealing with a sink, tub, or toilet clog helps you choose the right tool and technique. Acoustic cues (burbling sounds) and water depth can hint at whether hair, grease, food waste, or mineral buildup is the culprit. This initial assessment guides your plan and prevents unnecessary disassembly. As you proceed with unclog 360, remember that a measured diagnosis reduces trial and error and keeps the work contained.
Tools and workspace setup you’ll need (before you start)
Having a clean, organized workspace makes the unclog 360 process smoother. Gather a plunger, a drain snake or auger, rubber gloves, a bucket, towels, and a flashlight. If you’re working under a sink, lay a drop cloth to protect cabinets and catch drips. A heads-up about the trap area and accessibility will save you time. The goal is to create a safe, controlled environment where you can perform the steps with confidence. If you encounter a difficult bend or long run, you’ll be ready with the right tool and enough light to see what you’re doing.
Plunger techniques: the first line of defense
A properly used plunger can clear many clogs without further tools. Create a tight seal around the drain opening, and use firm, consistent strokes to pull and push. Maintain pressure for several seconds, then release slowly to pull the blockage loose. If you’re dealing with a kitchen or bathroom sink, a flange plunger typically works best; for toilets, a dedicated toilet plunger creates a stronger seal. The goal is to generate enough suction and pressure to move the blockage without splashing or overflow. With unclog 360, you should complete several cycles before moving on to a snake.
Pro tip: If the water won’t rise to cover the plunger flush, add a little water until the cup is submerged. This improves suction and effectiveness.
When to escalate: using a drain snake/auger safely
If plunging alone doesn’t clear the clog, a drain snake or hand auger can reach deeper blockages. Insert the snake slowly, rotate the handle to break up the clog, and pull back gently to remove debris. For sinks and showers, guide the auger along the pipe to avoid kinking. For toilets, use a toilet auger designed for porcelain to prevent scratches. Be mindful of the length you need; longer runs can require a steadier hand and patience. After withdrawal, run water to test.
Tip: Do not force the snake through a hard obstruction; instead, back out and try a different angle or section. This reduces the risk of pipe damage.
Special case: toilet clogs and safe alternates
Toilet clogs are often caused by toilet paper buildup or foreign objects. A toilet auger helps you penetrate the bend and retrieve or push the blockage forward. If you can’t feel improvement after several attempts, stop and reassess to avoid damaging the porcelain or the trap. Do not use a standard kitchen plunger on a toilet without a proper rubber flange; the seal won’t be effective and could damage the bowl edge. In stubborn cases, consider a professional service to avoid injury or overflow.
Flush, test, and verify: ensure the blockage is gone
After you finish any mechanical method, flush the drain with hot water to clear residual debris and test the flow. If water drains slowly or returns, re-evaluate the clog location and try a different technique or cycle. Confirm the blockage is fully cleared by running water from multiple fixtures. If you observe recurring backups, check for venting issues or a deeper main-line problem. Unclog 360 emphasizes verification over assumptions to avoid a false sense of resolution.
Maintenance and prevention after unclog 360
Preventing future clogs is easier than repeated fixes. Install strainers on sinks and showers, avoid pouring grease down the drain, and run hot water periodically to clear minor buildup. For kitchen drains, use a mix of baking soda and hot water monthly to deter grease accumulation. If you have a sewer or main line history, consider scheduling periodic inspections. Regular maintenance lowers the risk of recurring clogs and keeps your plumbing healthier over time.
When to call a professional
If water backs up into multiple fixtures, you’re dealing with a potential main-line issue or venting problem that requires a licensed plumber. If you lack the right tools, aren’t comfortable with disassembly, or have a septic system, professional guidance may be the safest option. The unclog 360 approach works well for many standard clogs, but a persistent or unusual clog is a sign to seek expert help to avoid damage or costly repairs.
Tools & Materials
- Plunger (cup or flange)(Choose a sink/plunger with a tight seal; flange plunger for toilets)
- Nitrile gloves(Protect hands; consider longer gloves for deeper work)
- Bucket(Catch water and debris; place under the area)
- Drain snake / auger(Manual or cordless; add length as needed)
- Adjustable wrench(Loosen screws or trap nuts if needed)
- Towels or rags(Keep area dry and clean)
- Flashlight or headlamp(Improve visibility in dark spaces)
- Enzymatic drain cleaner (optional)(Use after mechanical methods; avoid mixing with chemicals)
Steps
Estimated time: 40-75 minutes
- 1
Identify clog type
Observe symptoms, fixture affected, and backup pattern to determine whether the clog is in a sink, tub, or toilet. This helps you select the right tool and technique from the unclog 360 toolbox. Start with a quick visual check under the drain gasket and trap area.
Tip: Document symptoms with a quick note to track progression. - 2
Prepare workspace and tools
Put on gloves, lay towels, and place a bucket under the work area. Clear the area of objects that could get wet and ensure you have adequate lighting. Ready your plunger, snake, and optional cleaner.
Tip: Test tool fit before starting; a poor seal wastes effort. - 3
Plunge with proper seal
Position the plunger to cover the drain opening completely and push down firmly to create a seal. Use 8–12 controlled strokes, then pause to observe water movement. Repeat 2–3 cycles before moving on.
Tip: If water remains low, add a small amount to cover the plunger cup. - 4
Use a drain snake if plunging fails
Insert the snake into the drain and rotate the handle as you push forward. When you feel resistance, continue turning to break up the clog, then pull back debris. Withdraw slowly and clean off buildup.
Tip: Do not force the snake through the blockage; back out and try a different angle. - 5
Address toilet clogs with a toilet auger
If a toilet is clogged, use a toilet auger designed for porcelain to avoid scratches. Insert gently and crank the handle to extend the line past the bend. Retrieve debris and flush to test.
Tip: Never use a standard sink plunger on a toilet without a proper seal. - 6
Flush and verify
Run hot water or multiple fixtures to confirm flow restoration. If water backs up, retry the method or map alternative route. Ensure the drain remains clear before finishing.
Tip: Test with a short flush, then a longer run to verify reliability. - 7
Clean up and preventive steps
Wipe surfaces, dry the area, and store tools. Add strainers to prevent future clogs and apply a mild baking-soda routine to deter buildup.
Tip: Keep a simple drain maintenance plan as part of home care. - 8
Know when to call a pro
If backups persist in multiple fixtures or there is suspected main-line or venting issues, a licensed plumber is recommended. Safety first, especially with complex plumbing problems.
Tip: Don’t risk overflow or electrical hazards—seek professional help when uncertain.
Common Questions
What is unclog 360 and who is it for?
Unclog 360 is a practical, step-by-step DIY approach to clearing drains using plunger, auger, and safe cleaners. It’s designed for homeowners and DIY enthusiasts who want to fix common clogs without professional help when safe to do so.
Unclog 360 is a practical DIY approach for homeowners to fix common drains with plunger and auger, avoiding unnecessary professional help when possible.
Can I use chemical drain cleaners with this method?
Chemical cleaners are sometimes useful as a last resort, but mechanical methods are preferred first. Avoid mixing harsh chemicals with mechanical methods to prevent dangerous reactions or pipe damage.
Chemicals can be risky; try plungers and snakes first, and don’t mix cleaners with other methods.
How long does it usually take to unclog a typical drain?
Most standard clogs respond within 20–60 minutes depending on the clog’s location and severity. Some stubborn cases may take longer or require professional help.
Most clogs clear in under an hour, but tougher ones can take longer or need a plumber.
Is unclog 360 safe for septic systems?
Yes, when you use enzyme-based cleaners and mechanical methods, and avoid harsh chemical dumps. Always follow product directions and local code guidelines.
Yes, this approach can be septic-safe if you avoid harsh chemicals and follow directions.
What tools are essential for beginners?
A plunger, a drain snake, gloves, a bucket, towels, and good lighting cover the basics. For toilets, use a dedicated toilet auger to avoid damage.
Essential tools are a plunger, a snake, gloves, and a bucket; add a toilet auger for toilets.
What should I do if the clog keeps returning?
If clogs recur, assess drainage sources, check vents and consider periodic maintenance or calling a professional for deeper issues.
If clogs come back, look at the system more deeply and consider a pro for persistent problems.
Watch Video
Key Points
- Identify clog type before choosing a method
- Use proper tools and protective gear
- Plunge first, then escalate to a snake if needed
- Always test after clearing
- Prevent clogs with strainers and smart habits