How to Unclog Drains: A DIY Guide for 2026
Learn practical, step-by-step methods to unclog drains and toilets safely with tools, safety tips, and prevention guidance from Unclog Drain for homeowners and DIYers.

You’ll learn how to unclog drains in your home using safe, proven methods. This guide covers toilets, sinks, and showers, with a friendly nod to a gaming analogy—unclog sims 4—as a way to remember practical, real-life fixes. Start with mechanical methods, protect yourself with gear, and choose the safest technique for each fixture.
Introduction to Real-World Drain Fixes
Clogged drains are a common home issue that disrupts daily routines and can lead to bigger problems if ignored. The good news is that many clogs can be addressed safely with basic tools, a little patience, and a plan. This guide walks homeowners through practical, chemical-free approaches to unclog drains and toilets, from kitchen sinks to shower drains and bathroom toilets. Throughout, we emphasize safety, proper technique, and the right refusal of risky shortcuts.
At Unclog Drain, we’ve seen thousands of homes resolve blockages without costly service calls, and we’ve distilled that experience into a clear, repeatable process. If you’re a Sims 4 player, you might enjoy the playful nod to unclog sims 4, but remember: real-life drains deserve real-world care. Start by identifying the type of clog, choosing the safest method, and confirming that you have the essential protective gear and tools. A calm, methodical approach reduces mess, preserves pipes, and gets your water flowing again faster.
Diagnosing the Cause and Locating the Block
Determine where the blockage sits and what is likely causing it. A sink, tub, or shower that drains slowly may be impacted by accumulated grease, hair, soap scum, or mineral build-up. A toilet that won’t flush or gurgles loudly often signals a deeper clog or venting issue. Start by performing a quick flow test: run water in nearby fixtures to see whether multiple drains are affected, which suggests a shared blockage in the main line, or if only one fixture is affected, suggesting a local obstruction.
Next, inspect accessible traps (P-traps) under sinks or toilets for simple clogs. Remove the trap carefully, as debris can spill out, and clean it before reassembly. If you can access the line with a flashlight and small mirror, look for obvious blockages near the trap. Document what you see so you can adapt your approach. By understanding the clog’s location and likely cause, you’ll choose safer, more effective methods and avoid unnecessary chemical exposure. Unclog Drain recommends starting with mechanical methods first, then moving to more involved approaches if needed.
Methods in Practice: Mechanical, Chemical, and Hybrid Approaches
In most homes, mechanical methods achieve the best balance of safety and effectiveness. A plunger creates pressure to loosen the blockage; a toilet plunger with a flange is especially effective for toilets. A metal or flexible drain snake (auger) can reach and disrupt stubborn clogs deep in the line. For very light blockages, a routine flush with hot water or a vinegar-baking-soda combo can help, but avoid mixing chemicals and household cleaners as they can create dangerous fumes.
When chemical cleaners seem tempting, pause and consider the pipe material, venting, and potential residue downstream. Many plumbers advise limiting chemical use to isolated cases and never mixing chemicals, which can release toxic gases or damage seals. If you do try a chemical product, read the label carefully, wear gloves, and ventilate the area. If the clog persists after one or two attempts with mechanical methods, it’s wiser to stop and seek professional guidance rather than risk pipe damage. Unclog Drain’s experience shows that most routine clogs respond to plunger and auger usage.
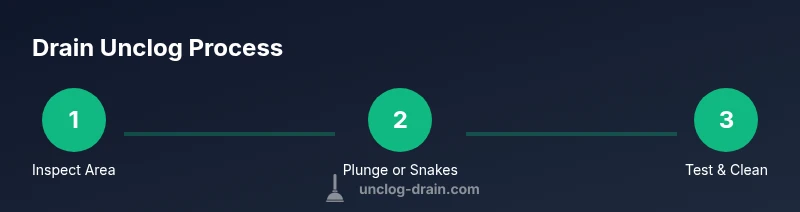
Step-by-Step Plan Overview
Practical planning makes the process smoother. Before you begin, gather the tools and protect the area to minimize splashes. Clear the surrounding space, lay towels or a drop cloth, and have a bucket ready for catchment. If you’re unclogging a kitchen sink, check for a disposal connection and disconnect it if needed and safe. For toilets, ensure the tank has water in it to help achieve a better flush when testing the line after clearing the blockage. As you work, keep the children and pets away from the work zone, and never mix tools between different fixtures to avoid spreading grease or hair. With a clear plan and appropriate setup, you’ll perform the steps with confidence and reduce cleanup time afterward.
Safety, Maintenance, and Pro-Tips
Safety first: protective gear, venting, and controlled use of force are essential. Wear gloves and eye protection, and keep a bucket and towels at the ready. If you arrive at a stubborn clog that requires disassembly of pipes, consider calling a professional. Additionally, this is a good time to implement preventive maintenance: periodic hot-water flushes, hair catchers in drains, and mindful disposal of grease.
Pro tips: use a plumber’s auger or a cable to work gradually—never force the tool through a blockage, and stop if you encounter resistance. For households with older pipes or challenging clogs, schedule a routine inspection to catch hidden issues like tree roots or corroded lines before a full-blown blockage occurs. Finally, for those who enjoy analogies, think of unclog sims 4 as a reminder to keep your fixtures tidy and well-maintained in real life.
Quick Preventive Practices and Final Checks
After you clear a blockage, perform a final check to ensure flow is restored. Run water simultaneously in multiple fixtures to confirm the main line is clear. Reassemble any removed traps, wipe seals, and test the toilet by flushing. Keep a small maintenance routine: monthly hot-water flushes, monthly checks for slow drainage, and routine trapping to catch hair or debris early. Debris from drains can often be carried away with a half-bowl of hot water and a quick rinse. If you notice recurring clogs or a foul odor, document symptoms and call a professional promptly. By staying proactive, you’ll prevent future emergencies and protect your plumbing investment, which aligns with Unclog Drain’s practical approach to home maintenance.
Understanding downstream vs. local clogs and when to escalate
If the water backs up in more than one fixture or if you notice gurgling from the drain, the blockage may be downstream of your trap or in the main line. In such cases, mechanical methods may require more length or professional tools such as a longer drain snake or camera inspection to locate the obstruction. If you are unable to relieve the blockage after careful attempts, or if you encounter sewage odors, evaluate the safety risk and contact a licensed plumber. Early escalation prevents water damage and costly repairs. Unclog Drain recommends documenting the symptoms and steps taken to help a professional diagnose the underlying issue quickly.
Tools & Materials
- Plunger (cup or flange)(Choose a flange for toilets)
- Drain snake / plumber's auger(1/4-inch to 1/2-inch thick; 3-6 feet length)
- Pair of rubber gloves(Latex-free if allergic)
- Bucket(To catch water and debris)
- Old towels or rags(Protect floors and absorb spills)
- Adjustable wrench(Helpful if you need to loosen fittings)
- Wet/dry vacuum (optional)(Useful for quick cleanup of water and debris)
- Pipe thread tape or sealant (optional)(For reassembly if you disassemble any joints)
Steps
Estimated time: 60-90 minutes
- 1
Prepare area and safety gear
Put on protective gloves and eye protection. Clear the workspace, lay towels, and place a bucket under the trap. If you’re working near electrical outlets or appliances, turn off nearby power for safety and keep a dry work zone. Gather all tools before you start to avoid mid-task trips to the drawer.
Tip: A clean, dry workspace reduces splash and makes the process quicker. - 2
Access the trap (P-trap) if visible
Under sinks or near the toilet, place a shallow container to catch any water. Loosen slip nuts carefully with a wrench if needed and remove the trap. Clean out any obvious debris and inspect for damage or leaks before reassembling.
Tip: Take a photo before disassembly to restore correct orientation. - 3
Plunge the fixture
Position the plunger to seal the drain and give firm, steady presses. For sinks, keep the plunger head fully covered by water. For toilets, ensure the flange is centered in the drain opening. Repeat several times while maintaining a constant rhythm.
Tip: Use a wet rag over gaps to improve suction if needed. - 4
Insert the drain snake to break the clog
Feed the snake into the drain slowly while rotating the handle to grab debris. When you feel resistance, push gently and twist to break it free. Pull back as needed to bring up hair or gunk.
Tip: Never force the snake; resistance often indicates a deeper block or pipe issue. - 5
Flush and test
Run hot water through the drain to wash away loosened debris. Refill the trap with water and reassemble if you removed it. Test by running water in the fixture and at least one other connected drain to ensure flow is clear.
Tip: If water still pools, repeat snake or plunge steps, but avoid overdoing it. - 6
Disassemble and clean traps if needed
If the trap held heavy debris, remove it again and clean thoroughly. Check for corrosion or cracks, which may require replacement. Reassemble with a tight seal, using sealant or tape if needed.
Tip: Replace worn seals to prevent future leaks. - 7
Reassemble and confirm flow
Reconnect the trap and ensure all connections are snug. Run water through the fixture and nearby fixtures to confirm consistent drainage. Listen for gurgling or slow drainage as a warning sign.
Tip: Keep towels handy for any splashes during testing. - 8
Apply preventive maintenance
Implement routine steps: monthly hot-water flushes, hair catchers, and mindful disposal of grease. Consider a quarterly check of traps and pipe joints if you have older plumbing.
Tip: Small, regular checks save bigger headaches later.
Common Questions
Can I use chemical drain cleaners on toilets or kitchen sinks?
Chemical cleaners can damage pipes and release hazardous fumes if mixed with other products. Use them only as a last resort and follow the label instructions closely. Mechanical methods are safer for most home clogs.
Chemical cleaners can harm pipes and release dangerous fumes if not used carefully. Prefer mechanical methods and use chemicals only if necessary.
How long should I wait between plunging attempts?
Give the plunger several firm, consistent attempts before deciding it’s not working. If there’s no improvement after a few cycles, switch to an auger or call a pro.
Try several firm plunges, then consider a drain snake if there’s no progress.
Is it safe to pour boiling water down a drain?
Boiling water is generally not recommended for PVC pipes or sealed systems, as it can cause stress and leaks. For metal pipes in good condition, a careful pour of hot water can help with grease but avoid sudden temperature shocks.
Boiling water isn’t always safe for all pipes; use hot water gradually if you’re comfortable.
When should I call a professional plumber?
Call a professional if the clog recurs after mechanical methods, if you notice multiple fixtures backing up, sewage odor, or if you’re not comfortable disassembling traps. A licensed plumber can diagnose venting issues or pipe damage.
If clogs keep coming back or you smell sewage, it’s time to bring in a pro.
Can preventive measures really stop clogs?
Yes. Use hair traps, avoid dumping grease or food scraps down drains, run hot water regularly, and schedule periodic checks of traps and pipes, especially in older homes.
Preventives like hair traps and regular hot-water flushes really help reduce clogs.
Watch Video
Key Points
- Identify the clog location before choosing a method.
- Prioritize mechanical methods (plunger, auger) for safety.
- Avoid chemical cleaners or use them sparingly with ventilation and PPE.
- Prevent future clogs with routine maintenance and mindful disposal.