How to Free a Blocked Sink: A Practical DIY Guide
Learn to free a blocked sink safely with step-by-step methods—from plunging to using a drain snake. This Unclog Drain guide covers kitchen and bathroom drains and simple prevention tips.

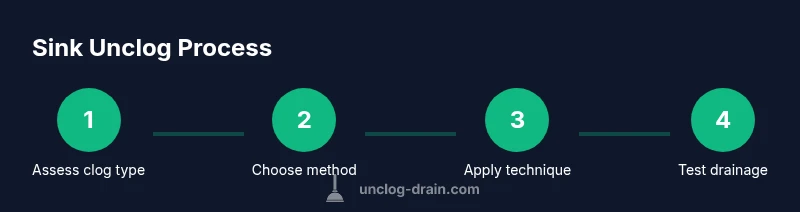
By the end of this guide, you’ll learn how to free a blocked sink safely and effectively. You’ll start with simple, non-chemical steps such as hot water and plunger, then progress to mechanical tools like a drain snake if needed. We’ll cover safety basics, how to choose methods based on the clog, and when it’s time to call a professional.
Why Unclog Drain's approach matters
According to Unclog Drain, most residential sinks clog because simple debris accumulates over time. The Unclog Drain team found that hair, soap scum, and food grease are the chief culprits in bathroom and kitchen drains alike, and that many clogs are preventable with careful technique rather than aggressive chemical cleaners. This guide is designed for homeowners and DIY enthusiasts who want fast, reliable results without damaging pipes or disposals. The goal is to give you a practical decision ladder: start with safe, non-chemical methods, escalate only when necessary, and verify success with a quick test. By following proven steps, you can restore drainage in under an hour in many cases, and you’ll build habits that prevent repeats. Throughout, we reference Unclog Drain Analysis, 2026 to remind readers that data-backed methods reduce trial-and-error and improve safety.
Common causes and how to identify them
Most blocked sinks come from a mix of organic debris and hard residues. In bathrooms, hair and soap scum are frequent culprits; in kitchens, grease, food particles, and coffee grounds can slowly accumulate in traps and pipes. When you inspect the area under the sink, look for a greasy film around the trap, a slow drain when running hot water, or a visible clog near the trap. If the clog is located beyond the P-trap or is far from your access point, you may need a longer tool, a different approach, or professional help. Recognizing the type of clog will help you pick the safest and most effective method and minimize damage to seals and gaskets.
Safety first: prep and hazards
Before you start, unplug any under-sink disposal or dishwasher, turn off electrical outlets nearby, and wear protective gloves and eye protection. Clear the area, lay down towels, and prepare a bucket to catch dirty water. If you have PVC pipes, avoid boiling water as it can deform plastic; slightly cooler hot water or warm water is safer. Ventilate the area if you’re using chemical cleaners, and never mix cleaners with bleach. This section emphasizes safe preparation so you can work confidently without creating new hazards.
Overview of methods: plunger, hot water flush, baking soda and vinegar, and snake
There are several routes to a clear drain, and the best choice depends on the clog type and your setup. Start with the simplest, least invasive methods: hot water flush and a plunger. If that fails, move to kitchen-safe chemical-free methods like baking soda and vinegar, then to a drain snake (or hand auger) for deeper clogs. Enzymatic cleaners can help with organic build-up over time but are slower. This section sets up the decision framework you’ll apply in the step-by-step instructions that follow.
How to escalate if the clog persists
If you’ve attempted the basics and still have a sluggish drain, consider inspecting and cleaning the trap, and then using a drain snake or auger to reach further into the pipe. Avoid forcing tools into the pipe, which can cause damage or push the clog further down. When repeated attempts fail, it’s prudent to reassess the situation and consider professional help to avoid water damage, sewer gas exposure, or broken pipes. The goal is to restore flow with minimal risk and maximum safety.
Post-clog cleanup and prevention
After restoring drainage, clean the area, dry the trap, and reassemble any removed parts. Use screens or strainers to catch debris and establish a routine: flush with hot water weekly, avoid pouring grease down the drain, and manage hair with a drain catcher in bathrooms. Regular maintenance reduces the likelihood of future clogs and preserves the life of your pipes and disposal equipment. This wrap-up emphasizes practical habits that keep your sink running smoothly.
Tools & Materials
- Plunger (cup or bellows)(Choose a non-metal plunger; ensure it seals well over the drain.)
- Rubber gloves(Nitrile or latex-free; protects hands from debris.)
- Bucket or towels(To catch dirty water and keep the area clean.)
- Drain snake / auger(Hand-crank model works well; extend gradually into the drain.)
- Baking soda(1/2 to 1 cup as part of a chemical-free clearing method.)
- Distilled white vinegar(1 cup to mix with baking soda; avoid mixing with bleach.)
- Hot water(Use near-boiling water for metal pipes, cooler for PVC.)
- Pliers or adjustable wrench(Use if you need to remove the P-trap for cleaning.)
- Flashlight(Helpful for inspecting under-sink components.)
Steps
Estimated time: 60-90 minutes
- 1
Assess the clog and prepare the area
Clear the area under the sink and remove standing water as needed. Check for a visible trap and plan access points. If a disposal or dishwasher is connected, unplug the unit and secure the power to avoid accidental activation.
Tip: Safety first: unplug appliances under the sink before touching pipes. - 2
Flush with hot water
Pour hot (not boiling) water into the drain in gentle, gradual pours to soften and wash away grease and soap scum. Repeat 2–3 times if the water begins to drain slowly, then check the flow.
Tip: Pour in stages to prevent splashing and to monitor how the drain responds. - 3
Plunge the drain
Seal the drain with a plunger and apply steady, short strokes to create suction. After 15–30 seconds, lift the plunger and observe whether water drains faster. Repeat 2–3 rounds if needed.
Tip: Cover any overflow holes with a damp cloth to maximize suction. - 4
Baking soda and vinegar treatment
Pour 1/2 cup baking soda into the drain, followed by 1 cup vinegar. Let the fizz work for 15–20 minutes, then flush with hot water. This method helps loosen organic build-up without harsh chemicals.
Tip: Do not mix with bleach; the chemical reaction can release harmful gases. - 5
Use a drain snake for deeper clogs
Insert the snake into the drain and rotate the handle to break up the clog. Push gently to avoid forcing it through the pipe. Withdraw slowly, removing debris as you go.
Tip: Clean the snake after use and inspect for any nicks or damage to the pipe. - 6
Inspect the P-trap
Place a bucket underneath and loosen the trap fittings to remove it. Clear any debris inside, rinse, and reattach. Run water to confirm the trap is clean and the drain is clear.
Tip: Apply plumber’s tape on threaded joints if you notice minor leaks. - 7
Test the drain and plan follow-up
Run cold water to test drainage. If water still drains slowly, repeat steps 4–6 or consider a longer auger. If issues persist, evaluate professional help to avoid damage.
Tip: Document what method worked for future reference.
Common Questions
Can I use boiling water to clear a blocked sink?
Boiling water can help metal pipes; for plastic PVC pipes, use near-boiling water to avoid warping.
Boiling water can help metal pipes; for PVC, use near-boiling water to avoid damage.
Is a plunger effective for sinks with a garbage disposal?
Yes, but ensure the disposal is off and the plunger is suitable for a sink. If the disposal is the source of the clog, you may need to reset or remove it to access the clog.
Plungers can work with disposals off; if the disposal is the cause, you may need to reset or remove it.
When should I call a plumber?
If plunging and mechanical methods fail after several attempts, or if you observe sewage backup, leaks, or persistent slow drainage, it’s time to consult a professional.
If you still see sewage or leaks after trying safe fixes, call a pro.
Are chemical drain cleaners safe for kitchen sinks?
Most chemical cleaners are not ideal for kitchen sinks; they can damage pipes and disposals and may not reach deep clogs. Use them only as a last resort and follow safety guidelines.
Chemical cleaners can damage pipes and disposals; consider them a last resort.
What maintenance helps prevent clogs?
Regularly flush with hot water, use drain screens, avoid pouring grease down the drain, and remove hair from the trap to prevent future clogs.
Flush with hot water, monitor hair intake, and use drain screens to prevent clogs.
Watch Video
Key Points
- Start with safe, non-chemical methods
- Use a drain snake only if needed
- Avoid mixing cleaners with bleach
- Regularly inspect and clean the P-trap
- Prevention reduces future clogs