How to Check Clogged Fuel Injectors: DIY Guide
Learn how to check clogged fuel injectors with a safe, step-by-step DIY approach. Diagnose symptoms, test fuel pressure, inspect spray patterns, and decide between cleaning or replacement—ensuring smoother engine performance.

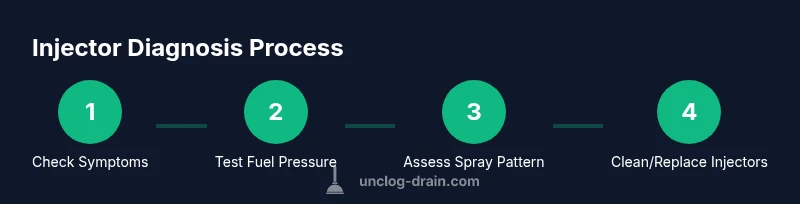
Quick answer: You can check for a clogged fuel injector by observing symptoms, verifying fuel pressure, and performing a balance test with a diagnostic scanner. Begin safely, relieve system pressure, and gather essential tools (fuel pressure gauge, noid light, and injector cleaner). A clogged injector typically causes rough idle, misfires, power loss, and reduced fuel economy. If symptoms persist, proceed with inspection and cleaning.
How fuel injectors work and what causes clogs
Fuel injectors are small precision valves that spray a fine mist of gasoline into each cylinder. In modern engines, injectors rely on electrical pulses from the engine control unit (ECU) and precise fuel pressure to atomize fuel efficiently. When deposits build up on the nozzle, or the fuel becomes contaminated, spray patterns degrade, leading to uneven combustion and rough running. Understanding how injectors operate helps you diagnose clogging without tearing apart the engine.
Common causes of clogging include using low-quality fuel, exposure to ethanol-rich blends, infrequent driving that allows varnish to form, extended periods with stale fuel, and dirty intake or fuel rails that trap debris. In older vehicles, a clogged injector may be caused by clogged filters or failed seals. Regular preventive maintenance, including fuel system cleaners and high-quality fuel, can slow this process. If you’re reading this, you’re likely asking how to check clogged fuel injector—this guide walks you through safe, testable steps that don’t assume professional tools.
Symptoms of a clogged injector
A clogged injector often shows up as engine performance issues rather than obvious visual signs alone. Expect rough idle, hesitation when you press the accelerator, or a misfiring cylinder indicated by misfire codes on a scanner. You may notice reduced power during acceleration, especially at highway speeds, and poorer fuel economy due to incomplete combustion. In some cases, you’ll hear a ticking or tapping sound from the engine due to misfires. Smoky exhaust or a strong fuel odor can also point to injector problems, though these symptoms could indicate other issues as well. Distinguishing a clogged injector from a failing coil, plug, or vacuum leak requires methodical testing, which we cover below.
Before you begin: safety and quick checks
Safety comes first when working on or around a running engine. Park on a flat surface, engage the parking brake, and allow the engine to cool before touching components. Disconnect the negative battery cable to avoid sparks when unplugging electrical connectors. Wear eye protection and gloves, and keep a fire extinguisher nearby in a workshop setting. Gather the basic tools you’ll need and prepare your work area by labeling hoses and connectors so reassembly is straightforward. This stage is not optional; it reduces the risk of shocks, fuel spray, or accidental component damage while you test for clogged fuel injector symptoms.
Testing fuel pressure and injector balance with basic tools
Begin with a fuel pressure test using a suitable gauge on the fuel rail. Compare observed rail pressure to your vehicle’s specification in the service manual. A low or fluctuating pressure often points to an upstream issue, a clogged filter, or a failing pump rather than a single injector. To check injector balance, use a diagnostic scanner capable of reading live data and misfire counters. A noid light helps confirm injector electrical pulse is reaching the injector. If the injector is not receiving a pulse, electrical fault or wiring damage may be the culprit rather than a physical clog. Document readings for each cylinder to identify patterns.
Cleaning options and DIY steps
If test results point to a light deposit buildup, you can try a sanctioned fuel system cleaner added to a full tank of gasoline. This approach is not a guaranteed fix for severe clogs, but it can help dissolve varnish on the nozzle. For more stubborn deposits, removing the fuel rail to inspect injectors with a jeweler’s loupe or small mirror allows you to see spray holes and check for obstructions. Some experienced DIYers use specialized ultrasonic cleaners or professional cleaning services, which can restore spray patterns. If you are not comfortable with injector removal, do not force tools or taps into the fuel rail; improper handling can cause leaks or fire hazards.
When to remove injectors for cleaning or replacement
Severe deposits, nozzle damage, or persistent misfires after basic cleaning usually requires injector removal. Before you remove injectors, verify that the vehicle’s ignition system is stable and that you have fresh O-rings, seals, and a clean workspace. In many cases, a professional cleaning, refurbishment, or replacement is recommended to guarantee spray performance and avoid future failures. If you remove injectors, inspect the seals for cracks, test the injector’s electrical resistance against spec, and consider replacing the injector seals to prevent leaks.
Authority sources and recommended readings
For reliability, consult authoritative sources when diagnosing clogged fuel injectors. The U.S. EPA and NHTSA offer general automotive safety and emissions guidelines, while SAE International publishes engineering standards and injector technology discussions that help you understand injector behavior and diagnostics. Cross-check your findings against vehicle-specific service manuals and manufacturer guidelines. The references below provide a solid starting point for deeper learning and safety considerations:
- https://www.nhtsa.gov
- https://www.epa.gov
- https://www.sae.org
Next steps and troubleshooting flow
If you’ve walked through the steps above and still see symptoms, compare observed data with service information for your exact make and model. Consider pursuing professional cleaning or injector replacement if required. Remember to re-test after any work and reset trims with an appropriate scanner if your vehicle supports it. The goal is consistent, clean spray from each injector to restore power, smooth idling, and improved fuel economy. If you suspect a fuel leak, do not drive the vehicle; seek service immediately.
Tools & Materials
- Fuel pressure gauge(Compatible with your fuel rail Schrader valve; check range in manual)
- Noid light injector tester(To verify injector electrical pulse)
- Diagnostic scanner / OBD-II reader(Live data for fuel trim and misfires)
- Safety gear (gloves, eye protection)(Protective equipment; prevent splashes)
- Replacement injector O-rings/seals(Have on hand if you access injectors)
- Fuel-safe catch container(Catch drips during rail removal)
- Fuel system cleaner(Use as recommended by manufacturer)
- Shop towels and rags(Contain spills and clean surfaces)
- Basic hand tools (socket set, screwdrivers)(Access rails and bolts)
- Service manual (vehicle-specific)(Reference for specs and procedures)
Steps
Estimated time: 60-120 minutes
- 1
Prepare safely and relieve pressure
Park on a level surface, engage the parking brake, and let the engine cool. Disconnect the negative battery terminal to prevent sparks while you disconnect electrical connectors. Relieving pressure minimizes injector spray risk and reduces the chance of fuel spray when the rail is opened.
Tip: Label all connectors as you disconnect them to simplify reassembly. - 2
Access the fuel rail and injectors
Open the hood and locate the fuel rail. Remove any shielding or covers as required by the service manual. Gently disconnect the electrical connectors for the injectors, keeping track of which connector goes to which injector.
Tip: Take a photo before disconnecting to aid reassembly. - 3
Connect fuel pressure gauge and verify rail pressure
Attach the fuel pressure gauge to the rail’s Schrader valve and compare the reading to the spec in your manual. Note any fluctuations as the engine is cranked or idled. A consistent reading within spec supports that the rail is delivering fuel properly.
Tip: If pressure is low, check the fuel filter and pump before focusing on injectors. - 4
Check injector electrical signals
Use a noid light to confirm injectors are receiving a pulse while the engine is cranking. If a cylinder shows no pulse, the issue might be wiring, a failed driver in the ECU, or a faulty connector rather than a clogged nozzle.
Tip: Cross-check signals across cylinders to spot pattern failures. - 5
Inspect spray patterns (without full removal if possible)
If feasible, observe the spray from each injector with the rail installed or after a careful rail removal. Look for symmetrical, cone-shaped sprays; unevenness can indicate clogging or damaged nozzles. Document any differences between injectors.
Tip: Even spray is a sign of healthy injectors; irregular spray warrants cleaning or replacement. - 6
Clean or replace injectors
For light deposits, a sanctioned fuel system cleaner added to a full tank can help. For stubborn buildup or damaged nozzles, remove the rail and clean each injector with a suitable cleaner or replace faulty units. Always replace O-rings and seals during reassembly.
Tip: Avoid blasting solvents directly into the intake; follow cleaner manufacturer guidance. - 7
Reassemble and reconnect
Reinstall the fuel rail, injectors, and connectors. Reconnect the battery, clear any codes with the scanner, and ensure all fittings are torqued to spec. Wipe any spills and inspect for leaks after the first startup.
Tip: Start the engine and listen for any leaks; a brief warm-up helps the system stabilize. - 8
Test drive and verify results
Take a short test drive and monitor engine response. Re-run a diagnostic scan to confirm no misfire codes appear and that fuel trims have normalized. If symptoms persist, escalate to a professional service for deeper cleaning or injector replacement.
Tip: Keep a log of symptoms and readings to compare against baseline later.
Common Questions
What are the most common signs of a clogged fuel injector?
Common signs include rough idle, engine misfires, hesitation during acceleration, reduced power, and poorer fuel economy. Some vehicles may show fault codes related to misfires or fuel trim. Use a diagnostic tool to confirm which cylinder is affected.
Look for rough idle, misfires, and reduced power. A scan can confirm which cylinder is affected.
Can I clean clogged injectors myself at home?
Light varnish buildup can sometimes be softened with approved fuel system cleaners added to a full tank. More stubborn clogs or damaged nozzles typically require injector removal and professional cleaning or replacement.
Yes for light deposits with the right cleaner, but serious clogs usually need professional service.
How long does injector cleaning take for a DIY job?
A simple at-home cleaner approach can take 1–2 hours, depending on access and the engine layout. Complete removing and cleaning each injector may take longer and require careful reassembly.
Most DIY injector cleanups take about an hour or two; full removal takes longer.
What cleaners work best for fuel injectors?
Use cleaners recommended by your vehicle manufacturer or trusted brands designed for fuel systems. Avoid household solvents, which can damage seals and fuel lines.
Stick to manufacturer-approved fuel system cleaners to protect seals and lines.
What if symptoms persist after cleaning?
If misfires or poor performance continue, there may be a more serious issue like injector leakage, wiring faults, or ECU problems. Consult a professional for a comprehensive diagnostic.
Persistent symptoms mean you should seek professional diagnostics.
Should I replace all injectors at once?
If multiple injectors show signs of wear or clogging, replacing them as a set is often prudent to restore uniform spray and performance. If only one injector shows issues, replacing that unit may suffice.
Often replace worn injectors as a set, unless only one is faulty.
Watch Video
Key Points
- Check symptoms before disassembly to target the right injector.
- Test fuel rail pressure and injector pulse as baseline checks.
- Light deposits can respond to cleaners; severe deposits often need part replacement.
- Always replace O-rings and seals when removing injectors.
- Document results to support decision between DIY fix and professional service.