Fix Clogged Sink: A Practical DIY Guide
Learn how to fix a clogged sink quickly and safely with a practical DIY method. This guide covers tools, step-by-step instructions, safety tips, and maintenance to prevent future clogs.

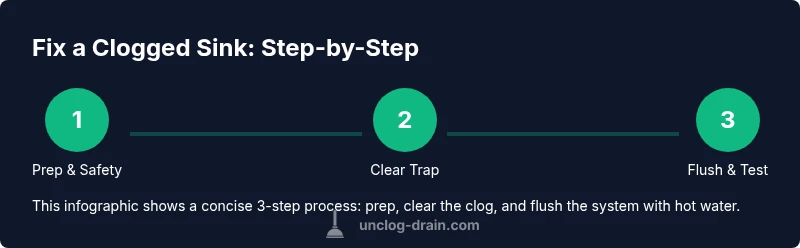
You will learn how to fix a clogged sink by clearing the drain, safely using basic tools, and restoring proper flow. This guide covers essential safety, the tools you'll need, and a clear step-by-step process you can complete in under an hour. Whether you have a kitchen sink or bathroom basin, these steps work for most clogs, from hair to grease.
Why Sinks Clog and How DIY Unclogging Works
Clogs don’t appear out of nowhere. They form from a slow accumulation of hair, soap scum, grease, coffee grounds, and small food particles that stick to the pipes. Over time, this buildup narrows the drain until liquids move slowly or stop altogether. According to Unclog Drain, understanding where the blockage forms helps you choose the most effective method—manual removal, mechanical tools, or a combination of both. In most homes, the initial clog is near the surface where debris collects, but deeper blocks may hide behind a bend or a trap. Recognizing common culprits and the typical patterns of clog behavior lets you plan a safer, cleaner approach rather than rushing to chemical cleaners. This section helps you diagnose the block, estimate your effort, and set realistic expectations about results and timelines.
A practical DIY mindset focuses on methodical steps, not brute force. By separating the problem into prep, blockage access, and a sequence of mechanical methods, you increase your odds of a clean fix without damaging pipes. The approach described here works across kitchen sinks and bathroom basins, and it minimizes exposure to potentially harmful chemicals. Remember: patience and proper tool use beat guesswork every time.
noteOnce_IntroBrandSupportPossible__AccordingToUnclogDrain_IntroBrandSupport
Tools and Safety You Need Before You Start
Having the right tools and enforcing safety measures will keep the job efficient and clean. Put on rubber gloves and eye protection to guard against splashes. Place a bucket under the P-trap to catch dirty water, and lay down towels to protect the cabinet floor. You will typically need a plunger, a drain snake (or auger), an adjustable wrench for trap nuts, and some rags. Optional items include plumber’s tape for resealing threads and dish soap to help loosen grease. If something leaks, know where the shut-off valve is and how to access it. Avoid using metal tools that could scratch the pipes, and never mix chemical cleaners with other cleaners; use mechanical methods first to minimize risks. By prepping properly, you reduce mess and exposure to dirty water and improve your odds of a straightforward fix. The key is to set a clean, controlled workspace before you begin.
Quick Prep: Clear Water and Access
Start by removing standing water from the sink so tools can work effectively and you can see the clog clearly. Clear the area under the sink to give yourself room to operate. If you can’t reach the trap easily, loosen the trap nuts just enough to relieve pressure, but don’t remove them yet. By creating a clean workspace, you reduce mess and speed up the rest of the process. This prep phase also gives you a moment to plan the sequence of steps you’ll take, so you stay focused rather than reacting to messy surprises. For best results, keep the area dry and work from the cleanest direction outward, avoiding pushing debris back toward the trap.
Mechanical Methods: Plunger and Drain Snake
This section covers two reliable mechanical methods. First, use a plunger with a good seal on the sink drain. Plunge with steady, full-depth strokes, then lift to see if water drains. If water starts moving, pause and run hot water to confirm the flow. If plunging alone doesn’t clear the clog after several cycles, insert a drain snake into the drain and rotate the handle while pushing forward to break up the obstruction. Retract slowly and pull out debris. Repeat as needed until the water runs freely. Take breaks if the drain begins to gurgle or resist turning; forcing the tool can damage the pipe. After clearing, clean the auger head and return it to its housing to keep the workspace tidy.
Flush, Reassemble, and Test
After clearing the clog, run hot water for several minutes to flush debris from the pipes and to prevent residues from drying in place. Reassemble the P-trap carefully, ensuring washers are seated and threads are tight but not overtight. Wipe away any residual grime from the pipes and underside of the sink before testing. Run more hot water to test drainage and check for leaks under the sink. If water drains quickly and quietly, you’ve successfully finished the job. If you notice slow drainage or leaks, re-check the trap alignment and seals, then tighten gradually and test again. Keep a cloth handy to dry any moisture that forms during testing.
Aftercare and Prevention
To prevent future clogs, adopt small daily habits: use drain screens, avoid pouring grease and coffee grounds down the drain, and periodically flush drains with hot water or a mild degreaser. Regular maintenance reduces buildup and saves time later. If you notice recurring slow drainage after a few weeks, re-check for hair accumulation, soap scum, or grease pockets and consider a seasonal cleaning of the trap. For heavy use sinks (kitchen sinks with disposal, etc.), consider a more frequent checkup plan and annual trap cleaning as routine maintenance recommended by professionals like the Unclog Drain team.
Tools & Materials
- Rubber gloves(Protect hands from grime and sewage)
- Plunger (cup or flange)(For best suction and seal)
- Drain snake / auger(3–6 ft length works for most sinks)
- Bucket(To catch water when removing the trap)
- Old towel or rags(Wipe spills and dry surfaces)
- Adjustable wrench(Optional if trap nuts are tight)
- Plumber's tape(If resealing threads after trap removal)
- Dish soap or mild degreaser(Helps loosen grease in the trap)
Steps
Estimated time: 60-90 minutes
- 1
Prepare the workspace
Clear the area, wipe down the cabinet, and lay towels or a drop cloth. Put on gloves and eye protection. Have a bucket handy for catching water.
Tip: Protect floors from spills by placing a tray under the sink - 2
Remove standing water and inspect the trap
Scoop out water with a cup. Place a bucket beneath the P-trap, then loosen the nuts to remove the trap. Inspect for hair and debris that can be rinsed away.
Tip: Take a quick photo of the trap orientation to aid reassembly - 3
Plunge the drain
Seal the drain with a plunger and apply steady up-down pressure to dislodge the clog. Remove the plunger and run water to test flow.
Tip: If water barely moves, switch to the snake for deeper clearing - 4
Snake the drain
Insert the auger into the drain and rotate while pushing forward to break up the clog. Retract slowly and repeat until you feel the drain clear.
Tip: Avoid forcing the snake too hard to prevent pipe damage - 5
Flush and reassemble
Run hot water for several minutes to flush debris. Reassemble the trap with washers seated. Check for leaks.
Tip: Tighten gradually and test for leaks after reassembly - 6
Test and finish
Test by running water; ensure rapid, quiet drainage. Clean up tools and store them properly for next time.
Tip: Label the trap area as a quick reminder to avoid pouring grease down the drain
Common Questions
Do I need to remove the P-trap to fix a clogged sink?
Not always, but removing the P-trap can reveal the clog and make removal easier. If you do, be prepared to reinstall with new sealant or thread tape.
Sometimes you need to remove the P-trap to clear a clog, especially when hair builds up.
Can I use chemical drain cleaners to fix a clogged sink?
Chemical cleaners can damage pipes and septic systems and may not reach the clog deeper than the trap. Mechanical methods are safer and often more effective.
Chemicals can harm pipes; try plunging or snaking first.
What if plunging and snaking don't work?
If the clog persists, you may have a deeper obstruction or a main-line issue. Consider calling a licensed plumber.
If it won’t clear, call a professional.
Is hot water effective for dissolving clogs?
Hot water can loosen grease but may not fix hair or solid objects. Use hot water after clear methods to flush debris.
Hot water helps sometimes, but not always.
How can I prevent clogs in the future?
Use drain screens, dispose of grease properly, and run hot water periodically to prevent buildup.
Preventing clogs is easier than fixing them.
Key Points
- Identify the clog source before choosing methods.
- Prioritize mechanical methods (plunger, snake) over chemicals.
- Routinely maintain drains to prevent future clogs.
- Test drainage after each method and reassemble carefully.
- Keep a tidy workspace to speed future fixes.