How to Check a Clogged Heater Core: DIY Troubleshooting Guide
Urgent, practical steps to diagnose and fix a clogged heater core in your car. Learn safe checks, flow tests, backflushing techniques, and prevention tips from Unclog Drain.

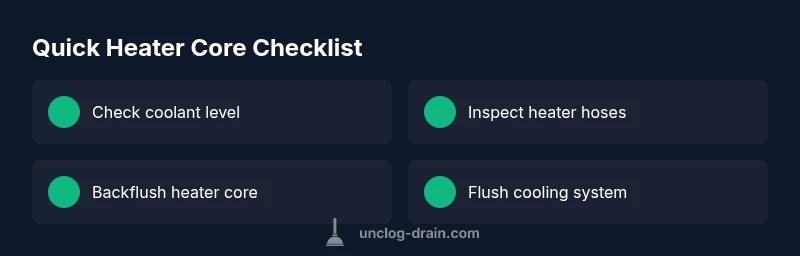
A clogged heater core typically results from coolant sludge, rust, or mineral deposits that restrict flow. Start with safe checks: confirm coolant level and look for leaks, then feel heater hoses with the engine warm to gauge flow. If buildup is suspected, backflush the heater core and flush the cooling system before considering replacement. If symptoms persist, seek professional service.
Why Heater Cores Clog and Why It Matters
A car's heater core acts like a small radiator that transfers heat from the engine coolant into the cabin. Over time, coolant can leave behind sludge, rust, and mineral deposits that restrict flow through the core. According to Unclog Drain, this buildup is the most common reason a heater stops delivering warm air, especially in older vehicles or systems that have not been flushed in years. When the core is clogged, you may notice little or no heat, or heat that is tepid and inconsistent. In severe cases, restricted coolant flow can contribute to overheating or excessive pressure in the cooling system. Bottom line: a clogged heater core is a maintenance issue that doesn’t fix itself. The sooner you diagnose the problem, the less risk you run of deeper cooling-system damage. In many cars the heater core is tucked behind the dash, so a DIY fix can be challenging, and parts replacement may be required if backflushing doesn’t restore flow. If you’re uncertain, err on the side of caution and proceed with a methodical approach. Regular coolant maintenance can prevent future clogs, saving you time and money in the long run.
To stay ahead, keep a simple maintenance schedule: check coolant color and level monthly, flush the cooling system every 2–3 years or as recommended by your vehicle maker, and address any coolant leaks promptly. The Unclog Drain team emphasizes that proactive maintenance is your best defense against heater-core clogs.
Safe, Initial Checks You Can Do Without Special Tools
Before pulling parts or taking the dash apart, run through these safe checks to confirm the basics are not the root cause. First, ensure the cooling system is properly filled when the engine is cold. Low coolant can mimic heater issues because the system cannot maintain proper flow. Look for obvious leaks around radiator hoses and at the heater hoses connected to the firewall. A damp area or crusty residue is a sign you may have a leak that needs repair.
Next, start the engine and set the climate control to HOT with the blower turned up. Feel the two heater hoses near the firewall; both should warm up after a couple of minutes. If one hose stays cool or cold, there may be an air lock, a partially closed valve, or a flow restriction upstream. If the heater never gets hot, consider whether the thermostat might be stuck closed or whether the blend door (which mixes hot and cold air) is stuck.
Finally, check for sweet or syrupy coolant smell inside the cabin, and inspect the coolant itself for contamination. A milky appearance or oil sheen in the coolant can indicate an internal engine issue that can cascade into heater problems. If you notice persistent contamination, stop operating the vehicle and seek professional diagnosis.
Diagnostic Clues and How to Interpret Them
Diagnosing a clogged heater core requires separating symptoms that look similar. A lack of heat is the most common symptom and can point to multiple causes including a clogged heater core, low coolant, air in the cooling system, a faulty thermostat, or a failing HVAC control. If you hear bubbling sounds from the heater core area when the system is trying to bleed air, it’s often an air lock or low-flow condition rather than a full blockage. A sweet coolant smell in the cabin and visible coolant residue on the passenger side footwell can indicate a coolant leak into the HVAC duct, which may accompany corrosion and sludge buildup inside the core.
Cross-check symptoms with two simple tests: (1) feel both heater hoses at the firewall after the engine warms; if one hose remains cool, suspect restricted flow; (2) verify coolant level and pressure by a proper bleed of the cooling system. Remember, thermostat issues or stuck blend doors can imitate a clogged core, so rule those out first before committing to heater-core work. If you find signs of sludge or rust in the coolant, the core likely has deposits that need removal or replacement. Unclog Drain analysis notes that sludge buildup is a leading contributor to heat loss and should be addressed promptly to avoid further damage.
Step-by-Step Fix for a Common Clog (Backflush Method and System Flush)
This section outlines a practical approach to addressing a suspected heater-core blockage without immediately replacing the core. It assumes basic mechanical aptitude and the right tools. If you are unsure at any point, stop and consult a professional.
- Prepare the work area and safety gear. Disconnect the battery, wear safety glasses, and have a drain pan ready for coolant. Label hoses to avoid reconnecting them incorrectly.
- Locate heater hoses. You’ll typically see two rubber hoses at the engine bay that run to the firewall. Loosen clamps and gently separate them from their metal hard lines, keeping track of which hose goes where.
- Backflush the heater core. With the engine cool, use a garden hose to push water through the heater core in the reverse direction from the normal flow. Alternate with controlled bursts to dislodge deposits. If you see a lot of debris, continue flushing until clear water exits the other hose.
- Reconnect hoses and refill the cooling system. Reinstall clamps, fill the radiator and overflow reservoir with the correct coolant mix, and bleed air from the system according to your vehicle's service manual.
- Test the system. Start the engine, run the heater on high, and monitor temperature stability and coolant level. A successful flush will show warm air consistently and no coolant loss.
If backflushing does not restore heat or if you notice recurring sludge, you likely need professional service to remove the core and replace it. Failure to fully restore flow may indicate a deeper issue in the cooling loop.
- Post-service check and maintenance. After the test drive, re-check for leaks and coolant level again. Maintain a regular coolant-flush schedule to prevent reoccurrence.
Prevention Tips and Safety Warnings
To minimize heater-core clogs, practice proactive maintenance. Use the correct antifreeze type and a proper coolant-to-water ratio as specified by your vehicle's manufacturer. Schedule routine cooling-system inspections, and if the coolant shows rust, discoloration, or sediment, flush the system sooner rather than later. Regularly inspecting hoses for cracks or bulges helps prevent leaks that can lead to air ingress and air locks, which mimic a clogged heater core. Safety should always come first: never remove the radiator cap when the engine is hot, work with the engine off and cool, and wear protective gloves and eye protection when handling hot coolant or pressurized hoses. Finally, if you are uncomfortable with disassembling dash panels or removing components to access the heater core, seek professional help to avoid costly mistakes.
Key Safety and Reliability Notes
- Always work on a cool engine; hot coolant can cause severe burns.
- Use the correct coolant type and follow the vehicle’s bleed procedure precisely.
- If you observe coolant leaks or contamination, address them immediately to prevent engine damage.
- Keep the work area clean and organize fasteners; dash removal may damage trim if not done carefully.
- After performing any major cooling-system work, run the engine to operating temperature and confirm there are no leaks and that the heater delivers steady warmth.
Steps
Estimated time: 1-3 hours
- 1
Prepare and safety check
Gather tools, put on protective gear, and ensure the engine is cool. Disconnect the battery and label hoses. This minimizes the risk of burns or misrouting hoses during disassembly.
Tip: Double-check vehicle-specific procedures in the service manual. - 2
Access heater hoses
Locate the two heater hoses at the firewall and inspect for cracks or leaks. Loosen clamps slowly and note which hose connects to which hard line to avoid misconnection.
Tip: Take photos before disconnecting to help reassembly. - 3
Backflush heater core
Disconnect the hoses and backflush the heater core with a garden hose in the reverse flow direction. Use short bursts and inspect output until clear water runs through.
Tip: Do not use high pressure; excessive pressure can damage seals. - 4
Reconnect and refill
Reconnect hoses, refill coolant, and bleed air per the manual. Check for bubbles and ensure the system remains full after starting the engine.
Tip: Keep a close eye on the coolant reservoir during first runs. - 5
Test heat and monitor
Set the climate control to HOT with blower on high. Verify steady heat at vents and watch for any leaks or temperature fluctuations.
Tip: If heat is still weak, stop and seek professional service. - 6
Post-test inspection
Drive a short distance and recheck coolant level and hoses. Confirm there are no drips and the engine maintains proper temperature.
Tip: Document any new symptoms for the next service visit.
Diagnosis: No or weak heat from the vehicle heater when the engine is at operating temperature
Possible Causes
- highLow coolant level or air in the cooling system
- highClogged heater core with sludge or rust
- mediumFaulty HVAC blend door or actuator preventing hot air from reaching the cabin
- lowThermostat stuck open or water pump issues causing reduced flow
Fixes
- easyTop off coolant and perform a proper bleed of the cooling system
- mediumBackflush the heater core and flush the cooling system to remove deposits
- hardReplace heater core if the blockage is severe or core damage is evident
- mediumRepair or replace HVAC blend door or actuator if it’s stuck or faulty
Common Questions
What causes a heater core to clog?
Common causes include coolant sludge, rust, and mineral buildup from years of use. If the coolant isn’t regularly flushed or if the system is contaminated, deposits can accumulate and restrict flow through the core.
Common causes are sludge, rust, and minerals in coolant; regular flushing helps prevent clogs.
Can I fix a clogged heater core myself?
You can perform safe checks and backflush the heater core on some vehicles. However, heater-core removal or replacement and certain backflushing procedures may require professional service, especially on modern vehicles with complex HVAC systems.
DIY steps exist, but some repairs need a professional technician.
How long does it take to replace a heater core?
Replacement duration varies by vehicle, often several hours. Some cars require dash removal or specialized tools, which can extend the process.
Replacement usually takes several hours depending on the car.
Is a bad thermostat always the culprit for no heat?
Not always. A stuck thermostat can cause overheating or no heat, but no heat combined with low coolant or a plugged core points toward the heater core or cooling system blockage.
Thermostat problems can cause heat issues, but there are other common culprits too.
Should I drive if the heater isn’t producing heat?
If it’s very cold outside, driving without heat can be uncomfortable and risky. Check for coolant leaks, monitor temperature, and seek diagnostic help if heat fails after simple checks.
Driving without heat can be uncomfortable; get it checked if symptoms persist.
Watch Video
Key Points
- Check coolant level and bleed the system first.
- Backflush the heater core if you suspect deposits.
- Differentiate heater-core issues from thermostat or blend-door problems.
- Prevent future clogs with regular coolant maintenance.