How to Clean a Tub Drain: A DIY Guide
Learn how to clean a tub drain safely and effectively with hands-on steps, tools, and preventive tips from Unclog Drain. Avoid harsh chemicals and restore fast-draining water.

With safe, non-chemical methods first, you can restore fast-draining water in a tub by clearing hair and soap buildup. Start with a plunger, then a drain snake, followed by a hot-water flush. Avoid harsh cleaners to protect pipes and seals. This approach emphasizes safety and minimizes damage to the P-trap and overflow.
Why a clean tub drain matters
According to Unclog Drain, a clean tub drain prevents slow-draining water, standing pools, odors, and mold growth. Hair, soap scum, and mineral deposits accumulate over time, gradually narrowing the passage and allowing clogs to form. Regular maintenance keeps your bathroom hygienic and comfortable, reducing the frustration of slow showers and backups. When a tub drain is clean, you’ll notice quicker drainage, less odor, and fewer maintenance hassles. In homes with long hair, hard water, or frequent bathing, a proactive approach saves time and money in the long run. A clean drain also minimizes the risk of sewer gas entering the bathroom and helps protect seals and gaskets from unnecessary stress. The goal is to establish a routine that fits into your weekly cleaning schedule and avoids disruptive, costly repairs.
How clogs form in tub drains
Most tub clogs begin with hair strands and soap scum that grab onto the curved sections of the drain and the stopper assembly. Over time, mineral deposits from hard water bind to hair, creating a dense mat that resists water flow. As water stagnates, more debris collects, making the blockage thicker and more difficult to remove. Soap residues also become gummy and hold onto hair, accelerating the clog. Understanding these culprits helps you tailor your approach—prioritize mechanical methods first, and reserve chemical cleaners for only the mildest buildups. Regular talking points include the importance of keeping the overflow clean and maintaining the P-trap to prevent recurring issues.
Safety first: before you start
Drain-cleaning work can create splashes, sharp tools, and slippery surfaces. Put on rubber gloves and eye protection, and lay towels around the tub to catch debris. Ventilate the bathroom or open a window if you’re using any cleaners, even mild vinegar solutions. Never mix cleaners, and avoid chemical drain products in a confined space where fumes can build up. If you smell sewage, hear gurgling, or encounter unusual resistance while probing, pause and consider calling a professional. Always keep children and pets away from the work area. Safety gear and a calm, methodical approach prevent injuries and unnecessary damage to plumbing fixtures.
Tub drain anatomy you should know
A tub drain system comprises several parts that affect how you access and clear clogs. The stopper controls water flow and is often the first place where hair collects. The overflow plate sits above the drain and can trap debris in its cavity. The P-trap, the curved pipe beneath the drain, is where most hair mats form and are the trickiest to remove. Knowing where these components live helps you plan your cleaning steps without over-disassembly. If you decide to access the P-trap, ensure you’re prepared to catch wastewater and reseal joints properly to prevent leaks. A basic understanding of the layout empowers you to work efficiently and avoid costly mistakes.
Quick checks to assess the clog
Start with simple diagnostics before taking apart fixtures. Run hot water down the drain for 30–60 seconds to see if it loosens debris. Listen for changes in flow when you apply a plunger and observe whether water drains more quickly after each attempt. Inspect the overflow opening for visible hair or soap residue and remove any obvious blocks with gloved fingers or a small brush. If the water still backs up or drains very slowly, the clog is deeper in the line or in the trap, indicating you’ll need to extend your method. These checks help you decide how aggressive your approach should be without jumping straight to disassembly.
Mechanical cleaning vs chemical cleaners: pros and cons
Mechanical methods, including plungers and drain snakes, are typically safer for frequent DIY work and effective for hair-based clogs. They also avoid the chemical exposure and potential pipe damage associated with strong cleaners. Chemical cleaners can damage rubber gaskets, older pipes, and finishings, and they often fail to fully break apart hair mats. If you do choose chemicals, use them sparingly, follow label directions, and flush with plenty of water afterward. For most households, mechanical methods provide quicker, more reliable results with less risk of unintended consequences. Your choice should balance safety, effectiveness, and the specifics of your plumbing setup.
How to remove the stopper and access the clog
Begin by placing a bucket under the area to catch any standing water. Remove the stopper according to the model—some twist out, others lift with a tool. Use a flashlight to inspect the area around the stopper and the overflow cavity for hair and residue. Clear visible debris with gloved fingers or a small brush, and wipe away buildup with a damp cloth. Reassemble the parts loosely to test drainage, then proceed to more advanced methods if needed. This step offers a clear view of what you’re dealing with and reduces surprises later in the process.
Using a plumber’s snake or auger
A hand-crank snake is ideal for hair clogs that don’t respond to plunging. Insert the snake into the drain, rotating while you push gently toward the blockage. When you feel resistance, back off slightly and re-aim to avoid pinching or breaking the tool. Clean the hair from the coil as you pull it back, and repeat several times to gradually clear the path. If you encounter a stubborn mat, pause and step back to recheck the stopper and overflow area. Persistence is key, but avoid forcing the snake beyond its limit to prevent pipe damage.
Flushing and testing drainage
After removing the clog, flush the line with hot water for several minutes to wash away remaining debris. A mild baking soda-vinegar flush can help lift residual buildup and freshen the drain, but avoid mixing with any other cleaners. Check the water flow by running the shower for 1–2 minutes and watching for consistent drainage. If water still pools, repeat the snake or plunging steps, or consider a professional assessment. A thorough flush confirms that you’ve cleared the block and restored normal function.
Maintenance habits to prevent future clogs
Prevention is easier than repeated cleaning. Use a hair catcher or screen to reduce hair entering the drain, wipe the stopper and surrounding area after each use, and rinse with hot water to dissolve soap scum regularly. Consider periodic gentle flushes with hot water and a small amount of baking soda to discourage buildup. Keep chemicals out of reach of children and pets, and avoid pouring grease or large food particles down any drain. Simple routine maintenance minimizes future clogs and keeps your tub drainage reliable.
When to call a professional
DIY fixes cover most routine clogs, but you should escalate to a plumber when backups persist after multiple attempts, you notice sewage odors, or you suspect a broken pipe or vent problem. A licensed pro can perform a camera inspection, check the vent stack, and verify that seals and joints are intact. If you recently renovated or have older plumbing, professional guidance helps prevent accidental damage and ensures your system remains up to code. Don’t delay professional help if the problem repeats after a reasonable DIY effort.
Common mistakes to avoid and safety reminders
Avoid chemical drain cleaners for tub drains whenever possible; they’re harsh on rubber gaskets and can damage fixtures. Do not force parts or pry on the stopper—careful disassembly prevents leaks and warped fittings. Always wear gloves and eye protection, and never mix cleaners with other products. After any procedure, test the drain thoroughly to confirm success. Taking a careful, methodical approach reduces the chance of re-clogs and protects your plumbing investment.
Tools & Materials
- Rubber gloves(Protect hands from grime and cleaning agents)
- Drain plunger(Cup or flange plunger works for tubs)
- Drain snake / auger(3-6 ft hand-crank model)
- Bucket or tray(Catch dirty water and debris)
- Old toothbrush or small brush(For scrubbing the stopper and overflow plate)
- Towels or rags(Contain spills and protect surrounding area)
- Vinegar and baking soda(Optional natural cleaners for flush)
- Kettle or pot for hot water(For flushing with hot water)
Steps
Estimated time: 30-60 minutes
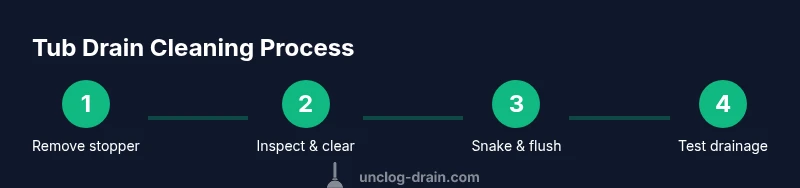
- 1
Remove the stopper and prepare
Turn off the water if you're near the hookups, and remove the tub stopper carefully. Place a bucket beneath to catch water and debris. Take a quick photo of the stopper assembly if needed for reassembly later.
Tip: Document how parts come apart so you can reassemble correctly. - 2
Inspect stopper and overflow
Use a flashlight to inspect the stopper housing and overflow cavity for hair and residue. Clear obvious debris with gloved fingers or a small brush. Wipe clean the surfaces before testing drainage.
Tip: Clear visible blocks first to reduce the load on plunging or snaking. - 3
Plunge the drain
Position the plunger to seal the drain and plunge vigorously for 15–20 seconds. Breaks up fine debris and pushes the clog upward toward the stopper. Repeat as needed a few times.
Tip: Keep a tight seal and avoid splashing outside the tub. - 4
Access the P-trap if needed
If plunging fails, loosen the accessible trap beneath the drain or inspect the immediate trap area. Place a towel to catch water, and carefully loosen any fittings. Clean out hair and buildup visible inside the trap.
Tip: Only loosen joints you can reseal securely to prevent leaks. - 5
Use the plumber’s snake
Insert the snake into the drain and rotate while applying gentle forward pressure to reach hair mats. When you feel resistance, back off slightly and pull back to remove the debris. Repeat until water starts to flow.
Tip: Don’t force the snake past resistance; it can kink or damage pipes. - 6
Flush and test
Run hot water down the drain for several minutes to wash away loosened debris. Optionally flush with a baking soda-vinegar combination for light cleaning. Check drainage by running the tub tap; if water remains slow, repeat steps 4–6.
Tip: Never mix vinegar with bleach or other cleaners. - 7
Reassemble and verify
Reinstall the stopper and any removed parts. Run the faucet to confirm consistent drainage and no leaks. Replace any covers and clean the area to finish.
Tip: Take a final test shower to confirm reliability before putting tools away. - 8
Cleanup and maintenance plan
Wipe all surfaces dry, store tools, and set a simple maintenance schedule. Use a hair catcher and perform a mild hot-water flush monthly to prevent future buildup.
Tip: Record your maintenance date so you don’t miss routine checks.
Common Questions
Can I use baking soda and vinegar to clear a tub drain?
They can help with mild buildup but are not effective for strong clogs. For hair-based blockages, mechanical methods usually work better.
Baking soda and vinegar can help a little with light buildup, but for hair clogs you’ll likely need a plunger or snake.
Is chemical drain cleaner safe for tub drains?
Chemical cleaners are not recommended for most tub drains. They can damage gaskets and pipes and often don’t remove hair mats effectively. Use mechanical methods first.
Most chemical cleaners can damage tub parts and don’t reliably remove hair clogs; mechanical methods are safer.
How long does a DIY tub drain cleanup take?
A typical DIY cleanup takes about 30 to 60 minutes, depending on the clog severity and accessibility of the stopper and trap.
Usually about half an hour to an hour, depending on how stubborn the clog is.
Do I need to disconnect the P-trap?
Most tub clogs don’t require disassembly of the P-trap. If you do remove it, ensure you can reseal all joints to prevent leaks.
You usually don’t have to take the trap apart, but if you do, reseal the joints carefully.
What are signs of a clogged vent?
Slow drainage, gurgling sounds, and odors can indicate a blocked vent. A professional inspection may be needed to clear it properly.
Look for slow draining with gurgling noises; that could mean the vent is blocked.
How often should I clean tub drains?
Clean or inspect every few months, or whenever you notice slower drainage. Regular maintenance helps prevent major clogs.
Every few months, or when you notice slow drainage, run a quick maintenance routine.
Watch Video
Key Points
- Identify the clog source early to choose the right method
- Prefer mechanical methods over harsh chemicals for tubs
- Keep the stopper and overflow clean to prevent repeats
- Test drainage after each cleaning stage
- Know when to escalate to a professional