Bathtub Won't Drain Not Clogged: Troubleshooting Guide
Urgent, step-by-step guide to diagnose and fix a bathtub that won’t drain when there’s no obvious clog. Safe DIY fixes, diagnostic flow, and when to call a pro for stubborn drains.

A bathtub won t drain not clogged is most often caused by hair buildup just beyond the strainer, a partial clog deeper in the line, or venting issues that slow drainage. Begin with quick fixes: remove the strainer, clean hair, and test the drain. If it remains slow, follow the diagnostic flow below to locate and fix the problem safely.
Problem overview: Why a bathtub won t drain not clogged may still drain slowly
A bathtub that won t drain not clogged can be misleading. Even when the visible drain cover looks clear, hair, soap scum, and mineral deposits can hide just beyond the strainer, collecting enough to slow or stop flow. The tub’s drain system typically includes a strainer, tailpiece, a P-trap, and a vent line. When a minor obstruction forms, water backs up and pools, signaling a drainage problem that isn t a full blockage. In many homes, the culprit is a combination of hair and soap scum that gradually builds up, reducing cross-sectional space and increasing resistance for water to exit. Recognizing these patterns early helps you choose the safest and most effective fixes. According to Unclog Drain, many tub drainage issues start with hair accumulation beyond the strainer, followed by partial clogs deeper in the line. When a tub won t drain not clogged, you should not assume it’s impossible to fix at home—start with simple steps and escalate only as needed.
In this scenario, it’s crucial to differentiate between a true obstruction and slow drainage caused by venting or mineral buildup. Venting problems restrict air flow, which can slow drainage and cause gurgling sounds. Mineral deposits can narrow pipe openings over time, especially in hard water areas. Soap scum can bind with hair to form a sticky plug that resists simple flushing. By understanding these mechanisms, you can target the right fix without resorting to aggressive chemicals or invasive work. The following sections guide you through a practical, safety-first approach that prioritizes mechanical clearing and maintenance over risky shortcuts.
Safety note from Unclog Drain: never mix cleaners or force chemical agents into pipes if you aren t sure about the pipe material or vent integrity. Always verify you have a clear, dry work area and wear gloves and eye protection. This helps you diagnose the root cause and prevent collateral damage to plumbing and finishes.
Quick checks you can perform before tools
- Start with the simplest checks: remove the drain cover and clean out any hair or soap scum from the strainer. A lot of times, the visible debris at the top is only part of the issue, and cleaning it out provides instant relief.
- Plug the overflow and test with a plunger. A tub plunger (not a sink plunger) creates the necessary suction to pull a partial clog away from the exit path. If you see a surge of water and faster drainage, the blockage is likely close to the strainer.
- Check the P-trap for obvious debris. If you can safely access the trap under the tub, place a bucket underneath and loosen the trap nuts to inspect for hair and gunk. Reassemble tightly to prevent leaks.
- Run hot water for a few minutes after cleaning. A supported flush helps move any loosened material through the line. For mineral buildup, a periodic flush with hot water can maintain flow between deeper cleanings.
- Avoid pouring large quantities of harsh chemical cleaners into a tub drain. These chemicals can damage pipes, vents, and seals, especially in older homes. If you must use a cleaner, choose a safe enzymatic option and follow the product instructions closely.
How hair, soap scum, and mineral buildup affects drainage
Hair is a leading culprit in tub drains. It tangles with soap scum and mineral deposits, creating a fibrous, sticky barrier that resists water flow. Over time, this combination acts like a dam, trapping debris at the strainer and in the tailpiece. Soap residues also create a slippery film that speeds up grime adherence and makes future cleanouts more challenging.
Mineral buildup from hard water can gradually narrow the throat of the drain, reducing the effective diameter. This makes it harder for water to pass, even if the drain doesn t appear fully blocked. In many homes, a layered combination of hair, soap, and minerals slowly increases resistance. Recognizing these patterns helps you choose mechanical methods (like traps, snakes, or augers) over chemical helpers that may not reach the root of the problem and can cause damage when misused.
Understanding the anatomy helps you plan a safer fix. A standard bathtub drain system includes a strainer, tailpiece, P-trap, and a vent line. If any component is partially blocked or misaligned, drainage efficiency drops. When you see slow drainage rather than a full stop, focus on debris removal first and test after each step to gauge your progress. The goal is to restore a clear path for water without forcing the system or compromising the finish of your bathroom.
Diagnostic flow: symptom to solution
- Symptom: Water drains slowly or stops after a few seconds, even with a seemingly clear drain.
- Causes (high/medium/low likelihood):
- Hair and soap scum accumulation near the strainer (high)
- Partial clog deeper in the drain line or P-trap (high)
- Venting issue (low)
- Mineral buildup narrowing pipe diameter (medium)
- Solutions (progressive):
- Clean the strainer and trap to clear obvious debris (easy)
- Remove and clean the P-trap to eliminate deeper blockages (medium)
- Use a drain snake or auger to reach further into the line (medium)
- Consider enzymatic cleaners as a supplementary step (easy)
- If the issue persists, call a licensed plumber for a camera inspection and vent assessment (hard)
Step-by-step clearance method: hands-on fix
- Prepare and safety: Gather gloves, a bucket, a wrench, a flashlight, a tub plunger, and a drain snake. Disconnect power to nearby electrical outlets if there s any risk of water exposure. Tip: Work in a well-lit area and keep pets away while you work.
- Remove drain cover and clean the strainer: Pry off the cover, clear hair, rinse debris, and inspect the tailpiece for obstructions. Reinstall the cover securely. Tip: Use needle-nose pliers to grab hair that s tucked into tight spaces.
- Inspect and clean the P-trap: Place a bucket underneath the trap, loosen the nuts, and remove the trap. Clear hair and gunk with a bottle brush or old sponge, then rinse. Reassemble snugly to prevent leaks. Tip: Avoid overtightening plastic fittings to prevent cracking.
- Use a drain snake to clear deeper buildup: Insert the snake into the drain until you feel resistance, twist and push to break up the obstruction, then pull out the debris. Tip: Keep a steady, gentle motion to prevent pipe damage.
- Flush with hot water and safe cleaners: Run hot water through the line for several minutes. If needed, use a safe enzymatic cleaner to target organic buildup without harsh chemicals. Tip: Do not mix cleaners; rinse thoroughly between steps.
- Re-test the drain: Run water and observe drainage speed. If it improves, repeat if necessary. If it s still slow, proceed to step 7. Tip: Mark drainage speed with a timer to quantify progress.
- When to call a professional: If water still won t drain or you notice persistent backflow into other fixtures, contact a licensed plumber for a camera inspection and vent assessment. Tip: A pro can diagnose venting or main-line issues not visible from the surface.
estimatedTime':'45-90 minutes'},
Steps
Estimated time: 45-90 minutes
- 1
Prepare and safety check
Gather gloves, bucket, wrenches, flashlight, plunger, and a drain snake. Ensure the area is dry and electricity away from splash zones. Safety first to prevent slips or injuries.
Tip: Wear eye protection and keep kids away from the work area. - 2
Remove drain cover and clean strainer
Pry off the cover, remove visible hair, rinse the strainer, and inspect the tailpiece for any blockages. Reattach the cover firmly to prevent leaks.
Tip: Use needle-nose pliers to pull hair from tight spots. - 3
Inspect and clean the P-trap
Place a bucket underneath, loosen the nuts, and remove the trap if accessible. Clear hair and gunk with a brush, then reassemble tightly.
Tip: Avoid overtightening plastic fittings to prevent leaks. - 4
Use a drain snake to reach deeper
Insert the snake into the drain, rotate as you push, and pull out hair and debris. Repeat until you feel clear passage.
Tip: Keep movements steady to avoid scratching pipes. - 5
Flush and optional enzymatic cleaner
Run hot water through the line for several minutes. If you choose, apply a safe enzymatic cleaner to tackle organics without harsh chemicals.
Tip: Do not mix cleaners and rinse thoroughly between steps. - 6
Re-test and evaluate
Test drainage by running a full sink of water. If the drain flow improves, you can continue maintenance; if not, prepare to call a pro.
Tip: Document drainage speed with a timer for your records. - 7
Call a professional if unresolved
If drainage remains slow or backflow occurs, a licensed plumber can diagnose vent, trap, or main-line issues with a camera and proper equipment.
Tip: Professional help prevents unnecessary pipe damage and guarantees a proper fix.
Diagnosis: Bathtub won t drain, water pools or drains extremely slowly despite a clear surface drain
Possible Causes
- highHair and soap scum buildup just beyond the strainer
- highPartial clog deeper in the drain line or P-trap
- lowVenting issues reducing drainage efficiency
- mediumMineral buildup narrowing pipe diameter
- lowSewer line blockage causing backpressure
Fixes
- easyRemove and clean the drain strainer and inspect the tailpiece for obstructions
- mediumDisassemble the P-trap and remove debris
- mediumUse a drain snake/auger to clear deeper hair buildup
- easyApply a safe enzymatic cleaner to target organic buildup
- hardCall a licensed plumber for camera inspection and vent assessment
Common Questions
What is the difference between a slow drain and a bathtub that won t drain at all?
A slow drain leaves water lingering but gradually clears; not draining means a deeper obstruction or venting issue prevents water from exiting. In both cases, start with simple debris removal and progress to deeper clearing if needed.
A slow drain gradually clears with time, while not draining means you likely have a deeper blockage or vent problem. Start with debris removal and then deeper clearing if needed.
Can chemical drain cleaners damage tub pipes?
Yes, caustic or acidic cleaners can corrode pipes, seals, or the vent system over time, especially in older plumbing. Use enzymatic cleaners or mechanical methods first, and reserve harsher chemicals for unavoidable situations with caution.
Yes, harsh cleaners can damage pipes. It s safer to start with enzymes or mechanical methods.
Is it safe to use a drain snake on a bathtub?
Yes, a hand or toilet auger designed for tub drains is generally safe when used carefully. Avoid forcing the snake and stop if you feel strong resistance. Always wear gloves.
Yes, a tub-specific snake is usually safe if you use it gently and stop if it resists.
What should I do if the tub drain backs up into other fixtures?
Backups suggest a main line or vent problem. Stop DIY attempts if you see repeated backflow, and contact a licensed plumber to inspect the sewer line venting and connections.
If you see backups in other fixtures, call a plumber to check the main line and venting.
How long does it take a plumber to fix a tub drain problem?
Repair time varies with the problem, but many simple clears take 1–2 hours. More complex issues like venting or main-line problems may require scheduling and a longer visit.
It depends on the issue, but simple clears can be quick; vent or main-line problems may take longer.
How can I prevent future bathtub drain clogs?
Regularly clean the strainer, install a hair catcher, flush with hot water weekly, and avoid pouring grease or large food particles down the drain. Routine maintenance reduces future clogs.
Clean the strainer often, use a hair catcher, and flush with hot water regularly to prevent clogs.
Watch Video
Key Points
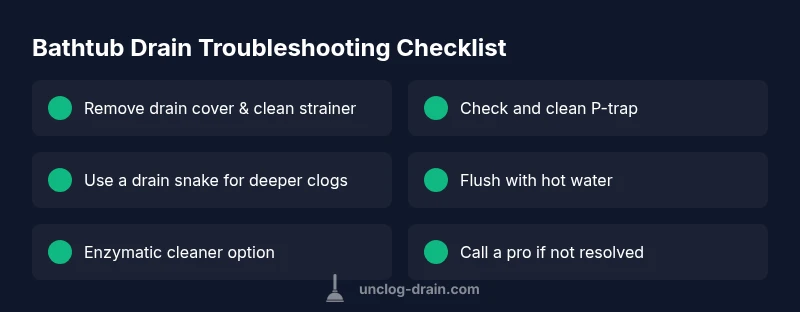
- Start with the simplest fixes (clean strainer)
- Inspect and clean the P-trap if present
- Use a snake for deeper blockages, avoid overusing chemicals
- Test drainage after each step to measure progress
- Call a professional if the drain remains stubborn or venting is suspected