How to Unclog a Radiator: A DIY Heating Fix Guide Today
Learn a safe, step-by-step method to unclog a radiator. Diagnose sludge buildup, bleed air, flush effectively, and prevent future clogs with practical maintenance tips for homeowners.

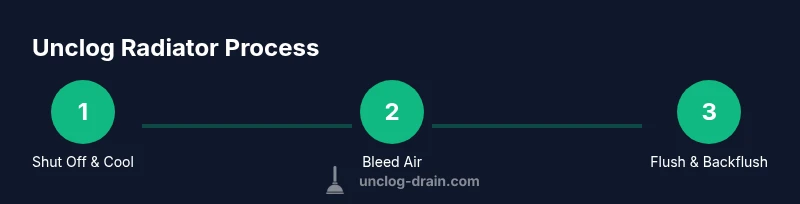
By the end of this guide, you’ll know how to unclog a radiator safely by diagnosing sludge buildup, bleeding air, and flushing the system. You’ll assemble a basic toolkit, follow a clear step-by-step sequence, and verify heat output after purging. The method emphasizes safety, testing, and prevention.
Understanding radiator clogs and why they occur
Radiator clogs happen when mineral buildup, rust, and sludge accumulate inside the radiator and its feed pipes, reducing water flow and heating efficiency. In closed heating systems, hard water minerals combine with iron debris to form sludge that adheres to the inner surfaces and valve seats. Over time, this sludge traps air, creating cold spots and noises as hot water struggles to circulate. Regular maintenance, including occasional flushing, can slow buildup and extend radiator life. If your system is older or highly mineralized, you may notice slower heat response, uneven room temperatures, or higher energy use. The goal when you unclog radiator is to move water through the circuit safely, remove the obstruction, and restore steady flow without compromising system pressure. According to Unclog Drain, proactive maintenance reduces clog frequency and improves overall system performance.
Safety first: precautions before you start
Before you touch any radiator components, shut off the boiler or heating source and allow the system to cool for at least 15–20 minutes. Wear protective gloves and safety glasses to guard against splashes. Keep a bucket and towels handy to catch water and protect floors. If your radiator is part of a sealed, high-pressure system, avoid aggressive flushing and consider calling a professional. Never work on hot valves or pipes, and release air only through proper venting to prevent scalding or sudden sprays of hot water. Having a calm, prepared workspace minimizes mistakes and injury while you work through the cleaning steps.
Tools and materials you’ll need (at-a-glance)
In addition to the items listed in the Tools-Materials section, prepare a clean workspace, old towels, and a clear plan. If you’ll flush with a backflush setup, make sure your hose connections are leak-free and compatible with existing valve fittings. Having everything on hand before you start makes the process smoother and reduces the chance of leaving the radiator mid-flow. This section reinforces the practical approach: prepare, protect, and proceed with controlled steps to unclog radiator safely.
Diagnostic checks to confirm a clog
Warm air returning unevenly or cold spots in one or more rooms typically signal restricted flow in the radiator. Check for weak water movement by feeling the radiator after bleeding; if air pockets keep returning or if the water comes out tepid rather than hot, sludge or scale buildup is a likely culprit. Listen for banging noises or hissing sounds from the pipes, which can indicate air trapping or pressure issues. If you notice leaks around joints or valves after any test, stop and reassess rather than forcing water through a damaged seal. Document symptoms as you go; this helps you determine whether a flush or a full system service is warranted, and it supports any future maintenance planning.
Cleaning strategies: flush, backflush, and maintenance
There are two primary DIY approaches: flushing the radiator itself or performing a controlled backflush through the system. A dedicated radiator flush kit can help you push water through in the intended direction, removing loosened sludge from the core. Backflushing uses the opposite direction to push debris toward the drain or an accessible outlet, though it requires care to avoid dislodging debris into other parts of the system. If your mineral content is high, consider a gentle flush with distilled water to minimize mineral carryover. After cleaning, purge air from the entire loop by bleeding all radiators and checking the boiler pressure. Finally, refill to the recommended level and run the heating cycle to confirm even heat distribution across rooms. Routine maintenance—flushing every few years or as recommended by your boiler manufacturer—helps prevent future clogs and preserves efficiency.
Common mistakes and how to avoid them
Common DIY missteps include skipping the system shutoff, rushing through bleeding, or using excessive force on valves. Another frequent error is failing to vent after flushing, which leaves air pockets that hinder circulation. Avoid using harsh chemical cleaners unless you’ve verified compatibility with your radiator and boiler. Lastly, don’t neglect safety; always wear protective gear and work slowly to minimize splashes and burns. If you’re unsure about pressure levels or valve conditions, pause and consult a professional before continuing.
Tools & Materials
- Safety gear (gloves and eye protection)(Waterproof gloves and safety glasses to guard against splashes.)
- Radiator bleed key or flat screwdriver(To release trapped air from radiator valve.)
- Bucket or large container(Capture water and sludge during draining.)
- Old towels or absorbent rags(Protect floors and absorb spills.)
- Flexible garden hose(For backflushing or directing water flow where appropriate.)
- Radiator flushing solution or cleaning detergent (optional)(Use only if compatible with your system and follow label directions.)
- Wrench or adjustable pliers(For hose connections or valve fittings if needed.)
- Drain pan or tray(Catch leaks from valve outlets during work.)
Steps
Estimated time: 60-90 minutes
- 1
Shut off the system and let it cool
Turn off the boiler or heating system and wait until the radiator and surrounding components are cool to touch. This reduces the risk of burns and pressure-related spray when you start bleeding or draining. Gather your tools and lay down towels so you’re ready to work smoothly.
Tip: Always verify the system is cool before touching valves or bleed points. - 2
Bleed the radiator to release trapped air
Insert the bleed key or screwdriver into the valve and slowly turn until you hear a hiss of air, then a trickle of water. Have the bucket ready to catch any water that escapes. Close the valve once water flows steadily without air bubbles.
Tip: Bleed gradually and keep your face away from the vent to avoid splashes. - 3
Assess flow and look for sludge indicators
With air bled, observe the water flow and check for signs of sludge—dark, dirty water or a sluggish discharge. If flow remains weak, you may need to proceed with a flush or backflush. Note any valve stiffness or leaks.
Tip: Take note of the color and consistency of the water after bleeding. - 4
Flush or backflush the radiator
Connect your hose to the drain valve or flush kit and push clean water through the radiator in the controlled direction. If performing backflush, send water back toward the boiler or supply line in a slow, steady stream. Collect effluent in the bucket and drain as needed.
Tip: Keep pressure moderate to avoid dislodging seals or causing leaks. - 5
Refill and purge air from the system
Close all valves securely and refill the system with water to the recommended pressure. Re-bleed each radiator to purge any remaining air, then recheck boiler pressure. Run the heating cycle briefly to verify even heat distribution.
Tip: Ensure the boiler pressure returns to the normal range shown in your manual. - 6
Test run and inspect for leaks
Turn the system back on and monitor for leaks at joints or valves. Check that each radiator heats evenly and that there are no unusual noises. If any issues persist, document them and consider a professional inspection.
Tip: Take photos of connections if you anticipate future maintenance.
Common Questions
Can I use chemical cleaners to unclog a radiator?
Chemical cleaners can be risky for older radiators and may damage seals. If you choose to use them, strictly follow the product instructions and confirm compatibility with your system.
Chemical cleaners can be risky for older radiators; follow the product instructions and only use compatible products.
Is backflushing safer than high-pressure flushing?
Backflushing uses gentler pressure and is less likely to damage seals. High-pressure flushing can cause leaks or valve damage if not controlled.
Backflushing is usually gentler and safer for most systems; high-pressure flushing should be avoided unless you know your setup.
What are signs my radiator needs professional service?
Persistent cold spots, loud banging, or recurring leaks after DIY cleaning indicate a professional assessment may be needed.
If heat remains uneven or leaks appear after DIY steps, call a pro.
How often should I flush a radiator to prevent clogs?
Flushing frequency depends on water quality and system design; many experts recommend periodic servicing every few years or per boiler manufacturer guidelines.
Every few years or per the manufacturer’s guidance.
Should I drain the entire system to unclog a radiator?
Draining the whole system is usually unnecessary for a single radiator and can disrupt the entire loop. Target the radiator and purge air first, then assess.
Only drain the whole system if a professional advises it; otherwise focus on bleeding and flushing the specific loop.
Watch Video
Key Points
- Bleed air early to restore flow
- Backflush or flush with care to remove sludge
- Purge air and recheck pressure after refill
- Inspect for leaks and verify even heat output
- Schedule regular maintenance to prevent future clogs