How to Clean a Clogged Washer Drain: DIY Guide
Learn safe, practical steps to clear a clogged washer drain with common DIY tools. Unclog Drain shares a detailed, beginner-friendly approach to remove lint, soap scum, and debris, plus prevention tips to keep drains flowing.

You will learn to locate, access, and safely clear a clogged washer drain using safe, common tools. Before you begin, unplug the washer, pull it away from the wall, shut off any nearby water supply if needed, and gather a drain snake, a bucket, towels, pliers, flashlight, and rubber gloves. The guide covers lint, soap scum, and small objects, plus prevention tips.
Why washer drain clogs happen and why it matters
Clogged washer drains disrupt laundry routines and can lead to standing water, mold growth, and foul odors. According to Unclog Drain, most residential washer drain clogs start with lint and soap scum accumulating in the standpipe, trap, or hose. Over time, small items like coins or buttons can travel with the drum's rinse cycles and lodge in piping. Understanding where clogs form helps you target the fix rather than guess.
When you identify a clogged path, you can prevent overflow during the next laundry cycle and minimize water damage behind the washer. A slow drain often indicates a partial blockage, while a full stop means the clog is more significant. If you hear gurgling noises or see water backing up into the tub, stop using the machine and address the clog promptly. This keeps your washer pump from burning out or slipping a belt due to overwork.
In this section, we’ll break down typical clog locations—each with practical checks you can perform safely. Remember to power down, protect the floor, and wear gloves. The following steps emphasize mechanical clearing over chemical cleaners, which reduces risk to your machine and home.
Safe prep and safety reminders before you start
Before you touch any moving parts, unplug the washer from the wall outlet and move the unit away from the wall to access hoses and the drain. Keep a bucket and towels handy for water that escapes. Wear rubber gloves and eye protection to guard against splashes and sharp edges. If your washer is installed behind a cabinet, you may need to detach the access panel with a screwdriver to reach the drain hose cleanly. Do not attempt to unplug, disassemble, or run water into electrical components while the machine is plugged in. If stalling water or electricity risk is present, consider calling a professional immediately.
Tools and materials you’ll need
- Bucket, 1–2 gallons (essential for catching water)
- Rubber gloves (essential)
- Flashlight (essential for visibility)
- Drain snake / flexible auger (essential)
- Pliers and adjustable wrench (essential)
- Screwdriver (essential for removing access panels)
- Towels or rags (essential for spills)
- Optional: Wet/dry vacuum (helpful, not mandatory)
- Optional: Knife or blade for freeing debris in tight spots (use carefully)
Having these on hand before you start minimizes delays and keeps the work clean and safe.
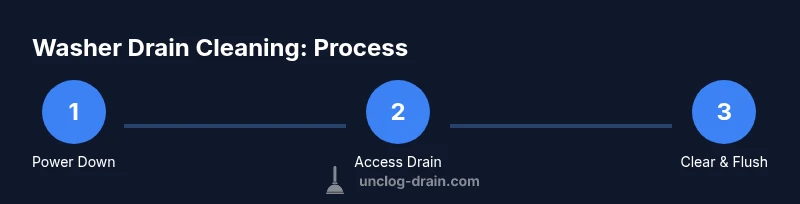
Step-by-step: Step 1 — Power down and access the drain
- Unplug the washer and move it a little away from the wall to access the drain line. This reduces the risk of accidental shock while you work.
- If your unit has a rear access panel, remove it with a screwdriver to expose the drain hose and trap area. This helps you see the blockage more clearly and prevents guesswork during clearing.
- Place a bucket beneath the drain connections to catch any residual water and drips. A folded towel around the area keeps the floor dry.
Tip: Keep the power off during the entire process and do not touch electrical components with wet hands. This minimizes the risk of electric shock and equipment damage.
Step-by-step: Step 2 — Inspect the trap and accessible piping
Carefully inspect the drain trap or cleanout for visible blockages. If your washer has a standpipe cleanout, disconnect it slowly and look for hair, lint, soap scum, or small items stuck in the bend. Use pliers to gently remove larger debris, then wipe the area clean with a rag before attempting the next step.
Tip: Take a quick photo of how hoses and clamps were arranged before you remove anything; it makes reassembly safer and faster.
Step-by-step: Step 3 — Use a drain snake to clear the main path
Insert the flexible drain snake into the trap or pipe opening and work it in slowly while rotating to break up the clog. Push and pull the snake while twisting to grab lint and debris, then pull the obstruction free. If you hit resistance, back up a bit and reinsert at a different angle.
Tip: Do not force the snake through a bend; instead, remove the bend if possible or work around it gradually to avoid damaging the pipe.
Warning: Be mindful of sharp edges and wear gloves to protect your hands from pinching or splinters.
Step-by-step: Step 4 — Flush and test the drain
Reconnect any disconnected parts loosely and reassemble the front panel if you removed one. Run a short rinse cycle with warm water to test drainage. Watch the standpipe and drain hose for smooth flow without backflow. If water backs up again, re-check the trap for residual debris and repeat the snaking process as needed.
Tip: Use the flashlight to inspect for remaining buildup after flushing; small clogs can be difficult to see without proper lighting.
Step-by-step: Step 5 — Prevent future clogs with maintenance
Schedule a simple maintenance routine:
- Clean the washer filter/pump strainer if your model has one.
- Run an occasional hot-water cycle with a cup of white vinegar or a washing machine cleaner to reduce soap scum buildup.
- Check hoses for kinks and replace damaged sections to maintain good drainage.
Tip: Establish a quarterly check-in to inspect the drain path and hoses; regular awareness reduces the chance of big clogs forming.
Step-by-step: Step 6 — Troubleshooting advanced scenarios
If the clog persists, you may be dealing with a more serious blockage in the main sewer line or an extended pipe run. In this case, avoid pouring chemical drain cleaners into the washer drain, as they can damage the pump and piping. Consider renting or borrowing a plumber’s auger with a longer reach or contacting a licensed professional if you notice persistent backups or foul odors that don’t fade after flushing.
Tip: Do not attempt to disassemble the pump housing beyond the manufacturer’s recommended access points; wrong disassembly can cause leaks and warranty issues.
Step-by-step: Step 7 — Reassemble and finalize
Reattach any panels, clamps, or hoses you previously removed. Ensure all connections are tight and aligned to prevent leaks. Plug the washer back in and move it back into its original position. Run a full wash cycle to verify that the drain remains clear and that there are no leaks around any fittings.
Tip: Keep a towel handy during the first few uses after reassembly to catch any minor drips that may occur as seals settle.
Step-by-step: Step 8 — Documentation and prevention planning
Record the date of the cleanup and any parts replaced for future reference. Maintain a simple spare parts list and a short maintenance scheduler. Share this information with other household members so everyone follows the same prevention steps and avoids accidental re-clogging.
Tip: Consider placing a reminder on a calendar or phone to run a quarterly drain check; consistency beats reactive fixes.
Step-by-step: Step 9 — When to call a pro and what to expect
If you encounter repeated clogs, recurring backups, or you’re uncomfortable handling electrical components, it’s wise to call a plumber. A professional assessment can uncover underlying issues like sewer line problems or venting blockages that affect multiple fixtures. Ask for a written estimate and discuss preventive maintenance options to minimize future costs.
Tip: The Unclog Drain team recommends professional help when safety, warranty, or repeated failures are at stake to protect your plumbing system.
Tools & Materials
- Flat-head screwdriver(For removing access panels if needed)
- Bucket(2 gal capacity recommended)
- Rubber gloves(Waterproof; protect hands from debris and chemical cleaners)
- Flashlight(Bright, focused light for visibility in the drain area)
- Drain snake / flexible auger(6–8 ft length; choose a model with a forward-turn tip)
- Pliers(Needle-nose or slip-joint for debris removal)
- Adjustable wrench(For hose clamps and fittings)
- Towels/rags(Contain spills and keep area dry)
- Wet/dry vacuum (optional)(Useful for removing standing water)
Steps
Estimated time: 60-90 minutes
- 1
Power down and access the drain
Unplug the washer and move it a few inches from the wall to expose the drain hose and trap. If there is a rear access panel, remove it with a screwdriver to improve visibility and access. This minimizes risk and makes the clearance easier.
Tip: Safety first: never touch electrical components with wet hands and keep your workspace dry. - 2
Inspect the trap and reachable piping
Look for lint, hair, coins, and soap scum in the trap or cleanout. Use pliers to remove obvious debris carefully, then wipe the area clean so you can check for residual buildup.
Tip: Take a quick photo of hose configurations for easy reassembly. - 3
Insert and advance the drain snake
Gently insert the snake into the drain opening and rotate as you push; aim to break up the blockage rather than force through. Pull back periodically to grab dislodged material.
Tip: Avoid forcing through tight bends—pause and adjust angle if you meet resistance. - 4
Flush the path and test drainage
Reconnect any removed parts loosely and run a short warm-water cycle to verify flow. Observe the standpipe and hose for leaks or backflow.
Tip: If water backs up, repeat snaking or inspect the trap again for stubborn debris. - 5
Deep-clean and preventive steps
Perform a maintenance clean by running an empty hot-water cycle with a bit of white vinegar or a washer cleaner. Inspect hoses for wear and replace damaged sections.
Tip: Set a quarterly reminder to check hoses and drains. - 6
Handle advanced clogs with care
If you suspect a larger blockage in the main line or vents, avoid chemical cleaners and seek a professional. They can assess sewer-related issues and ensure proper venting.
Tip: Chemicals can damage seals and void warranties; choose non-chemical approaches when possible. - 7
Reassemble and verify
Secure all panels and hoses, plug the machine back in, and place it back in its original position. Run a full cycle to confirm the drain stays clear.
Tip: Watch for leaks during the first few uses after reassembly. - 8
Document and schedule maintenance
Log the date of cleaning and any parts replaced, and set reminders for routine drain checks to prevent future clogs.
Tip: A simple maintenance log saves time during future fixes. - 9
Know when to call a pro
If clogs recur despite following these steps, or you’re unsure about electrical components, contact a licensed plumber for a professional evaluation.
Tip: Professional help can prevent water damage and protect appliance warranty.
Common Questions
Will using chemical drain cleaners damage my washer?
Yes, chemical cleaners can degrade seals, hoses, and the pump over time. They should be avoided when clearing a washer drain. Use mechanical methods first and only seek professional help if the clog persists.
Chemical cleaners can harm washers; stick to mechanical clearing first and consult a pro if needed.
Can I unclog a washer drain without moving the washer?
In some models you can access the drain via an exterior panel or standpipe, but many require moving the unit to reach the drain hose and trap. If you can’t reach the drain safely, stop and call a professional.
Sometimes you can reach it, but if you can’t safely access it, call a professional.
What are common causes of washer drain clogs?
Lint, soap scum, and hair are the leading culprits. Small objects accidentally dropped into the drum can also contribute, especially if the standpipe and trap aren’t cleaned regularly.
Lint and soap scum are the main culprits, along with stray debris in the drain.
How often should I clean my washer drain?
Aim for a quarterly drain check and maintenance clean, plus an annual thorough inspection, to catch buildup before it becomes a clog.
Every few months is a good rule of thumb for maintenance.
Should I call a plumber for a slow drain?
If the drain remains slow after mechanical clearing, or if backups continue across fixtures, a professional assessment is warranted to rule out mainline or vent issues.
If it stays slow after DIY steps, get a pro to check the plumbing system.
Will clearing the trap damage my washing machine?
When done carefully, clearing the trap with proper tools minimizes risk. Avoid forcing tools into the machine and disconnect power first to prevent damage or shock.
Be careful with traps and always unplug the machine first.
Watch Video
Key Points
- Clear the clog safely with a snake and mechanical clearing methods
- Inspect traps and hoses before pulling debris
- Test the drain with a short cycle to confirm flow
- Establish a maintenance routine to prevent future clogs