How to Check a Clogged Air Filter: A DIY Guide
Learn how to inspect, test, and replace clogged air filters in home HVAC and cars. This step-by-step guide covers signs of clogging, proper tools, safety, and best-practice maintenance from Unclog Drain.

By the end of this guide, you’ll be able to check a clogged air filter in both home HVAC and vehicle contexts, identify signs of dirt and reduced airflow, and decide whether cleaning or replacement is needed. You’ll follow safe inspection steps, gather the right tools, and use a simple replacement checklist that you can reuse each season. Proper filter maintenance saves energy and improves performance.
Why Checking Your Air Filter Matters—Right Now
Filters are the first line of defense against dust, allergens, and debris circling through your home or vehicle. A clogged filter restricts airflow, makes heating or cooling systems work harder, and can trigger higher energy use, uneven temperatures, or engine inefficiencies. According to Unclog Drain, regular inspection helps catch problems early and saves you from bigger repairs later. Keeping filters clean also reduces indoor air pollution and extends the life of your HVAC components and your car’s engine air path.
How Dirty Air Filters Affect Performance and Safety
A dirty air filter reduces airflow, causing wear on the blower motor and compressor in HVAC systems. In cars, a clogged intake filter can lower fuel efficiency and performance, and may trigger fault codes related to air flow. When airflow is restricted, your system compensates by pulling harder, which can raise energy bills and shorten equipment life. The key takeaway is simple: a clean filter keeps air moving smoothly and protects connected components.
Signs a Filter Is Clogged or Deteriorated
Look for visible dirt on the filter pleats, especially near the intake edge. A discolored frame or stained housing often indicates heavy buildup. For HVAC, you may notice reduced airflow from registers or longer heating/cooling cycles. In a car, you might experience reduced throttle response or difficulty maintaining steady RPMs. If you can’t see dirt but airflow seems weak, it’s still worth testing the filter and checking the housing for leaks or gaps.
HVAC vs Car Air Filters: Context Matters
HVAC filters sit in a return-air duct or furnace compartment and protect your entire home HVAC system. Car engine air filters protect the intake path and engine combustion. While the inspection approach is similar—check fit, inspect the media, and assess airflow—the replacement intervals and filter specs differ. Always refer to the manufacturer’s guidance for compatibility and installation orientation.
Tools and Materials You’ll Need (Essential List)
- Replacement air filter of the correct size and rating (essential)
- Gloves (essential)
- Flashlight (essential)
- Screwdriver (if the access panel requires it) (essential if applicable)
- Clean cloth or paper towels (essential)
- Trash bag or sealed disposal bag (essential)
- Optional: vacuum attachment for housekeeping (useful, not required)
Having the right tools on hand makes the inspection straightforward and minimizes the risk of damaging the filter housing.
Visual Inspection: What Dirt and Mold Look Like
A new or clean filter shows uniformly colored media with visible pleats; dirt, dust, or debris sticks to the surface in a uniform pattern. If you see dark stains, mold growth, dampness, or a crumbling edge, replace the filter immediately and inspect the housing for moisture intrusion. Dust build-up near the intake indicates reduced efficiency, and you should address the source of dust in your environment to prevent rapid re-clogging.
How to Test Airflow and Decide on Cleaning vs Replacement
For HVAC: check airflow by feeling air at the registers with your hand at a safe distance. If airflow is weak, inspect the filter and replace if discolored or clogged. For cars: with the engine off, remove the filter and hold it up to the light; if you can’t see light through the media, replace it. If the filter is damp or moldy, replace it and investigate moisture sources in the housing. If you’re unsure about cleaning, opt for replacement to avoid underperforming the system.
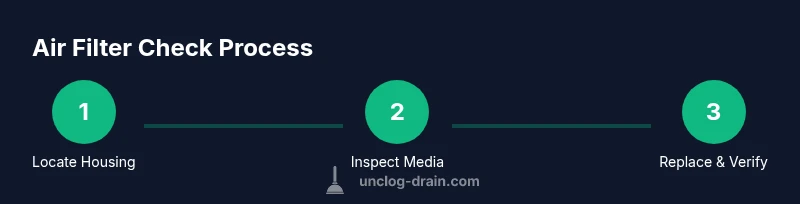
Step-By-Step Quick Reference: What to Do First
The quickest path is to locate the filter housing, assess the filter type and size, and remove the filter carefully. Take a quick look at the media for discoloration, and then choose replacement if soiled beyond a simple wipe. Reinsert the new filter with the correct orientation, seal any gaps, and run the system briefly to verify airflow. This quick loop helps prevent longer downtime and ensures you’re acting on solid evidence of clogging.
Replacement and Aftercare: Reinstall and Verify
Install the new or cleaned filter, ensuring it sits flat and oriented as indicated by arrows on the frame. Re-seal any housing covers and restore power to the HVAC or vehicle. Run a quick test to confirm air is moving freely through the vents or intake and monitor for odd smells or noises that could indicate improper fit. Keep a log of the date and filter type for future maintenance.
Maintenance Strategy: Create a Reusable Check Plan
Develop a simple seasonal checklist that prompts you to inspect each filter, replace when needed, and document the replacement. Consider environmental factors (pets, dusty surroundings, seasonal weather) that affect clogging rates. Creating a routine reduces the risk of unexpected filter failure and helps you budget for replacements.
Common Pitfalls and How to Avoid Them
Avoid forcing the filter into a housing that’s the wrong size or orientation. Never reuse a visibly dirty filter in a returning air path, and don’t neglect the housing seals, which can cause leaks. Ensure you don’t use harsh cleaners on the filter media, which can damage it. If you encounter moisture, mold, or odors that persist after replacement, consult a professional before continuing.
Quick Troubleshooting Resources and Next Steps
If you’re unsure whether the filter is the root cause of airflow issues, run through a quick diagnostic: verify the filter size, check for housing leaks, and confirm the target airflow pattern. Use manufacturer guidelines or a trusted DIY guide for appliance-specific steps. Consider scheduling a professional inspection if problems persist after replacement.
Practical Takeaway: Keep It Simple and Repeatable
A clean air filter is a small investment that yields big dividends: better air quality, lower energy use, and longer equipment life. Stick to a regular inspection schedule, replace when necessary, and document each change. By building a lightweight maintenance loop, you protect your home and vehicle from avoidable wear and tear.
Tools & Materials
- Replacement air filter (correct size & rating)(Check the filter labeling or manual for size and MERV rating for HVAC; for cars, use OEM or recommended brand)
- Gloves(Disposable or reusable; protects hands from dust and contaminants)
- Flashlight(Bright light helps inspect the filter media and housing interior)
- Screwdriver (if needed for access panel)(Phillips or flathead depending on panel screws)
- Cloth or paper towels(Wipe away dust and moisture from housing surfaces)
- Trash bag(Seal old filter securely before disposal)
- Vacuum with hose attachment(Useful for cleaning dust from the housing but not required)
Steps
Estimated time: Estimated total time: 25-40 minutes
- 1
Locate the filter housing
Find where the filter sits in your HVAC return or your car’s intake. Check the owner’s manual if you’re unsure of the exact location. This initial step saves time and prevents accidental damage when you open the panel.
Tip: If the panel is stiff, use a gentle wiggle or a small amount of penetrating oil on stubborn screws. - 2
Power down and prepare
Turn off the HVAC system at the breaker or switch, or park the car with the engine off. Wearing gloves, set up your work area with a tray or bag to catch dust. This safety step reduces the risk of shock or injury.
Tip: Double-check power is off before touching the filter housing to avoid injury. - 3
Remove the old filter
Carefully slide or lift the filter out of its frame, noting orientation arrows on the filter. Handle gently to avoid dislodging dirt into the duct. If the filter sticks, check for bent channels or debris in the housing.
Tip: Take a quick photo of the old filter in place for reference on size and orientation. - 4
Inspect the filter media
Hold the filter up to a light source and check for discoloration, tears, or dampness. A heavily soiled filter is a clear sign it needs replacement. If you see mold or moisture, address moisture sources before reinserting a new filter.
Tip: A filter that looks well-used but not visibly dirty may still be over its service life in dusty environments. - 5
Decide on cleaning vs replacement
Most disposable filters should be replaced rather than cleaned. Some reusable filters can be cleaned per manufacturer instructions, but improper cleaning can reduce filtration efficiency. When in doubt, replace to maintain proper airflow.
Tip: Blocked filters rarely benefit from cleaning; replacement is usually the safer path. - 6
Clean the housing area
Wipe the inside of the filter chamber with a dry cloth to remove loose dust. If moisture or spills exist, dry the area thoroughly before installing a new filter. This step helps seal better and prevents debris from bypassing the filter.
Tip: Avoid using water on many HVAC housings unless the manual allows it. - 7
Install the new or cleaned filter
Insert the filter with the arrows pointing toward the airflow direction. Ensure it sits flat and there are no gaps around the edges. Reclose the panel securely to prevent air leaks.
Tip: If you feel resistance, remove and reinsert to confirm correct orientation. - 8
Restore power and test airflow
Turn the system back on and run for a few minutes to ensure air moves freely through all vents. Listen for unusual noises that could indicate misalignment. Check for any airflow irregularities at multiple outlets.
Tip: Run a quick check at several vents to verify even airflow. - 9
Record the replacement
Note the date, filter size, and MERV rating in a maintenance log. Keeping a record makes it easier to schedule future inspections and replacements. If you use a reusable filter, record cleaning dates too.
Tip: Keep your notes with your filter to simplify future purchases. - 10
Clean up and dispose
Seal the old filter in a bag and dispose according to local guidelines. Wipe down any surfaces touched during the process to reduce dust circulation. Return all tools to their place.
Tip: Wash your hands after handling filter material to avoid skin irritation. - 11
Set a maintenance cadence
Create a routine: inspect filters on a set schedule and replace as needed depending on environment. High-dust or pet-heavy homes may require more frequent checks. A consistent cadence helps prevent clogging and energy waste.
Tip: Pair filter checks with seasonal HVAC service visits for efficiency. - 12
Troubleshoot persistent problems
If you still notice weak airflow after replacement, check for other issues such as duct leaks, blocked vents, or a faulty blower motor. In cars, a persistent air restriction could indicate a deeper intake or engine problem. When in doubt, consult a professional.
Tip: Document symptoms and steps taken to help a technician diagnose quickly.
Common Questions
How often should I check my HVAC air filter?
Regular checks help prevent efficiency loss and wear on your system. The frequency depends on usage, environmental dust, and pets. In dusty environments, inspect filters more often and replace promptly when dirty.
Check your HVAC filter regularly; more often in dusty homes. Replace promptly when it looks dirty.
Can a clogged air filter cause higher energy bills?
Yes. A clogged filter restricts airflow, forcing your system to work harder and use more energy. Replacing the filter can improve efficiency and reduce strain on fans and blowers.
A dirty filter can raise energy use because your system has to work harder to push air through.
What is the difference between cleaning and replacing a filter?
Most filters are designed to be replaced. Cleaning is sometimes possible for reusable types, but improper cleaning can reduce filtration efficiency and allow contaminants to bypass the media. When in doubt, replace with a new filter.
Most filters should be replaced; cleaning is only good for reusable types per manufacturer guidelines.
How do I know what size filter I need?
Check the filter frame for size markings, review the HVAC manual, or measure the existing filter with a ruler. For cars, use the owner’s manual or a trusted parts retailer to confirm OEM part numbers and dimensions.
Look at the filter frame for size or check the manual; for cars, use the OEM part as a guide.
What should I do if air flow remains weak after replacement?
If airflow stays weak, inspect for duct leaks, blocked vents, or a faulty blower motor. In cars, persistent restriction could indicate deeper intake issues. Consider professional inspection if issues persist.
If airflow is still weak after replacement, check for leaks or blockages and call a pro if needed.
Are there safety risks when inspecting air filters?
Always power down equipment before opening housings. Wear gloves to avoid contact with dust and mold. If you notice mold or wetness, handle carefully and seek professional guidance.
Power down first, wear gloves, and be cautious of mold or moisture.
Watch Video
Key Points
- Check filters regularly to prevent airflow loss.
- Replace when visibly dirty rather than attempting to clean heavily soiled media.
- Use the correct size and orientation for installation.
- Document replacements to simplify future maintenance.