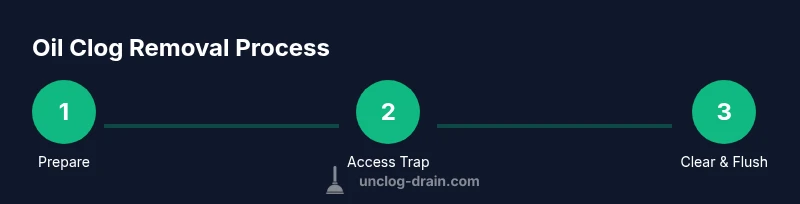
How to Unclog Oil from Sink: A DIY Guide
Discover safe, effective steps to unclog oil from sink, with tools, step-by-step instructions, and prevention tips to keep kitchen drains clear.

To unclog oil from a sink, start by removing standing water and clearing the drain with basic tools, then use mechanical methods (plunger or drain snake) to break up the oil buildup, followed by a hot water flush. Avoid caustic cleaners on kitchen pipes, and finish with a thorough rinse. This approach minimizes damage and speeds restoration.
Why unclog oil from sink matters
Oil and grease entering drains can coat the interior of pipes, slow drainage, and invite bacteria and odors. In kitchens, cooking oil, fats, and greasy sauces are common culprits. If you want to unclog oil from sink, you must address both the blockage and the source of the oil to prevent future buildup. Oil behaves like glue in cold pipes: it clings to the sides, traps hair and food scraps, and gradually forms a stubborn, semi-solid plug. Left unchecked, it can move into the trap and beyond, leading to sluggish drainage or a full backup. The cost of ignoring the problem is not just an inconvenient clog; it can create sewer odors, odors in the cabinet, and even unsanitary conditions around a breakfast or dinner prep area. According to Unclog Drain, quick, controlled action reduces the risk of escalating blockages and makes subsequent maintenance easier. You’ll learn a safe, practical approach to remove the oil without damaging pipes or fixtures.
Safety first: assess and prepare
Before you dive into any unclogging task, set safety and prep in place. Put on rubber gloves and eye protection; hot water and cleaning agents can splash. Clear the area under the sink so you can access the P-trap and drain, and place a bucket and towels to catch spills. If you suspect a gas or sewer odor, stop and ventilate; never mix cleaners with unknown fumes. For oil clogs, the dish soap and water you’ll use later can reduce surface tension, but avoid mixing caustic drain cleaners with oil slicks, which can damage metal pipes or plastic fittings. Turn off power to any nearby disposal if present to prevent accidental activation. Finally, inspect the sink trap visually from under the cabinet; you may find the first sign of clogging there, and it often provides a straightforward clearance. This preparation reduces mess and protects you from common hazards.
Understanding oil clog mechanics in home drains
Oil-based clogs form when cooled fats and oils solidify inside pipes, trapping debris and reducing water velocity. Grease that sticks to the pipe walls creates a rough surface that encourages more sediment to cling, gradually narrowing the pipe and increasing the likelihood of a backup. In most kitchens, the first line of defense is the P-trap; if you remove the trap and find a greasy, waxy buildup, you’re likely dealing with a formed plug rather than a loose hair tunnel. Recognizing where the clog begins helps you choose the best method—mechanical disruption in a trap-based setup or deeper snaking for longer runs. The Unclog Drain team notes that addressing both the symptom (the clog) and the source (grease disposal habits) yields the most durable results.
Mechanical approaches: plungers and augers
Mechanical methods rely on physical force to loosen and dislodge the clog. A sink plunger can create a pressure pulse that moves the oil, while a drain snake or auger can reach beyond the trap to break apart the fatty plug. For best results, seal the overflow (if present) and ensure a good seal around the plunger. When using a snake, feed it slowly and rotate to cut through the slick, greasy layer. If you’re dealing with a stubborn accumulation, remove and clean the P-trap first to clear the easiest path and inspect for damage. Always work with a bucket to catch dirty water and wear gloves to protect your hands.
Chemical vs mechanical: when to avoid acids
Chemicals can be tempting for quick fixes, but most kitchen oil clogs respond poorly to caustic or acidic products. Harsh cleaners can damage plastic pipes, degrade gaskets, and produce harmful fumes. For oil-based blockages, mechanical methods combined with hot water flushes are safer and effective. If you must use a cleaner, choose enzyme-based products that target organic buildup and avoid mixing cleaners with oil residues. Remember that the goal is to restore flow, not to chemically digest solidified fats in a way that could compromise joints and seals.
Quick methods for oil clogs specifically
As a specialized approach, you can first flush the drain with hot water (not boiling) and a few drops of mild dish soap, then use plunger or snake to disrupt the film. After mechanical work, run hot water for several minutes to help wash away loosened grease. If you have a garbage disposal, operate it only after confirming the blades are not blocked and the trap is clear. In many cases, the clog is local to the trap area, making removal straightforward and reducing the risk of debris migrating further into the pipes.
Preventing future oil clogs: best practices
Prevention is easier than remediation. Recycle used cooking oil by letting it cool and pouring into a sealable container for disposal, instead of pouring it down the drain. Use a strainer to catch solids, wipe grease from dishes before rinsing, and run hot water and a small amount of dish soap down the drain after cooking to keep fats from sticking to pipes. Periodic trap inspections and mindful disposal habits reduce the chance of recurring clogs. A quick monthly check under the sink and a gentle flush during heavy grease days can go a long way toward keeping your kitchen drain clear.
Troubleshooting and signs of success
You’ll know you’ve successfully unclogged oil from sink when water drains quickly and without gurgling, the trap remains dry and leak-free, and there’s no persistent odor. If you still notice slow drainage after attempting the above steps, re-check the trap, re-snake the line, or consider repeating the hot-water flush. Persistent backups may indicate a deeper line issue, which could require professional inspection to avoid water damage or sanitary hazards.
What to do if the clog returns
If oil clogs recur within a short period, revisit disposal habits and consider a deeper cleaning routine for the entire drain line. Investigate the possibility of a partial blockage in the main line and confirm that venting is adequate. Regular maintenance, combined with mindful use of the disposal and proper disposal of cooking oils, helps prevent repeating incidents. This is also a good time to review local guidelines for oil disposal and environmental considerations.
Tools & Materials
- Rubber gloves(Protect hands from hot water and debris)
- Dish soap(Use a small amount to help emulsify grease)
- Bucket(Catch water and oil when you remove the trap)
- Old towels or rags(Protect surfaces and clean spills)
- Plunger (cup or flange)(Seal around the drain for a pressure push)
- Drain snake / auger(3-6 feet is typical for kitchen drains)
- Adjustable wrench(Loosen and tighten trap nuts)
- Pliers or channel locks(For stubborn nuts or trap removal)
- Plastic scrub brush(Clean the trap and piping outside the joint)
Steps
Estimated time: 30-45 minutes
- 1
Prepare the area and remove standing water
Clear the under-sink area and place a bucket. Remove as much standing water as possible from the sink using a cup or small container. This makes it easier to access the trap and the drain opening.
Tip: Keep towels handy to catch splashes. - 2
Inspect and remove the P-trap
Place the bucket under the trap, then use the wrench to loosen the nuts. Remove the trap and check for a grease-coated blockage. Clean the trap with soap and hot water, and set it aside for reassembly.
Tip: Be mindful of the orientation to avoid reassembly errors. - 3
Clear the trap and drain inlet
After removing the trap, clear any visible grease with a brush. If the inlet is still blocked, use the plunger to dislodge the material, working with short, firm strokes.
Tip: Do not force the snake if you feel heavy resistance. - 4
Snake the drain beyond the trap
Insert the snake into the pipe beyond the trap and rotate slowly as you push. Stop if you meet resistance and pull back slightly before continuing. This helps break up the oil film further down the line.
Tip: Avoid bending the snake sharply to prevent kinking. - 5
Reassemble the trap and test a flush
Reattach the P-trap, ensuring all washers are seated and nuts are snug. Run hot water into the sink for several minutes to wash away grease. Check for leaks at the joints.
Tip: Hand-tighten first, then snug with wrench to avoid stripping. - 6
Finish with a final flush and preventive steps
Finish with a long hot-water flush and a small amount of dish soap to emulsify any residual fats. Implement prevention steps like oil disposal in a container and a monthly drain check.
Tip: Don’t pour oil down the drain in large quantities; let it cool and store for disposal.
Common Questions
Is it safe to use chemical drain cleaners for oil clogs?
Chemical drain cleaners can damage pipes, especially in kitchen lines. Mechanical methods are safer for oil-based clogs.
Chemical cleaners can damage pipes; mechanical methods are safer for oil clogs.
Will hot water alone unclog an oil clog?
Hot water helps dissolve some grease but is rarely enough on its own for a solid oil clog. It works best as part of a broader mechanical approach.
Hot water helps, but usually isn’t enough by itself.
Can baking soda and vinegar remove oil clogs?
Baking soda and vinegar can loosen light buildup, but they rarely solve heavy oil clogs. Use as an occasional aid, not the sole method.
They can help a bit, but aren’t a guaranteed fix for heavy oil clogs.
When should I call a plumber?
If multiple DIY attempts fail or clogs reappear despite maintenance, a licensed plumber can inspect the line and rule out deeper issues.
If it keeps backing up, call a plumber.
Can oil clogs indicate a larger plumbing problem?
Occasional kitchen clogs are common, but frequent oil-based blockages can signal broader pipe buildup or venting issues that warrant professional evaluation.
Frequent clogs could mean bigger pipe issues.
Is removing the P-trap necessary?
Removing and cleaning the P-trap often provides the easiest access to the clog and helps verify there’s no damage that could cause leaks.
Yes, remove the P-trap for a thorough clear.
Watch Video
Key Points
- Act quickly to prevent grease buildup
- Use mechanical methods before chemical cleaners
- Inspect and clean the P-trap for best results
- Adopt better disposal habits to prevent future clogs