How to Unblock a Sink Without a Plunger: Step-by-Step Guide
Learn safe, proven steps to unblock a sink without a plunger using hot water, baking soda and vinegar, a drain snake, and basic tools. Expert tips help prevent future clogs and avoid chemical cleaners.

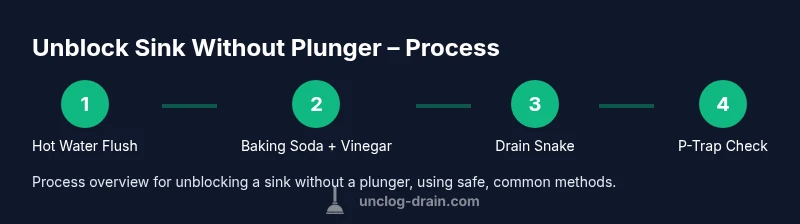
To unblock a sink without a plunger, start with hot water flush, baking soda and vinegar, then mechanical methods like a snake or wet-dry vacuum. Avoid harsh chemical cleaners as they can damage pipes. If the clog persists, try removing the P-trap with basic hand tools before calling a pro.
Why a Plunger Isn’t Always Needed
According to Unclog Drain, most kitchen sink clogs aren’t created equal. A plunger can help with some surface blockages, but many sinks clog deeper in the drain where a plunger seal is less effective. In practice, DIY fixes that target the grease, soap scum, and hair buildup common to kitchen and bathroom sinks tend to work more reliably. By understanding where clogs form and how water flows through the trap, you can pick the right tool for the job and avoid making the situation worse. This section explains why alternative approaches are often faster, safer, and less messy than yanking on a plunger, especially for sinks with disposal units or tight cabinet space.
Safety First: Prep & Protect Your Area
Before starting any unclogging method, safety comes first. Put on rubber gloves and eye protection to guard against splashes. Clear the area around the sink and place a bucket underneath the trap to catch water and debris. If you have a garbage disposal, switch off the unit at the circuit or unplug it to prevent accidental activation. Lay down old towels or a drop cloth to minimize spills. Ventilate the space if you’re using any cleaners with a strong odor. A quick safety check now prevents avoidable injuries and makes each subsequent step smoother and more effective.
Step 1 — Flush with Hot Water and Gentle Degreasing
Hot water can dissolve and loosen many everyday clogs caused by grease, soap residue, and food oils. Boil water in a kettle or pot and pour it in stages into the drain, allowing a moment between pours for the water to work. This staged approach reduces the risk of splashing and pipe damage while encouraging a smooth flow. If you hear a hiss or see bubbling, pause and resume after a minute. For best results, do this as the first action after safety prep and avoid using boiling water on PVC piping that’s very old or brittle.
Step 2 — Baking Soda and Vinegar Action
Follow with a simple chemical-free fizz using baking soda and white vinegar. Pour about a half cup of baking soda into the drain, then slowly add a cup of white vinegar. Cover the drain with a plug or damp cloth to keep the fizzing action contained, and wait 15 to 20 minutes. The rising fizz helps loosen smaller obstructions and push dissolved debris toward the trap. After the wait, flush again with hot water to clear the loosened material from the pipe.
Step 3 — Mechanical Options: Drain Snake / Auger
If the clog remains, a hand-crank drain snake is an effective, affordable tool to reach beyond the immediate drain opening. Carefully feed the snake into the drain while turning the handle to break through the obstruction. When you feel resistance, rotate and pull back slowly to capture the clog and haul it out. Retrace the motion a few times, then pull the snake free and run hot water to flush the line. This method does not require any chemical cleaners and minimizes risk to pipes.
Step 4 — Vacuum Suck Method with a Wet/Dry Vacuum
A wet/dry shop vacuum can sometimes pull a clog out when other methods fail. Set the vacuum to liquid mode if available, and seal the drain opening with a damp cloth to improve suction. Run the vacuum for 20–30 seconds at a time, then release and reseal to repeat. Be patient and use several short suction attempts rather than one long pull. This method works best for stubborn debris near the drain’s mouth and for light grease buildup.
Step 5 — Inspect and Clean the P-Trap
If the drain still runs slowly, you may need to inspect the P-trap beneath the sink. Place a bucket under the trap, then use a wrench or adjustable pliers to loosen the slip nuts. Detach the trap carefully, remove debris, and rinse the parts before reassembling. Reattach, ensuring a tight seal to prevent leaks. Reconnect the drain and run water to confirm a steady flow. If you find a large amount of hair or food particles, take a photo for future reference and consider a fine mesh strainer to prevent future clogs.
Step 6 — When DIY Has Reached Its Limit
If repeated attempts don’t restore full drainage or if you notice persistent odors or leaking around the trap, DIY fixes may have reached their limit. In these cases, it’s wise to stop experimenting with aggressive methods that could damage seals or piping and contact a licensed plumber. Enzyme-based cleaners can be used sparingly if you prefer a chemical approach, but avoid mixing cleaners or using them as a replacement for mechanical clearing. A professional inspection can uncover hidden blockages or pipe damage that DIY methods miss.
Maintenance: Prevent Future Clogs with Simple Habits
To keep sinks draining freely, adopt a few simple habits. Run hot water for 15–30 seconds after each major use of the sink, especially when dealing with grease or starch-based foods. Use a strainer to catch hair, food particles, and oil before they go down the drain. For disposals, run cold water while grinding and avoid pouring grease or coffee grounds into the sink. Periodically flush the line with a kettle of hot water, followed by a small amount of baking soda and hot water rinse to maintain cleanliness.
Troubleshooting Quick Checks and What You Learned
If the drain remains slow after following these steps, revisit the P-trap and check for loose connections or hidden debris. Listen for gurgling in the pipes, which can indicate a blockage in the main line. In most homes, the simplest DIY methods resolve common clogs without a plunger, but some situations require professional equipment. Keep a regular maintenance routine, and you’ll reduce calls to a plumber and keep costs down.
Tools & Materials
- Boiling water(Heat water in a kettle or pot; pour gradually in stages)
- Baking soda(About 1/2 cup for a typical kitchen drain)
- White vinegar(About 1 cup; used after baking soda)
- Drain snake / hand auger(3-6 ft length if possible; choose flexible model)
- Wet/dry shop vacuum(Set to liquid mode if available)
- Pliers or wrench(For detaching the P-trap if needed)
- P-trap bucket(Catch water and debris when removing trap)
- Rubber gloves(Hygiene and grip during handling)
Steps
Estimated time: 60-90 minutes
- 1
Prepare area and safety
Clear the area, put on protective gloves and eyewear, and place a bucket beneath the P-trap. If there is standing water, use towels to soak up the excess. Ensure the sink drain is accessible and the disposal (if present) is powered off before you begin.
Tip: Keep a towel handy and photograph connections before disassembly in case you need to reassemble later. - 2
Flush with hot water
Boil water and pour it into the drain in several stages, pausing briefly between pours. The goal is to loosen fats and soap scum without shocking old pipes. Do not dump boiling water into brittle PVC; test pipe age if uncertain.
Tip: Pour slowly to minimize splashing and avoid burns; let the water sit a moment before adding more. - 3
Baking soda followed by vinegar
Pour about 1/2 cup baking soda into the drain, then gradually add 1 cup white vinegar. Cover the drain to trap the fizz, and wait 15–20 minutes. This method helps loosen smaller obstructions without harsh chemicals.
Tip: Avoid mixing with other chemical cleaners; keep children and pets away during fizzing. - 4
Use a drain snake / auger
Insert the snake into the drain and rotate the handle to advance it. When you feel resistance, slowly pull back to capture the clog. Repeat a few times, then withdraw and flush with hot water.
Tip: Work slowly to avoid damaging the pipe and wear gloves to keep hands clean. - 5
Vacuum suction method
If available, seal the drain and use a wet/dry vacuum on liquid mode to pull the clog. Run several short suction cycles, allowing air to equalize between attempts. Clean up any extracted debris afterward.
Tip: Seal well with a damp cloth for better suction; never run the vacuum without a proper seal. - 6
Inspect and clean the P-trap
Place a bucket under the trap, loosen slip nuts, and carefully remove the trap. Clear debris, rinse parts, and reassemble tightly to prevent leaks. Run water to confirm a steady drain and check for leaks around connections.
Tip: Take a photo of the layout before disassembly; this helps during reassembly. - 7
Test the drain and reseal
Run water for several minutes to verify consistent drainage. Look for slow draining or leaks; tighten fittings if needed. If the drain is still slow, consider professional assessment.
Tip: Use a flashlight to inspect inside the trap for hidden debris you might have missed. - 8
Prevent future clogs
Adopt maintenance habits to keep drains clear: strain debris, avoid pouring grease down the drain, and flush with hot water regularly. A simple routine reduces the chance of recurring clogs.
Tip: Keep a small strainer in place and clean it weekly to minimize buildup.
Common Questions
What is the quickest safe method to unblock a sink without a plunger?
The fastest safe approach is to start with hot water flush, then baking soda and vinegar, followed by a drain snake or vacuum if needed. Avoid chemical cleaners that can harm pipes. If it remains clogged, check or remove the P-trap.
Try hot water flush and baking soda with vinegar first, then a drain snake or vacuum. If it’s still clogged, check the P-trap.
Should I use chemical drain cleaners if I can't unclog without a plunger?
Chemical cleaners can damage pipes and septic systems and may not reach deeper blockages. Use enzyme-based products sparingly and only after non-chemical methods fail. When in doubt, call a professional.
Chemical cleaners can damage pipes; try enzymes sparingly and seek a pro if the clog persists.
When should I call a plumber?
If the clog returns after multiple attempts, if you notice persistent odors, or leaks around the trap, contact a licensed plumber. A professional can diagnose hidden blockages or pipe damage that DIY methods miss.
Call a plumber if the clog keeps returning or you smell persistent odors.
How do I safely remove and clean the P-trap?
Place a bucket under the trap, use a wrench to loosen the slip nuts, remove the trap, clean out debris, and rinse parts before reassembling. Ensure all seals are tight to prevent leaks when you test run water.
Remove the trap with a bucket underneath, clean, reattach, and test for leaks.
Can I unblock a sink without removing any hardware?
Yes, many clogs clear with hot water, baking soda and vinegar, or a snake without removing hardware. If these methods fail, you may need to access the P-trap or use a vacuum method before disassembly.
Yes, you can often do it without removing hardware; try the basic methods first.
Watch Video
Key Points
- Start with safe, low-risk DIY methods.
- A drain snake is a strong alternative to a plunger.
- Remove the P-trap only if necessary and with caution.
- Avoid harsh chemical cleaners that can damage pipes.
- Regular maintenance prevents future clogs.