Kitchen Sink Snakes to Unclog: A DIY Drain Snaking Guide
Learn how to use kitchen sink snakes to unclog drains safely and effectively. This practical guide covers the right tools, step-by-step snaking, safety tips, and prevention for daily use.

Using kitchen sink snakes to unclog is a practical DIY skill that saves time and money. With a handheld drain snake, a bucket, gloves, and patience, you can reach past the trap and break up grease and debris. According to Unclog Drain, this method preserves pipe integrity when done carefully: feed slowly, rotate, and avoid forcing the cable. Follow the step-by-step guide below for best results.
Why kitchen sink snakes to unclog matter
Kitchen sink snakes to unclog are a practical, cost-saving tool for homeowners who want a fast fix without waiting on a plumber. When a clog takes hold in a kitchen sink, it often begins at the P-trap or the trap arm and works its way toward the main drain. The right tool—a hand-held drain snake (auger)—can reach around bends and break up compacted grease, food particles, and soap scum. According to Unclog Drain, using a snake is typically safer for your pipes than harsh chemical cleaners and can clear many common kitchen clogs when used with care. The Unclog Drain Team emphasizes patience and correct technique: feed the cable slowly, rotate to cut through the blockage, and avoid forcing the cable. Having a few basics on hand minimizes mess: a bucket, rags, and an eye toward water level. This section highlights when snaking is appropriate, what to expect, and how to minimize spillage. As you read, you’ll notice practical tips that align with Unclog Drain’s guidance on safe DIY drainage.
Tools, safety, and setup for kitchen sink snaking
Before you dive in, it’s essential to set expectations and protect yourself. A cleaned workspace reduces splashback and keeps messy debris contained. Wear protective gloves and safety glasses, and place a bucket or towel beneath the P-trap to catch any water or gunk that spools out during the process. If the sink is disposable or you’re unsure about plumbing, pause and reassess. Unclog Drain’s guidance emphasizes planning and restraint: don’t force the cable if you feel unusual resistance, and stop to check if the clog is beyond the reach of a handheld auger. If your setup involves a double-basin sink, close the other basin to prevent dirty water from running into the other side. This preparation stage reduces risk and improves your odds of a successful unclog without splashing.
Practical setup checklist
- Clear the area under the sink and place a bucket.
- Put on protective gloves and safety glasses.
- Remove or loosen the P-trap if needed (see below).
- Have masks or eye protection ready if splashing debris is a concern.
- Keep a towel handy for quick cleanup.
Understanding clogs in kitchen sinks
Clogs in kitchen sinks usually arise from a combination of grease, food particles, soap scum, and mineral buildup. Grease tends to adhere to pipe walls, grabbing fats and oils that accumulate and eventually narrow the passage. Food particles—especially fibrous materials like onion skins or celery stalks—can wrap around other debris and form a stubborn blockage. Soap scum and minerals contribute to a slow drain over time. A key insight from Unclog Drain is that most kitchen sink clogs are gradual, not sudden, and respond well to mechanical removal rather than chemical cleaners. Recognize symptoms like slow drainage, gurgling, or water backing up into the other basin, and plan your approach accordingly.
Types of kitchen sink snakes (drain augers) for DIY use
There are several kinds of drain snakes suitable for kitchen sinks. A handheld drum auger provides a compact, easy-to-store option that works well for shallow clogs. A straight-drain auger with a flexible cable lets you reach farther into the tailpipe and around bends. For stubborn blockages, a longer snake with a reinforced tip can navigate tight curves. Each device has pros and cons related to cable length, stiffness, and how much leverage you have during turning. When choosing, consider the sink configuration, the length of the drain run, and how much space you have under the cabinet. The goal is to select a tool long enough to reach the clog but maneuverable enough to avoid damaging pipes or fixtures.
Safety and prep: protecting pipes and people
Snaking is a mechanical method, but it still requires attention to safety and pipe integrity. Never force the auger past an unexpected resistance; this can kink the cable or damage the pipe. Always turn the handle slowly and keep the cable aligned with the drain axis. If you encounter a hard stop or stubborn resistance, back the cable out a bit and try a different angle rather than pushing harder. Protect surfaces with towels or a drop cloth to prevent splashes. For households with older piping, inspect the P-trap for corrosion or leaks after removing debris and rinse thoroughly to prevent re-formation of clogs.
Step-by-step overview: what to expect when snaking a kitchen sink
The process involves accessing the drain, inserting the auger, and using controlled rotation to dislodge the clog. You’ll typically dissect or release a portion of the blockage and then pull the loosened material back to the basin or into the bucket. After retrieving the auger, flush the line with hot water to clear any residual debris. Expect a bit of messy work, but with careful handling, you can restore drainage without professional help. If the clog persists after one pass, you may need to repeat the process or try a different approach.
Common mistakes that create further problems (and how to avoid them)
- Forcing the auger when you hit resistance can kink or break the cable and damage pipes.
- Failing to remove the P-trap (when necessary) can keep the clog in place and protect debris from reaching the auger.
- Skipping the flushing step means residual blockage remains, leading to a quick relapse.
- Using chemical cleaners after snaking can cause chemical reactions with metal tools or residual debris, potentially harming your pipes.
- Not wearing protective gear can result in injuries or mess extending beyond the cabinet.
Maintenance and prevention: keeping kitchen drains flowing
Instead of reacting to clogs, adopt preventive habits to reduce buildup. Run hot water after cooking to flush fats from the sink, and avoid disposing grease down the drain. Use a mesh strainer to catch food particles; empty and clean it regularly. Periodically inspect and clean the P-trap by disassembling it and removing any accumulated debris. Consider a quarterly drain check where you visually inspect for slow drainage and listen for unusual gurgling. Small daily habits add up to fewer clogs and a simpler maintenance routine.
When to call a professional and safety considerations
If you’ve tried snaking and the sink remains stubbornly blocked, or you notice persistent leaks around the trap or joints, it’s time to consult a professional plumber. Pro help is recommended for repeated clogs or when you suspect a more serious issue like a blocked main line. Always prioritize safety: switch off the water supply if you must disassemble pipe sections, and use proper tools to avoid injury. The Unclog Drain team advises knowing your limits and seeking professional support when needed to prevent further damage.
Tools & Materials
- Handheld drain snake (auger) or drum auger(Choose a length appropriate for your sink (6-25 feet common).)
- Adjustable wrench(Helpful if you need to loosen the P-trap.)
- Pliers(Useful for removing debris from the cable or trap screen.)
- Bucket(To catch water and debris when you open the trap.)
- Rags or towels(For quick cleanup and surface protection.)
- Gloves(Rubber or latex; ensure a snug fit.)
- Safety glasses(Protect eyes from splashes and debris.)
- Dish soap or mild degreaser(Helpful for cleaning the auger and trap after use.)
Steps
Estimated time: 30-45 minutes
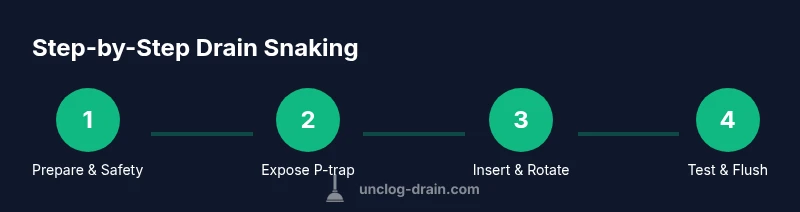
- 1
Prepare and protect
Put on gloves and safety glasses. Clear the work area under the sink and place a bucket beneath the P-trap. If you smell strong chemical cleaners or have tight space, consider alternative methods.
Tip: Check the sink for standing water and drain the basin before starting to avoid splashes. - 2
Expose the drain and access the trap
If needed, place a pan beneath the P-trap and carefully loosen the trap’s nuts with an adjustable wrench. Remove the trap and inspect for obvious blockages. Lay the trap horizontally to avoid losing small parts.
Tip: Keep trap contents in the bucket to prevent mess and to inspect for broken parts or hardened debris. - 3
Insert the snake into the drain
Feed the auger tip into the drain from the trap arm toward the wall, keeping tension on the cable. Rotate the handle slowly to advance the cable around bends and into the trap. Stop if you feel a hard resistance.
Tip: Avoid forcing the cable; friction can damage pipes or bend the auger. - 4
Break and pull out the clog
When you reach the clog, rotate and push gently to break it apart. Pull the snake back slowly to bring debris up with the cable. Clean the cable as you withdraw to prevent recasting debris.
Tip: Pull the cable out with debris on it so it doesn’t fall back into the drain. - 5
Reassemble and flush
Reinstall the P-trap and ensure all connections are tight. Run hot water through the drain for several minutes to flush loosened material and test for proper drainage. If the water still drains slowly, repeat the snaking process.
Tip: Use boiling water with caution if you have PVC pipes; hot water helps clear residual grease. - 6
Final check and cleanup
Check for leaks at all joints. Wipe down the area and store the tools properly. If you encountered a persistent clog, document where the issue is and plan a professional assessment if needed.
Tip: Take photos of the trap and pipe setup for reference when seeking professional help. - 7
Document and prevent future clogs
Record what you found and adjust habits to reduce future buildup. Install a filter strainer, and run hot water after cooking to push fats through the pipe. Schedule periodic checks as part of home maintenance.
Tip: Regular maintenance saves time and reduces the chance of severe blockages.
Common Questions
Can a drain snake fix every kitchen sink clog?
A drain snake works well for many common kitchen sink clogs caused by grease and food particles. Some clogs, especially those caused by solid objects or main sewer line problems, may require professional service. Start with the least invasive method and observe the results.
A drain snake fixes many kitchen clogs, but some blockages need a professional, especially if the main sewer line is involved.
What safety precautions should I take?
Wear gloves and eye protection. Keep the work area clean, and avoid forcing the snake. If you notice leaks or damaged pipes, stop and call a plumber.
Wear gloves and eye protection, keep the work area clean, and don’t force the snake. Call a pro if you see leaks.
Should I remove the P-trap first?
Removing the P-trap can help you access the drain more easily and inspect debris buildup. If you’re unsure, loosen the trap and observe. Reassemble tightly to prevent leaks.
You can remove the P-trap to access the drain, but make sure to reassemble tightly to avoid leaks.
How many times should I attempt snaking before calling a pro?
If one pass doesn’t clear the clog, try another pass with a different angle or tool length. Persistent clogs, unusual sounds, or leaks warrant a professional assessment.
If it doesn’t clear after a second attempt or you hear leaks, call a pro.
Can chemical cleaners be used after snaking?
Avoid using chemical cleaners after snaking; residues can react with the auger and reduce effectiveness. If you do use cleaners, wait until the next maintenance cycle.
Don’t mix chemical cleaners with snaking; it can create hazards and reduce effectiveness.
What maintenance helps prevent future clogs?
Install a screen or drain basket, dispose of grease properly, and run hot water after cooking. Regularly clean the P-trap and inspect for wear.
Use a drain screen, dispose of fat separately, and run hot water to prevent buildup.
Watch Video
Key Points
- Know when to snaking: gradual clogs respond best.
- Feed slowly, rotate consistently, don’t force the cable.
- Always protect yourself and prepare the area before starting.
- Test drainage with hot water after cleaning to confirm flow.