Fixing a Kitchen Sink Clogged Past Trap: A DIY Guide
Learn how to unclog a kitchen sink clogged past trap with step-by-step DIY fixes, safety tips, and prevention to stop future backups.

Most likely the clog sits beyond the P-trap, in the trap arm or deeper in the drain line where grease and debris accumulate. Start by disassembling and cleaning the P-trap, then flush with hot water and try a drain snake past the trap. If the clog persists, inspect the trap arm and consider vent checks or professional help.
Why the Kitchen Sink Gets Clogged Past Trap
A kitchen sink clogged past trap describes a blockage that sits beyond the P-trap underneath the sink. This location matters because the trap arm and downstream joints are where grease, fine food particles, coffee grounds, and mineral buildup commonly accumulate, forming stubborn jams that resist simple tailpiece cleaning. The symptom is water backing up past the trap when you run the faucet, sometimes accompanied by a gurgling sound or slow drainage. Understanding that the clog lies beyond the trap helps you target the right section and avoid unnecessary disassembly. According to Unclog Drain, a practical approach begins with inspecting the trap arm for debris before pulling apart the P-trap, since many blockages occur there rather than at the visible trap. The Unclog Drain team found that forcing cleaners into the trap without addressing the deeper section often leads to recurrent clogs. If odors or sewer gas appear, cease flushing and call a professional promptly. In older plumbing, mineral buildup and pipe corrosion can also contribute to limited flow beyond the trap, making immediate action more urgent. To protect your home, treat the situation as a potential leak risk and proceed methodically rather than hammering at stubborn clogs.
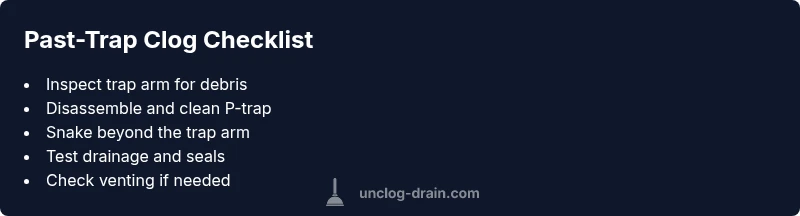
Quick Checks You Can Do Before Disassembling P-Trap
-
Inspect the cabinet area for leaks or standing water and ensure the shut-off valves are accessible.
-
Remove the sink strainer and visually inspect the tailpiece for obvious food particles or hair.
-
Check the P-trap for standing water; if water remains after flushing, the obstruction is more likely in the trap arm or beyond.
-
Loosen the trap’s slip nuts on both ends with a bucket ready to catch water; do not force the nuts if they’re seized.
-
After clearing obvious debris, flush with hot water and observe drainage. If it still backs up, the issue is past the trap. As a reminder from the Unclog Drain team, start with the trap area and move outward.
-
If accessible, inspect the vent path for blockages (especially in multi-story homes) as poor venting can mimic a past-trap clog.
Diagnostic Approach for Past-Trap Clogs
If water backs up past the trap, the next step is to confirm whether the blockage sits in the trap arm or further downstream. A slow, intermittent backup often points to partial blockages in the trap arm or the sanitary tee. A robust backup that persists after trap cleaning suggests a deeper clog or a venting issue. Begin with basic mechanical checks, then progress to a snake or auger for deeper lines. Listen for changes in sound: a gurgling vent can indicate vent-related drainage problems. If you suspect the clog extends to the main line, do not repeatedly flush with chemical cleaners; this may push debris further and create pressure or backup elsewhere. When in doubt, a professional diagnostic can quickly determine whether the clog lies beyond the trap and whether venting is involved. The goal is to identify the exact location to avoid unnecessary disassembly and protect your pipes from damage.
Step-By-Step Fix for Common Causes (Past-Trap Clogs)
- Shut off water supply and place a bucket under the P-trap. This prevents spills and prepares you for trap removal.
- Loosen the trap nuts with an adjustable wrench and carefully remove the P-trap. Inspect both ends for cracks or wear and clean out all debris.
- Reassemble temporarily without sealing and run warm water to test drainage. If water backs up again, the culprit is likely in the trap arm or beyond.
- Use a drain snake to reach past the trap into the trap arm. Twist and push to break up the jam, then pull out any loose material.
- Clean the trap thoroughly, reinstall with new seals if needed, and secure. Run hot water for several minutes to clear the line.
- If the clog remains after snake, inspect the sanitary tee and vent line (if accessible); a professional may be necessary for deeper main-line issues.
Tip: Always wear gloves and eye protection, and place towels around the workspace to catch splashes.
Estimated time: 40-90 minutes, depending on access and clog depth.
Safety Tips and Common Mistakes
- Do not mix chemical drain cleaners with hot water or other cleaners; chemical reactions can damage pipes and fixtures.
- Never force a snake through a clogged line; apply steady pressure and rotate to dislodge debris.
- If you smell strong sewer gas or see sewage flow into the cabinet, stop and contact a licensed plumber.
- Always depressurize the system by closing the shut-offs before any disassembly.
- Maintain your P-trap with routine cleaning and use a strainer to catch food particles.
- Common mistake: assuming a clogged tailpiece means the trap is blocked; always verify the trap arm and beyond first.
- When in doubt, call a pro to avoid pipe damage or personal injury.
Prevention and Maintenance to Stop Clogs From Returning
- Use a sink strainer and regularly clean it to prevent debris from entering the trap arm.
- Pour boiling water or a homemade baking soda-vinegar flush down the drain once a week to reduce buildup, but avoid using these alone to clear severe clogs.
- Avoid disposing of grease, coffee grounds, or fibrous food down the kitchen sink; these items are common sources of past-trap clogs.
- Schedule annual drain checks if you have older plumbing or mineral-rich water.
- If you do a disposal, run it with cold water and periodically clean the disposal area to prevent grease buildup.
- The Unclog Drain team recommends keeping a small maintenance routine to keep the trap and trap arm clean and to address slow drainage before it worsens.
Steps
Estimated time: 40-90 minutes
- 1
Shut off water and prep workspace
Turn off the water supply to the sink, place a bucket under the trap, and lay towels to catch spills. This prevents accidental flooding and protects the area.
Tip: Have a flashlight handy to see inside the trap and trap arm. - 2
Loosen and remove the P-trap
Use an adjustable wrench to loosen the slip nuts, then carefully detach the P-trap. Empty any water into the bucket and inspect for cracks.
Tip: If nuts are corroded, apply penetrating oil and wait a few minutes before retrying. - 3
Inspect and clean the trap
Check the interior of the P-trap for buildup, hair, and food particles. Clean thoroughly with a brush and rinse.
Tip: Replace any worn washers to prevent leaks. - 4
Test the trap arm with a snake
Insert a drain snake into the trap arm, push forward, and rotate to break up the clog. Pull out debris as it advances.
Tip: Work slowly to avoid pushing debris further down. - 5
Reassemble and test drainage
Reattach the trap with new washers if needed, tighten securely, and run hot water to flush treated areas. Check for leaks.
Tip: Run the water for several minutes to ensure a clean flow. - 6
Evaluate the next steps
If water still backs up past the trap, the clog may be in the branch line or vent; consider professional service.
Tip: Document symptoms for the plumber to save time.
Diagnosis: Kitchen sink drains slowly and water backs up past the trap.
Possible Causes
- highBlockage beyond the P-trap (trap arm or sanitary tee)
- mediumGrease and food debris compacted in the trap or trap arm
- lowVenting issues causing slow drainage
Fixes
- easyDisassemble and clean the P-trap and trap arm, removing all debris and resealing.
- mediumUse a plumber's snake/auger to clear deeper blockages beyond the trap arm.
- hardCheck and clear the vent path if accessible; consider professional help for vent-related issues.
Common Questions
What does it mean when a kitchen sink is clogged past the trap?
It means the blockage sits beyond the P-trap, in the trap arm or farther down the drain line. This location often requires cleaning the trap arm or using a snake deeper in the system rather than just cleaning the P-trap.
A clog past the trap is located beyond the trap, in the trap arm or deeper, so you’ll typically need to clear beyond the P-trap.
Can I fix a past-trap clog myself?
Yes, many past-trap clogs can be fixed with basic tools: remove and clean the P-trap, use a drain snake beyond the trap, and test drainage. If the clog remains, professional help may be needed for venting or main-line issues.
Yes, you can usually fix it with basic tools, but if it persists, call a pro.
What tools do I need to unclog beyond the trap?
A bucket, adjustable wrench, pliers, a drain snake or auger, a stiff brush, and protective gloves. A flashlight helps you see inside the trap arm.
Grab a bucket, wrench, snake, and gloves to get started.
Should I remove the P-trap to fix a past-trap clog?
Removing the P-trap is often the first step to clear debris. Inspect for cracks, clean thoroughly, and reseal tightly before testing drainage.
Often yes—remove and clean the trap, then reassemble and test.
What if the clog is in the main sewer line?
If clogs persist after cleaning the trap and trap arm, the issue may be in the main line or vent. In this case, contact a licensed plumber to avoid damage.
Persistent backups beyond the trap may mean the main line is involved; call a plumber.
Are chemical cleaners safe for past-trap clogs?
Chemical drain cleaners are not recommended for past-trap clogs; they can damage pipes, traps, and sealants, and may not reach the deeper obstruction.
Avoid chemical cleaners because they can damage pipes and won’t safely reach deeper clogs.
Watch Video
Key Points
- Identify clog location beyond trap
- Clean trap and trap arm before deeper checks
- Use a snake for deeper blockages
- Avoid harsh chemicals and call a pro if needed