Sink with Garbage Disposal Not Draining? Urgent DIY Fix Guide
Urgent guide to diagnose and fix a sink with garbage disposal not draining. Step-by-step checks, safe fixes, and prevention tips from Unclog Drain to restore drainage quickly and avoid future clogs.

To fix a sink with garbage disposal not draining, start with the easy checks: unplug or switch off power, remove standing water, inspect for obvious jams, and reset the disposal. If water still won't drain, use a wrench to loosen the impeller, clear debris from the trap and check the P-trap, then run cold water. If unresolved, call a plumber.
Why a sink with garbage disposal not draining happens
When a sink with garbage disposal not draining, the most common culprits are jams in the disposal, a clogged P-trap, or a blocked vent. Start by checking the simplest causes first, because many clogs respond to basic maintenance. Debris can lodge around the impeller or in the discharge line, creating a bottleneck that prevents water from flowing freely. Food waste like fibrous celery, coffee grounds, or oily residues can accumulate and harden, forming a stubborn blockage. A slow drain can also result from a blocked vent or air gap, which prevents air from escaping as water moves through the pipes. If you recently replaced the disposal or altered the drain connections, verify that the discharge line is properly attached and that there are no loose fittings. Always begin with power off for safety. In many homes, a straightforward clog or jam is all that’s needed to restore drainage quickly, avoiding more invasive work.
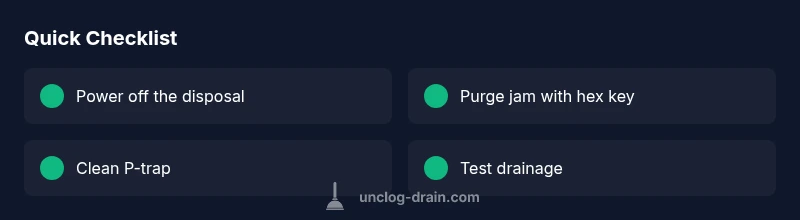
Quick checks you can do before calling a pro
Before you reach for tools or panic, run through a short, safe checklist to rule out the most common, easy fixes. First, ensure the disposal is completely powered off at the outlet or circuit breaker. Then remove standing water with a cup or sponge so you can see the area clearly. If you hear a humming sound but the blades don’t grind, the unit is jammed and needs manual clearing. Check the electrical reset button on the bottom of the unit and press it after you’ve cleared any obstruction. Inspect the splash guard and the side slots for trapped debris. Don’t force anything; use a flashlight to look inside and a hex wrench (often 1/4-inch) to manually turn the impeller from the bottom to dislodge a jam. Finally, test the drain by running cold water while the disposal is on. If the water still won’t drain, the issue likely lies farther downstream, such as a clogged P-trap or drain line.
How food debris and soap contribute to clogs
Disposals are designed to chop up waste, but some items still create trouble if overfed or improperly treated. Fibrous veggies (celery, corn husks), potato peels, and eggshells can wrap around the impeller, forming a compact mass that resists grinding. Fats and oils can firm up on the walls of the pipes, trapping food particles and slowing drainage. Soap residues can also leave a film that binds sediment together, especially when hot water is not used consistently. Over time, these deposits accumulate in the disposal chamber, the trap, and the elbows of the drain, reducing flow and increasing the likelihood of a clog. Regularly flushing the system with cold water and avoiding oversized loads helps, but when a clog forms, a targeted approach is required rather than relying on chemical cleaners.
Diagnostic flow: symptom to solution
Start with the most visible symptoms: water backs up, the disposal hums without grinding, or there’s a foul odor. If water backs up but the disposal runs, the blockage is likely downstream or in the trap. If the disposal hums but won’t grind, there’s a jam in the impeller. If the water drains slowly after clearing the trap, you may still have a vent or pipe issue. Use this flow to guide fixes: jam in disposal → clear jam → reset → test drain; trap blockage → disassemble P-trap and clean; vent/air gap → check and clear obstruction; all else → call a professional.
Step-by-step fixes for the most common cause
The most common cause of a sink with garbage disposal not draining is a jam or trap blockage. Begin with the simple, safe fixes below, then move to more involved steps if needed. Ensure power is off before each action. If you are uncomfortable at any point, stop and call a professional.
Safety tips and common mistakes
Safety is non-negotiable. Never put your hands into a disposal while it’s connected to power. Always unplug or switch off the circuit first. Do not rely on chemical drain cleaners in a disposal; they can damage the unit and create hazardous fumes. Be cautious when handling the P-trap—water may spill, so have towels ready. If you smell burning plastic or hear grinding that sounds irregular, stop and seek expert help to prevent motor damage.
Prevention and maintenance to avoid future clogs
Maintenance is the best cure for repeated drain issues. Run cold water for a full 15–30 seconds after grinding to flush debris. Grate or mince large pieces of food to avoid feeding the disposal bulky waste. Regularly wipe the inside with a non-abrasive sponge and a citrus peel or a baking soda/vinegar flush to reduce odors and buildup. Periodically inspect the P-trap for leaks and ensure all fittings are tight. Consider using a drain screen to catch debris before it enters the disposal and schedule a yearly check if you’re on a high-wood-pantry diet.
When to call a professional and what to expect
If you’ve followed the steps above and the sink still won’t drain, it’s time to involve a pro. A plumber can diagnose ventilation issues, more complex pipe obstructions, or disposal motor problems. Expect them to inspect the disposal unit, test the vent and drain lines, and may use camera inspection for deeper clogs. A timely professional visit can prevent water damage and extended downtime.
Next steps if the drain remains blocked
If the drain remains blocked after both jam-clearing and trap-cleaning attempts, you may have a more serious obstruction in the main line or an internal disposal failure. In this case, avoid repeated aggressive attempts, as they can cause leaks or bursts. Document the symptoms, the steps you’ve tried, and call a qualified plumber promptly to prevent water damage and ensure safe disposal operation.
Steps
Estimated time: 60-90 minutes
- 1
Power down and prep
Turn off the power to the disposal at the outlet or breaker. Remove standing water with a cup or sponge. This creates a safe workspace and helps you see what you’re doing.
Tip: Always double-check the breaker first to avoid any surprise startups. - 2
Check for jams
Use a flashlight to inspect the disposal opening. If you can access the impeller, insert a wooden stick or hex key into the hex-shaped hole and gently rotate to free a jam. Do not put your hands inside the unit.
Tip: Rotate slowly; forcing it can damage the blades. - 3
Reset and test
Press the reset button on the bottom of the unit after clearing any obstruction. Reconnect power and run cold water through the disposal for 15–30 seconds while the unit operates.
Tip: If the reset doesn’t engage, give the area a moment and try again. - 4
Inspect and clean the P-trap
Place a bucket under the trap, disconnect the slip nuts, and remove the trap to clean out trapped debris. Reassemble tightly and test drainage with cold water.
Tip: Keep towels handy—the trap often holds a surprising amount of water. - 5
Test and observe
Run the faucet and the disposal simultaneously to observe drainage. If water drains slowly, recheck fittings and consider a veterinary inspection for hidden leaks.
Tip: Observe for any leaks around joints after reassembly. - 6
Vent check and professional fallback
If drainage remains slow or intermittent, inspect the air gap or vent line for obstruction. If you’re uncomfortable or the problem persists, schedule a professional inspection to avoid damage.
Tip: A blocked vent often requires plumbing experience to resolve safely.
Diagnosis: Water backs up in the sink and the disposal either won’t run or won’t drain.
Possible Causes
- highClogged disposal with jammed impeller
- highBlocked P-trap or drain line from food debris
- mediumVent or air gap obstruction causing slow drainage
- lowElectrical reset needed or motor failure
Fixes
- easyUnplug the unit and manually clear any jam with a hex key or tongs, then reset and test
- easyDisassemble and clean the P-trap and drain connection, then reassemble and test drainage
- mediumInspect the vent/air gap and clear any obstruction with a snake or professional vent cleaning
- hardIf the disposal motor is failed or hums with resistance after resets, replace or service by a professional
Common Questions
What is the first thing I should do when my sink with garbage disposal not draining?
Power off the disposal, remove standing water, and inspect for a jam. If you can access the impeller, manually rotate it to dislodge any blockages before testing drainage.
First, turn off the disposal, clear standing water, and check for jams. If you can reach the impeller, gently loosen any obstruction before testing drainage.
Can I clear a disposal jam without removing the unit?
Yes. Use a hex key to rotate the impeller from below the unit while it’s still powered off. Clear any obstruction slowly, then reset and test with cold water.
You can clear a jam with a hex key from beneath the unit, then reset and test with cold water.
Is it safe to use a plunger on a disposal?
Plungers are unlikely to fix disposal jams and can force debris further into the pipe. Try mechanical clearance first, then move to trap cleaning if needed.
Plungers don’t usually fix disposals; start with manual jam clearance and trap cleaning instead.
Why does water back up after I run the disposal?
A backup typically means a downstream clog in the P-trap or drain line, or a blocked vent. Inspect the trap and use a snake if necessary, and check the vent if accessible.
Backups usually point to a downstream clog or vent issue; check the trap and consider vent inspection.
When should I call a plumber for a disposal issue?
Call a plumber if you cannot clear the jam, if there is persistent drainage failure after fixes, or if you suspect vent or main-line problems. They can diagnose ventilation and piping safely.
Call a plumber if you can’t clear the jam or if drainage still fails after fixes.
How can I prevent future clogs in a garbage disposal?
Avoid fibrous or hard-to-grind items, run cold water during and after grinding, and use a disposal-safe cleaner or citrus flush periodically. Install a drain screen to catch debris before it enters the disposal.
Prevent clogs by avoiding fibrous waste, flushing with cold water, and using a disposal-safe cleaner regularly.
Watch Video
Key Points
- Start with power-off checks and jam clearing.
- Always clean the P-trap before replacing parts.
- Avoid chemical cleaners in disposals and focus on mechanical cleaning.
- Call a professional if the issue persists after steps.