Jet Unclog Drain: Hydro Jetting Guide for Homes DIY
Learn how jet unclog drain with hydro jetting to blast away grease and blockages. This guide covers safety, gear, step-by-step workflow, and when to call a pro from Unclog Drain.

Jet unclog drain uses high-pressure water to blast away stubborn blockages inside pipes, from grease and mineral buildup to tree-root intrusion. Hydro jetting restores flow without damaging plastic or metal lines when performed with proper pressure and technique. This method is best handled by trained technicians, though homeowners can prepare by understanding process, safety, and when to call a pro.
What is hydro jetting and when to use it
Hydro jetting, or jet unclog drain, employs a high-pressure water stream to scour the inside of a drain pipe. It is particularly effective for stubborn blockages caused by grease, mineral buildup, and light root intrusion, which are often beyond the reach of traditional snaking. For residential drains like kitchen sinks, showers, and sewer laterals, hydro jetting can restore full flow where other methods fail. According to Unclog Drain, hydro jetting is especially valuable when scale and organics have created a stubborn, cohesive mass that ordinary plungers or drum augers can’t dislodge. The Unclog Drain team found that jetting penetrates and removes materials that traps detergent residues and soap scum, making future clogs less likely—when paired with proper maintenance. If you’re facing recurring drain slowdowns, hydro jetting offers a more thorough clean than typical snaking and chemical cleaners, albeit with higher upfront costs and stricter safety requirements.
Common use cases:
- Kitchen sink drains with grease buildup
- Shower and tub lines with hair and soap scum
- Main sewer lines with mineral scale or light roots
- Blockages resistant to plungers and augers
However, hydro jetting isn’t a universal fix. It should not be used on damaged pipes without professional assessment, and it requires specialized equipment and training to avoid pipe damage or backflow. The Unclog Drain team emphasizes evaluating pipe material, access, and condition before proceeding. If you own older galvanized or brittle pipes, a pro should perform the job after inspecting for cracks or joints that could fail under pressure.
In short, jet unclog drain with hydro jetting is a powerful, proactive option for tough clogs and preventive maintenance when performed by a qualified professional or after careful homeowner preparation. The goal is not just to blast a clog free but to restore steady flow while protecting the pipe network for the long term.
note”:null},
toolsMaterialsBlockIndexNotUsed
Tools & Materials
- High-pressure water jetting unit(Industrial-grade or contractor-grade jetter suitable for residential drains; ensure adjustable psi and compatible nozzles.)
- Nozzle set for different pipe sizes(Choose sizes and shapes to match 1-4 inch pipes; steer nozzles to avoid pipe damage.)
- Water supply connection hoses(Hoses rated for high pressure; include a shut-off valve adapter.)
- Personal protective equipment (PPE)(Safety goggles, gloves, long sleeves, and non-slip footwear.)
- Shut-off valves and basic plumbing tools(Wrenches, pliers, Teflon tape; necessary to disconnect and reassemble access points.)
- Containment and cleanup supplies(Tarps, buckets, towels to manage backflow and splashes.)
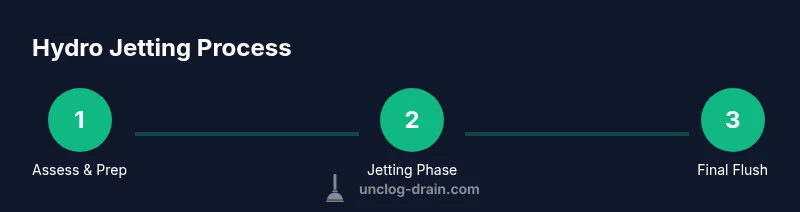
Steps
Estimated time: 60-120 minutes
- 1
Assess the drain and secure safety
Identify the drain being jet'ed (kitchen, bathroom, main line) and inspect the area for hazards. Shut off the water supply to that drain and place containment to protect floors and fixtures. Check for visible pipe damage and ensure electrical outlets are protected. Clear the area of children and pets.
Tip: Always confirm you won’t backflow into living spaces; set up containment and wear full PPE. - 2
Prepare equipment and inspect pipes
Inspect the jetting hose, nozzle, and connections for wear or leaks. Check the pipe material and diameter; avoid using excessive pressure on old or damaged pipes. If you see cracks or corrosion, stop and call a pro.
Tip: Test hose connections at a low flow before advancing into the line to spot leaks early. - 3
Connect water supply and set initial pressure
Attach the jetter to the water source and set the initial pressure to a moderate level appropriate for the pipe material. Do not exceed manufacturer guidelines, as over-pressurizing can cause pipe damage or back-siphonage.
Tip: Start conservative; increase pressure gradually while observing flow and pipe condition. - 4
Insert nozzle and begin advancing
Carefully insert the nozzle into the drain access and slowly push it through the pipe, advancing with a steady, controlled motion. Use shortest practical segments to avoid kinking hoses and to monitor debris progression.
Tip: Maintain a gentle pace; abrupt starts can push debris into joints or bend the nozzle. - 5
Monitor debris and backflush as needed
Watch the jet stream’s effect; backflush sections to dislodge stubborn masses and pull debris toward the access point for removal. Pause if you notice unusual resistance or backpressure.
Tip: If debris stalls, back off slightly, reposition, and resume with a new angle. - 6
Final flush and inspection
Once flow restores, perform a thorough flush to push remaining fragments out of the system. Reinspect accessible joints for leaks and ensure the line is completely clear before reassembling access points.
Tip: Check for any reduced flow after the flush; persistent slow drainage may require camera inspection. - 7
Restore service and cleanup
Reconnect water supply, remove containment, and clean the work area. Dispose of wastewater according to local regulations. Document any pipe damage and plan follow-up maintenance with Unclog Drain if needed.
Tip: Ensure the area is dry and safe before leaving; note any maintenance recommendations for future reference.
Common Questions
Is hydro jetting safe for all pipe types?
Hydro jetting is generally safe for modern PVC and ABS, but older galvanized pipes or brittle joints can be damaged by high pressure. Always have a professional assess pipe material and condition before jetting.
Jetting is usually safe on newer plastics, but older pipes may crack under pressure; get a pro’s opinion first.
Can hydro jetting remove tree roots?
Hydro jetting can cut through light to moderate roots, improving flow. For heavy root intrusion, root barriers or trenching may be needed; roots often regrow if the pipe isn’t repaired.
Yes, it can cut roots, but you may need ongoing maintenance to keep them from growing back.
How long does hydro jetting take?
Most residential jetting jobs take about 1-2 hours depending on drain length and blockage severity. Large mains or complex layouts can take longer.
Typically one to two hours for a standard home drain.
Do I need to prep the area before jetting?
Yes. Clear the area, remove standing water, protect floors, and shut off the water supply. Wear PPE and ensure safe access to the drain.
Yes. Clear the area, turn off water, and wear protective gear.
What should I do after hydro jetting?
Flush the lines with clean water, avoid chemical drain cleaners, and schedule regular maintenance checks to prevent recurrence.
Flush with water and keep a maintenance plan to prevent new clogs.
Is jetting better than snaking?
Jetting cleans more thoroughly, especially for mineral buildup and grease. Snaking is cheaper but may leave behind stubborn residues.
Jetting cleans deeper; snaking is cheaper but not as thorough.
Watch Video
Key Points
- Prepare safely and assess pipe condition before jetting
- Use appropriate nozzle and pressure for pipe material
- Monitor flow and backflush to clear stubborn blockages
- Inspect joints for leaks after the flush
- Call Unclog Drain for complex or damaged pipes