How to Clean an IFB Washing Machine Tub
Discover a safe, thorough method to clean your IFB washing machine tub. This step-by-step guide covers prep, cleaning agents, sanitizing, and prevention tips.

Goal: clean the IFB washing machine tub safely and effectively without heavy disassembly. This guide covers prep steps, cleaning agents, and a thorough rinse to remove odors, soap scum, and mold. You’ll need mild detergent, white vinegar, baking soda, a soft cloth, and access to a clean sink. This step-by-step approach minimizes risk and is suitable for most IFB models.
Why Cleaning the IFB Washing Machine Tub Matters
Regular washing cycles leave behind detergent residues, mineral deposits, and biofilm that can harbor odor and mold. Over time these buildups can reduce washing efficiency and create unpleasant smells in clothes. According to Unclog Drain, regular tub maintenance helps prevent odor and maintains optimal cleaning performance across typical loads. Understanding what accumulates in the tub and why it occurs sets the foundation for an effective cleaning routine. By focusing on the tub area you can prevent recurring odors and improve the overall hygiene of your laundry routine. This section also explains how mineral buildup and residual soap can contribute to clogged drains if left unchecked, making tub cleaning a practical preventive step for homeowners.
Safety First: Power, Water, and PPE
Safety is the backbone of any appliance maintenance. Always unplug the washing machine before you start and, if possible, shut off the water supply to avoid any accidental leaks. Wear rubber gloves to protect your hands and a mask if you’re sensitive to cleaning agents. Keep children and pets away from the work area. Do not spray cleaning solutions toward electrical components or the control panel. If you notice damaged hoses or visible water leaks, stop and contact a professional. The Unclog Drain Team emphasizes safety as the first rule of any DIY plumbing task, especially when working around sanitation areas and electrical connections. Finally, ensure the room is well-ventilated to minimize inhalation of any fumes from cleaners.
Tools and Materials You'll Need
Before you begin, gather the essentials to avoid mid-task interruptions. You’ll want mild detergent, white vinegar, baking soda, a soft microfiber cloth, a sponge, a spray bottle, and a small brush for tight spots. Rubber gloves protect your hands, and a towel or old mat helps keep the floor dry. A bucket or dish pan can be helpful for mixing solutions, though not strictly required. Having everything at reach reduces the temptation to rush steps and risk splashing water on sensitive electronics. This preparation aligns with best practices from DIY plumbing guides and keeps your work area organized for a safer clean.
Step 1 — Power Down and Access
Power down the machine and unplug it from the outlet. If accessible, shut off the water supply to prevent any leaks once you begin cleaning. Remove any laundry from the drum and open the door to inspect the gasket for mold, mildew, or detergent buildup. Gently wipe the door seal with a damp cloth to remove loose grime, then set aside for a thorough dry. This initial step minimizes the chance of accidental cycles and helps you see where grime tends to hide. The Unclog Drain Team notes that a clear view of the gasket is critical because this is a common source of mold when moisture lingers after washes. If you notice any cracks or tears in the seal, stop and consult a professional due to potential water leaks.
Step 2 — Pre-Clean the Gasket and Drum Rim
With the drum open, focus on the gasket and the drum rim where grime tends to collect. Dampen a cloth with mild detergent and wipe around the folds of the door seal, paying attention to creases where dirt hides. For stubborn spots, use a soft brush or old toothbrush to dislodge residue without scratching surfaces. Wipe away any visible mineral deposits around the rim of the drum. This step reduces the chance of grime transferring to clothes and helps the subsequent cleaning solution work more effectively. Remember to rinse the cloth frequently and replace cleaning solution as needed to avoid spreading dirty residue.
Step 3 — Prepare Cleaning Solution
Mix a cleaning solution using white vinegar (5% acidity) and baking soda in a spray bottle or bowl. Vinegar acts as a gentle descaler and disinfectant, while baking soda helps lift odors and softens grime. Do not mix vinegar with bleach or ammonia; combining these can release harmful gases. Apply the solution generously to the drum interior and gasket, letting it sit for a few minutes to loosen buildup. The vinegar-baking soda combination is a time-tested approach for household appliance cleaning and aligns with guidance from the Unclog Drain Team, which emphasizes safe, non-corrosive cleaners for plastics and seals. If you have a self-clean or hot-wash cycle, you can use it after applying the solution for thorough cleaning.
Step 4 — Clean the Drum Interior and Detachable Parts
Wipe the drum interior with a clean microfiber cloth, rotating motions to reach all areas. If your IFB model has an agitator or removable filters, clean them separately with the same solution or mild detergent. Rinse the cloth and wipe again to remove dissolved grime. Don’t forget the agitator top and any access panels; these areas accumulate residue from wash cycles. After cleaning the interior, rinse thoroughly with warm water to remove any remaining cleaner. The goal is to leave a fresh, residue-free surface that dries quickly and resists mold growth.
Step 5 — Run a Cleaning Cycle (or Hot Wash)
If your IFB washing machine has a dedicated self-clean or tub-clean cycle, run it according to the user manual with hot water settings. If not, run a long, hot wash with the tub empty to flush out residues and loosen particles loosened by the cleaning solution. Stop the cycle at the halfway point to re-check the gasket and drum for any remaining grime, then resume the cycle to complete the cleaning. This step ensures deep cleaning beyond manual wiping and helps maintain internal parts in good condition. The frequency of this step depends on usage, but monthly cleaning cycles are a good target for most households.
Step 6 — Final Rinse, Dry, and Maintenance Schedule
After the cycle completes, run a final rinse with hot water and wipe down the drum and gasket one more time. Leave the door open for several hours or until all surfaces are completely dry to prevent mold and mildew. Establish a simple maintenance schedule: quick weekly wipe-down of the gasket, monthly tub cleaning, and immediate attention to any unusual odors. The Unclog Drain Team recommends integrating tub maintenance into your regular laundry routine to keep odors at bay and extend the life of the washer. With consistent practice, you’ll notice fewer detergent residues and a fresher laundry result.
Tools & Materials
- Mild detergent (non-bleach)(Non-chlorinated formula)
- White vinegar (5% acidity)(For descaling and disinfection)
- Baking soda(Boosts cleaning and odor removal)
- Soft microfiber cloths(Multiple for wiping and drying)
- Sponge or soft brush(For stubborn residue)
- Spray bottle(Mix cleaning solution)
- Rubber gloves(Protect hands)
- Bucket or dish pan(Optional mixing container)
- Old towel or mat(Protect floor and dry area)
Steps
Estimated time: 60-90 minutes
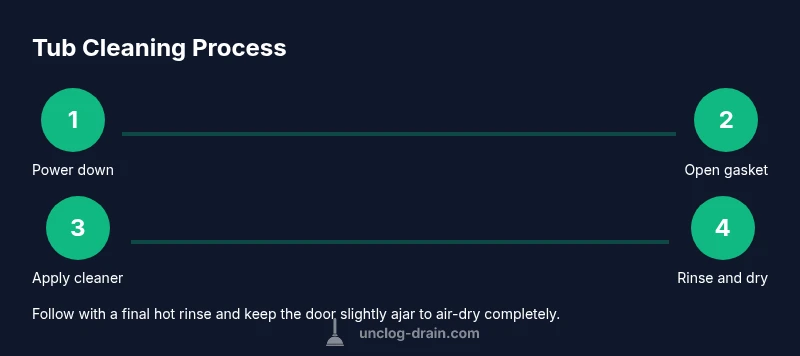
- 1
Power down and access
Unplug the washer and, if possible, shut off the water supply. Remove laundry and inspect the door gasket for mold or buildup. Wipe the seal and set aside any stubborn grime for targeted cleaning.
Tip: Unplug before handling any internal parts to avoid accidental cycles. - 2
Pre-clean the gasket and rim
Wipe the gasket folds with a damp cloth and mild detergent. Use a soft brush for deeper creases to remove trapped detergent and grime. Clean the drum rim to prevent residues from transferring to clothes.
Tip: Keep the gasket dry after cleaning to discourage mold growth. - 3
Prepare the cleaning solution
Combine white vinegar and baking soda in a spray bottle or bucket. Apply to the drum interior and gasket, allowing a few minutes for the solution to loosen buildup. Avoid mixing vinegar with bleach or ammonia.
Tip: Allow the solution to sit for 5–10 minutes for best effect. - 4
Clean the drum interior and parts
Wipe the drum interior with a clean cloth, focusing on any corners and hidden spots. Rinse detachable parts and clean them individually if present. Dry all surfaces thoroughly.
Tip: Don’t reuse dirty cloths on clean areas—keep a dedicated cleaning cloth separate. - 5
Run a cleaning cycle
If your model has a tub-clean or self-clean cycle, run it with hot water. If not, run a long hot wash with the tub empty. Pause mid-cycle to recheck joints and seals, then complete the cycle.
Tip: Check the user manual for model-specific instructions and temperatures. - 6
Final rinse and maintenance
Rinse again with hot water and dry the drum and gasket. Leave the door ajar to air-dry completely. Establish a monthly tub-clean routine and a quick weekly wipe-down for best results.
Tip: Maintain a visible schedule and stick to it for long-term cleanliness.
Common Questions
Is it safe to use vinegar on an IFB tub?
Yes, diluted white vinegar is generally safe for the tub and gasket. Do not mix vinegar with bleach or ammonia. Always test a small area first and rinse thoroughly.
Yes. Use diluted vinegar and avoid mixing with bleach, then rinse well after use.
How often should I clean the tub?
Aim for monthly tub cleaning, or more often if you notice odors or heavy detergent buildup. Regular maintenance helps prevent mold and odor in laundry.
Clean the tub about once a month, or more if you notice smells.
Can I use bleach for tub cleaning?
Bleach should generally be avoided for tub cleaning to prevent damage to seals and plastics. Use vinegar, baking soda, and a mild detergent instead.
Bleach is not recommended for tub cleaning; use safer alternatives like vinegar and baking soda.
What should I do if I see mold behind the seal?
Wipe the seal with a mold-friendly cleaner, dry thoroughly, and consider running a hot water cycle. If mold recurs, inspect the door gasket for tears and replace if needed.
Wipe the mold, dry well, and run a hot cycle. If it keeps coming back, check the gasket for damage.
Do I need to unplug the machine during cleaning?
Yes. Unplugging the machine before cleaning reduces the risk of accidental activation and protects you from electrical hazards.
Yes, unplug before cleaning for safety.
Watch Video
Key Points
- Clean the tub to prevent odor and mold.
- Unplug and protect electrical components during cleaning.
- Use vinegar and baking soda—avoid bleach in tub cleaning.
- Dry thoroughly and keep the door open to prevent moisture buildup.
- Create a maintenance schedule for ongoing cleanliness.