How to Clean IFB Microwave: A Complete DIY Guide
Learn how to clean an IFB microwave safely and effectively. This step-by-step guide covers interior, turntable, door seals, and exterior cleaning, plus deodorizing tips and maintenance to keep it running smoothly.

This guide teaches you how to clean IFB microwave interiors and exteriors safely, including the cavity, turntable, and door seals. You’ll follow a clear, step-by-step routine that uses gentle cleaners, steam, and microfiber cloths to remove grime, odors, and stains without damaging sensitive components.
What makes IFB microwaves different and why cleaning matters
IFB microwaves, like many kitchen appliances, benefit from regular, careful cleaning to prevent lingering odors, food splatters, and baked-on residue. The interior cavity often has a ceramic enamel or coated surface designed to resist staining, but harsh cleaners or abrasive tools can scratch it. When you learn how to clean IFB microwave surfaces properly, you extend the life of the appliance, maintain even heating, and keep odors from transferring between meals. According to Unclog Drain, routine maintenance of household appliances reduces grime buildup and preserves efficiency, even for devices far from a drain-related task. Keep this guide handy for monthly touch-ups and after any spill that creates a strong smell or stubborn residue.
Safety first: preparing to clean your IFB microwave
Before you start any cleaning, unplug the unit and ensure it is cool. Remove the turntable and its support ring so you can reach every corner of the cavity. Do not blast water or cleaning solutions directly onto the control panel or vents; moisture near electrical components can cause damage. Use a microwave-safe container with warm water and a splash of mild dish soap for spot-cleaning tools, and reserve steam-cleaning methods for interior grime. Reading the IFB user manual for model-specific cautions will help you avoid costly mistakes. As you proceed, remember that gentle, non-abrasive methods beat harsh chemicals for most interior jobs.
Daily upkeep to prevent grime buildup
Small habits add up: cover food to minimize splatter, wipe the interior after cooking any sauce with sugar or tomato, and wipe the door seal weekly to prevent food particles from drying into the gasket. A quick wipe with a damp microfiber cloth is usually enough after each use. For odors, place a microwave-safe bowl of water with a few lemon slices inside and run for 2–3 minutes to loosen residue and refresh the aroma. Regular maintenance reduces the need for heavy cleaning and protects the enamel coating from micro-scratches.
Cleaning the interior cavity: steam and wipe method
The interior is best cleaned with a steam-assisted approach. Fill a microwave-safe bowl with about one cup of water and add a few slices of lemon (or a tablespoon of baking soda for odor control). Heat on high for 3–5 minutes, stopping when you see steam fogging the walls. Carefully remove the bowl (it will be hot) and wipe the cavity with a clean microfiber cloth, working in circular motions to lift grease and burnt bits. Rinse the cloth and repeat as needed until the walls look bright and free of grime. Dry with a soft cloth before replacing the turntable.
Turntable and support ring: thorough washing
Remove the turntable and its support ring and wash them with warm water and a mild dish soap. Use a non-abrasive sponge to scrub away any baked-on residue. Rinse thoroughly and allow to air-dry completely before reassembling. If there are stubborn spots, a paste of baking soda and water can be used for gentle scrubbing; avoid metal scrubbers that could scratch the surface.
Exterior surfaces and control panel care
Wipe the exterior with a damp microfiber cloth, then dry with a clean towel. For the control panel, use a lightly damp cloth or a small amount of alcohol-based cleaner on a cloth; never spray cleaners directly onto the panel. Clean the door’s glass with a glass cleaner or a mild solution of soap and water, taking care around the gasket. Keeping the exterior free of grease reduces fingerprints and improves the overall appearance of your IFB microwave.
Odors, stains, and deodorizing tricks
If lingering odors persist, steam cleaning with lemon water or a baking soda paste can be effective. For stubborn stains, apply a paste of baking soda and water, let sit for 5–10 minutes, then scrub gently and wipe away. A quick wipe with vinegar and water is sometimes used for tough grime, but avoid using vinegar in excess, as it can leave an acidic residue that may affect finishes over time. Always finish by rinsing with clean water and drying thoroughly.
Maintenance scheduling and avoiding common mistakes
Aim for a light wipe-down weekly and a full interior clean every 4–6 weeks, depending on usage. Do not use oven cleaners, bleach, or abrasive pads inside the cavity. Never submerge the microwave or allow excessive moisture to enter vents or the control panel. If your model has a charcoal filter or exhaust vent, consult the manual before attempting to replace parts. Small, consistent cleaning sessions keep the microwave hygienic and ready for daily meals.
Troubleshooting: what to do if issues persist after cleaning
If you still notice odd odors after cleaning, run a short clean cycle with water and lemon to refresh the aroma. If residue remains or heating is uneven, inspect the door seal for cuts or gaps, and check that the turntable is reassembled correctly. Persistent issues may indicate a hidden leak or mechanical fault; in those cases, contact IFB support or a service professional for a diagnostic check.
When to call a professional
If you observe sparking, unusual noises, or persistent odors after multiple cleanings, do not continue to operate the unit. Stop using it and seek professional service to prevent further damage. A qualified technician can diagnose seal failures, magnetron issues, or vent blockages that basic cleaning cannot resolve.
Tools & Materials
- Microwave-safe bowl(Used for steam cleaning; heat-safe and heat-resistant)
- Mild dish soap (clear or fragrance-free)(Gentle formula; avoid strong degreasers)
- Water(Room temperature to warm; for steam and rinsing)
- Lemon slices or lemon juice(Natural deodorizer; optional if using baking soda)
- Baking soda(For odor neutralizing paste and gentle scrubbing)
- White vinegar(Only for spot deodorizing; avoid mixing directly with lemon steam)
- Microfiber cloths(Non-abrasive, lint-free for streak-free surfaces)
- Soft sponge or non-abrasive scrubber(Use for light scrubbing on stubborn stains)
- Isopropyl alcohol (70%)(For cleaning the exterior panel; avoid near rubber seals)
- Latex or nitrile gloves(Protect hands during cleaning)
Steps
Estimated time: 30-45 minutes
- 1
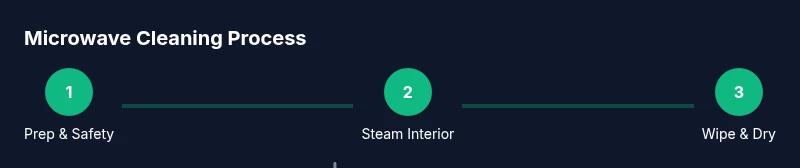
Power down and prep
Unplug the microwave and remove the turntable and support ring. Set them aside for washing. This prevents accidental activation and keeps components safe during cleaning.
Tip: Take a quick photo of the turntable layout to ensure correct reassembly. - 2
Set up steam cleaning
Fill a microwave-safe bowl with 1 cup of water and add lemon slices or a splash of baking soda. Place the bowl on the turntable and run on high for 3–5 minutes until the interior steams up.
Tip: If your microwave has a stubborn interior stain, extend the steam time by 1–2 minutes. - 3
Wipe the interior cavity
Carefully remove the hot bowl and wipe the interior walls with a microfiber cloth, repeating with a clean cloth until grime loosens. Avoid spraying cleaner directly onto the walls.
Tip: Use circular motions to lift grease from the corners. - 4
Clean the turntable and ring
Wash the turntable and support ring with warm water and mild soap, rinse thoroughly, and dry completely before reassembly.
Tip: Inspect the grooves for any buildup and scrub gently with a soft sponge. - 5
Exterior and door care
Wipe the exterior surfaces and door glass with a microfiber cloth; use a small amount of isopropyl alcohol on a cloth for stubborn fingerprints. Do not spray onto the control panel.
Tip: Dry immediately to prevent streaks and moisture in crevices. - 6
Deodorize the cavity
If odors linger, make a baking soda paste and apply to any tough stains, then wipe away after 3–5 minutes. Rinse with a damp cloth and dry.
Tip: Always finish with a dry cloth to avoid moisture retention. - 7
Reassemble and test
Reinsert the turntable and ensure it rotates freely. Plug in the microwave and run a quick 1-minute test with a cup of water to confirm there are no odd smells or noises.
Tip: If you detect noise or wobble, recheck the mounting and turntable alignment. - 8
Schedule regular upkeep
Set a monthly reminder to perform a light interior wipe-down and a deeper clean every 4–6 weeks, depending on usage and spill frequency.
Tip: Keep a small calendar note next to the appliance for consistency. - 9
Know when to seek help
If sparking, smoke, or persistent malfunction occurs, discontinue use and contact customer support or a professional technician.
Tip: Avoid DIY fixes that involve internal components beyond cleaning.
Common Questions
Can I use bleach or abrasive cleaners inside my IFB microwave?
No. Bleach and abrasive cleaners can damage the enamel coating and electrical components. Stick to mild soap, baking soda, and steam for best results.
Bleach and abrasives can harm the microwave enamel and electronics. Use mild soap and steam instead.
Is it safe to use lemon juice or vinegar for steam cleaning?
Lemon juice is a common, safe option for steam cleaning and deodorizing. If you use vinegar, avoid mixing it with lemon steam and limit exposure.
Yes, lemon is safe and effective for steam cleaning. If you use vinegar, don’t mix it with lemon steam and limit exposure.
How often should I clean my IFB microwave?
Wipe the interior after spills and do a deeper clean every 4–6 weeks, depending on usage. This helps prevent buildup and odors.
Wipe after spills and deep clean every month or so, depending on use.
Can I operate the microwave without the turntable?
No. The turntable ensures even heating and proper rotation. If missing, the appliance may heat unevenly and could be damaged.
Don’t run it without the turntable; it helps even heating and safe operation.
What should I do if residue remains after cleaning?
Re-run a steam clean and wipe with a fresh microfiber cloth. If stubborn areas persist, apply a baking soda paste, then rinse and dry thoroughly.
Steam again, wipe with a clean cloth, and try a baking soda paste on stubborn spots.
Are commercial microwave cleaners recommended?
Commercial cleaners are not usually necessary; mild soap and steam work well for most models. If you choose a cleaner, ensure it is labeled safe for microwave use and follow instructions.
Usually, mild soap and steam are enough; if you use a commercial cleaner, verify microwave safety first.
Watch Video
Key Points
- Unplug before cleaning and remove the turntable.
- Steam cleaning loosens grime without harsh scrubbing.
- Dry every surface after cleaning to prevent moisture damage.
- Schedule regular upkeep to prevent odor and residue buildup.