Snake Plunger: The DIY Guide to Unclog Drains
A comprehensive DIY guide to using a snake plunger for sinks and toilets. Learn how to choose, prepare, and operate your auger safely, plus tips, maintenance, and troubleshooting to keep drains flowing.

By following this guide, you will safely unclog sinks and toilets using a snake plunger, avoiding harsh chemicals. You will learn how to choose the right tool, prepare the workspace, and apply controlled motions to break up the clog. With practical tips and safety reminders, you can fix most routine blockages quickly and avoid costly repairs.
What is a snake plunger and how it works
A snake plunger is a manual drainage tool that combines a flexible coil (the snake) with a handle, designed to probe and break apart clogs inside pipes. The coil is fed into the drain, and as you twist and push, the teeth or ridges grip debris and rotate it loose, or push it forward to clear a path. Unlike chemical cleaners, a snake plunger relies on mechanical action, which reduces the risk of damage to pipes and downstream plumbing when used correctly. According to Unclog Drain, the right technique centers on patient feeding, steady rotation, and minimal force in order to avoid bending or snapping the coil. Proper use also reduces mess and protects your home from fumes that can come from aggressive cleaners. In many households, a snake plunger remains a reliable first line of defense against typical clogs caused by hair, soap scum, grease, and small food particles. A well-maintained snake plunger should become a staple in any DIY toolkit, especially for bathrooms and kitchen drains. This tool is versatile, but success hinges on selecting the correct length, type, and technique for your specific drain.
When to use a snake plunger
Using a snake plunger makes sense for clogs that block a sink drain, bathroom drain, or toilet line but do not require more aggressive intervention. If standing water sits stubbornly after several plunges, or you notice gurgling noises and slow drainage, a snake plunger often retrieves the obstruction by breaking it up or grabbing it to pull it out. The Unclog Drain analysis notes that homeowners report better results when they pair the tool with a clear workspace and a calm, methodical approach rather than rushing the motion. For septic systems, take care not to introduce excessive water usage that could back up into other fixtures. If you’re unsure whether the clog is from a trap, vent, or deeper pipe, consider moving to a more specialized tool or seeking professional help.
Types of snakes and their uses
There are several forms of snakes designed for different drainage scenarios. A basic hand auger is compact and ideal for sink traps, a longer drain auger can reach further into pipes, while a toilet auger is specifically shaped to navigate the bend of a toilet drain without scratching porcelain. Each type has a different drum length, coil thickness, and flexibility. The choice depends on the drain location, pipe material, and the expected depth of the clog. Understanding the distinctions helps you pick the right tool for the job, reducing frustration and the chance of pipe damage. In practice, most residential clogs respond to a standard 3-6 foot snake for sinks and a longer variant for showers or main lines, while toilet clogs may require a dedicated toilet auger.
Safety first: PPE and precautions
Personal protective equipment (PPE) is essential when using a snake plunger. Wear sturdy gloves to protect your hands from sharp edges or irritants, and eye protection to shield against splashes. Keep a bucket and towels handy to catch wastewater and debris, and ensure good ventilation to minimize odors. Never mix caustic cleaners with mechanical unclogging tools, as chemical reactions can cause dangerous fumes or pressure buildup. If you encounter sewer gas, stop immediately and ventilate the area; persistent gas odors are a sign to call a professional.
Preparing your workspace
Clear the area around the drain and lay down towels or old rags to absorb splashes. If you’re working under a sink, remove any items from the cabinet and lay them aside to prevent water damage. Check the trap for signs of damage or loose connections before inserting the snake. Have a flashlight ready to inspect the pipe and the end of the snake as you feed it in. Place a bucket nearby to catch any backflow and set up a fan or open window for ventilation. A clean, controlled environment reduces the chances of contaminating other fixtures and makes the process smoother.
Core technique: feeding and turning the snake
Feed the snake into the drain slowly, allowing the coil to bend and follow the pipe. When you encounter resistance, rotate the handle to grip or dislodge the blockage, then push a bit further. Maintain steady pressure without forcing the coil, which can kink or break the line. As you advance, slowly retrieve and reinsert to loosen the clog from multiple angles. After breaking free, run hot water to flush debris and ensure the line remains clear. Remember to reset the coil after use and wipe down the tool to prevent rust.
Common clogs and how the snake helps
Clogs in bathroom sinks often involve hair and soap scum, while kitchen sinks may trap grease and food particles. A snake plunger can break up soft blockages and pull them toward the trap for removal. In showers and tubs, mineral buildup and hair can create stubborn tangles that the coil can twist around to loosen. If the blockage is deeply rooted in a main line, you may need a longer snake or professional equipment. Real-world results depend on patience, proper length selection, and consistent, measured turns.
Troubleshooting: when the snake won’t move or won’t budge
If the snake coil won’t advance, check for a tight bend or a fully blocked trap. Gently back out the tool and reinsert from a slightly different angle, using a slower pace and more gradual turns. If you feel significant resistance with no progress, pull back and reassess the drain direction or consider disassembling the trap to access the pipe directly. For persistent clogs, don’t force the tool; applying too much torque may damage the pipe or create a bigger blockage. In such cases, pause and call a plumber.
Maintenance and storage after use
Rinse the coil with clean water and remove any debris trapped on the teeth. Dry the snake thoroughly to prevent rust and store it in a dry location away from moisture. Wipe down the handle and housing with a mild cleaner if needed, and inspect for kinks or bends before next use. Keeping the tool clean and properly stored extends its life and ensures it remains ready for the next clog. Always sanitize after use if you’ve been dealing with a particularly dirty drain.
Toilet-specific tips: navigating tight bends and porcelain care
Toilet clogs require special attention because the drain path includes a U-bend and a narrow trap cavity. A toilet auger is designed to flex without scratching the porcelain. When using a snake plunger in a toilet, insert gently, rotate frequently, and avoid forcing the coil past the bend. If you lose grip on the clog, stop and reassess rather than pulling hard, which can damage the flush mechanism or the toilet itself. For best results, flush the toilet after partial clearing to test flow and avoid creating new blockages.
Safe alternatives and when to call a pro
Chemical drain cleaners are not recommended when using a snake plunger because they can create hazardous fumes or corrode pipes. For stubborn clogs that don’t yield after several attempts, consider a more advanced tool like a larger auger, a camera inspection, or a professional service. If you’re uncertain about pipe material, aging, or sewer lines, a licensed plumber can diagnose the issue with specialized equipment and ensure you don’t cause lasting damage. A proactive approach is to schedule regular maintenance and avoid chemical overuse.
Cleaning and disinfecting the tool after use
After you finish, clean the snake thoroughly with hot water and a mild detergent. Remove any remaining debris and dry completely before storage. Sanitize the handle and any contact surfaces to reduce the spread of germs. Store the tool in a dry, ventilated area, away from other tools that could cause corrosion. Cleaning and proper storage protect your equipment and ensure it’s ready for the next clog.
The mindset for successful DIY drain care
Patience, preparation, and methodical action are your best allies when unclogging drains with a snake plunger. Take time to inspect the drain, choose the right tool length, and maintain a steady rhythm rather than forcing the coil. Building a routine around preventive care—like regular flushes of hot water and careful disposal of grease—can reduce clogs over time. With the right approach, you’ll gain confidence and reduce the need for harsh chemicals or expensive services.
The Unclog Drain perspective: practical, safe, and effective
From the Unclog Drain vantage point, a snake plunger remains an essential tool for homeowners tackling typical clogs. The emphasis is on safe handling, correct tool selection, and a measured workflow that respects the plumbing system. By combining mechanical action with sound hygiene practices, you can resolve many common blockages without professional intervention. The goal is clarity in your drains and confidence in your DIY skills.
Tools & Materials
- Snake plunger (hand auger or toilet auger)(Choose a model appropriate for your drain type; 3-6 ft for sinks, 6-8 ft for deeper lines)
- Rubber gloves(Protect hands from debris and contaminants)
- Safety goggles(Eye protection against splashes)
- Old towels or rags(Cushion spills and catch debris)
- Bucket(Catch backflow if needed)
- Flashlight(Inspect traps and pipe ends)
- Penetrating lubricant or dish soap(Lubricate the coil tip if it binds)
- Pipe wrench or pliers(Used to disconnect traps if necessary)
- Cleaning brush and sanitizer(Sanitize tools after use)
- Towel or mat to protect floor(Prevent water damage to surrounding area)
- Measuring tape(Helps estimate needed snake length)
Steps
Estimated time: Estimated total time: 30-45 minutes
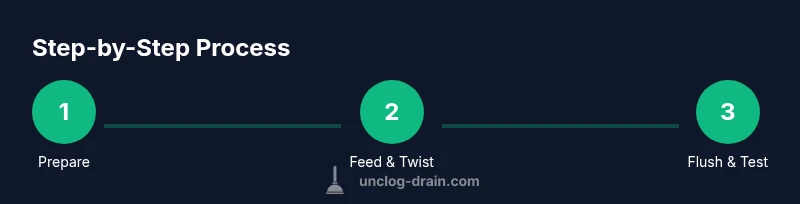
- 1
Assess the drain and prepare
Put on PPE, lay towels, and clear the area. Remove any accessories around the sink or toilet to prevent contamination. Position the bucket to catch any backflow and ensure you can see the trap and pipe clearly.
Tip: Double-check that you have the correct snake length for the drain you're working on. - 2
Select the appropriate tool length
Choose a snake length that reaches beyond the bend but won’t bend or kink easily. Longer isn’t always better if it can’t navigate tight curves. For sinks, a shorter coil is often sufficient; for main lines, a longer coil can help.
Tip: If you’re between lengths, err on the side of a slightly longer tool rather than a shorter one. - 3
Insert the coil gently
Slowly feed the coil into the drain opening, keeping tension on the handle. Let the coil advance on its own path, resisting urge to push too hard at once. Stop if you feel a hard obstruction and transition to a different angle.
Tip: Lube the tip lightly with dish soap if it binds in the initial bends. - 4
Rotate and push to break up the clog
As you feed, use a controlled twisting motion to grab or break up the clog. Rotate the handle consistently and move the coil forward gradually. Retract slightly after each push to re-engage the blockage from another angle.
Tip: Maintain steady pressure; jerking can cause the coil to kink or damage the pipe. - 5
Pull back and reinsert if needed
If you meet resistance, pull back a bit and try a fresh angle. Reinsert and continue the feed with measured turns. This approach helps dislodge debris that’s held together by soap or grease.
Tip: Don’t force the coil past a stubborn bend; instead, back out and retry from a different angle. - 6
Test flow with water
Run hot water to flush the line after breaking up the blockage. If water drains slowly, repeat the insertion and rotation steps once more. Avoid using chemical cleaners right after mechanical clearing.
Tip: A controlled flush confirms the clog is cleared and reduces future buildups. - 7
Inspect for remaining debris
Disconnect the trap if accessible to inspect for remaining debris near the bend. Remove any trapped material with pliers or a brush. Reassemble the trap securely after cleaning.
Tip: Inspect the trap gasket for wear; replacing worn parts prevents future leaks. - 8
Clean and dry the tool
Rinse the coil to remove sludge and dry thoroughly. Wipe the handle and housing with a mild cleaner to prevent rust and contamination. Store the tool in a dry place away from moisture.
Tip: Always sanitize after use to minimize bacteria spread. - 9
Evaluate other possible causes
If water still backs up, the clog might be deeper in the line or caused by a damaged trap. Consider a camera inspection or professional diagnostic to identify root causes. Do not misinterpret a minor slowdown as a fully cleared line.
Tip: Document symptoms for the plumber if you call one later. - 10
Prevent future clogs
Practice regular maintenance: avoid pouring grease down the drain, use strainers, and run hot water after meals to clear food particles. Periodic checks of traps and vents help prevent surprises.
Tip: Routine maintenance reduces the frequency of clogs and extends pipe life. - 11
Toilet-specific precautions
When addressing a toilet clog, use a toilet auger designed for porcelain. Avoid forcing the coil into the bend to prevent cracking the bowl. If you feel resistance that doesn’t yield, stop and seek professional support.
Tip: Use protective eyewear to guard against splashes during attempts. - 12
Finalize and store
Recheck all connections and ensure the area is dry. Dry the snake completely before storage and keep it in its case or a dedicated tool rack. Label the area with a quick note to remind yourself of maintenance tasks.
Tip: Keep your plunger in a ventilated area to prevent mold growth.
Common Questions
Can a snake plunger fix all clogs?
A snake plunger handles many typical clogs in sinks and toilets, but deeply rooted grease, mineral buildup, or broken pipes may require advanced tools or professional service. If the clog persists after several careful attempts, consider a plumber.
A snake plunger works for common clogs, but if the clog lasts, call a professional for deeper issues.
Is it safe to use a snake plunger on PVC pipes?
Yes, when used gently and correctly. Avoid applying excessive force that could damage the pipe or push debris further into the system. If you’re unsure, pause and inspect the area before continuing.
It’s generally safe on PVC if you’re careful and don’t force the coil.
How long should I run the tool before trying again?
There’s no fixed time; instead, alternate feeding and rotating for a few cycles, then test by flushing with water. If progress stalls, back out and retry from another angle.
Try a few cycles, then test with water; adjust as needed.
Can I reuse the snake plunger on different drains?
Yes, after cleaning and drying thoroughly. Avoid cross-contaminating fixtures; sanitize the tool and work area between tasks.
Yes, but clean and sanitize between uses.
What if the clog returns after using a snake plunger?
If recurring, the blockage may be deeper or part of a more serious issue. Reassess the root cause, consider professional inspection, and avoid repeated aggressive plunging.
If it comes back, deeper issues may exist; get a pro to check.
Watch Video
Key Points
- Choose the correct snake length for your drain.
- Feed and rotate the coil with steady, controlled motion.
- Don't use chemical cleaners in tandem with mechanical clearing.
- Test flow with water before finishing.
- Maintain and store tools properly to extend life.