J Tube Unclog: A Practical DIY Guide for Home Drains
Learn how to unclog a j tube safely at home with step-by-step methods using a drain snake, hot water flush, and careful chemical aids. Unclog Drain shares expert DIY guidance to fix common J-tube clogs quickly and safely.

To perform a j tube unclog, you’ll typically combine mechanical snaking, a hot-water flush, and careful inspection. Start with a safe access point, remove visible debris, then use a drain snake to break up the blockage, followed by a controlled rinse. This guide outlines a precise, safe approach for DIY homeowners.
What is a J tube and why clogs happen
According to Unclog Drain, a J tube is a curved segment of pipe that guides wastewater from a fixture toward the main drain. Debris tends to collect at the bend where gravity slows flow and seals form. Hair, soap scum, mineral buildup, and grease are the usual culprits, especially in older homes with metal or PVC piping. A clogged J tube often shows up as slow drainage, backups, or gurgling sounds from the trap. Understanding the geometry of this section helps you diagnose quickly and avoid unnecessary disassembly. In many homes the J tube connects a vertical drop to a horizontal run, creating a natural choke point. A visual check of the bend can confirm the bottleneck, allowing you to apply a targeted unclog method without turning the entire fixture upside down. If you can locate a cleanout or trap access, your j tube unclog becomes safer and faster, with less risk to the pipe joints.
Safety first: precautions before you start
Before you reach for tools, protect yourself and your home. Shut off the water supply if you can, especially for sinks with tight fittings. Wear rubber gloves, eye protection, and old clothes. Remove standing water with a cup or sponge so you can observe the clog clearly. Never mix chemical cleaners with other treatments; this can create dangerous gases or pressure build‑ups in the J tube. Keep children and pets away while you work. If you see a crusty buildup or mold around the trap, pause and re-evaluate; tackling moisture and airflow first reduces slip hazards and mold growth. By following these precautions, you limit exposure to contaminants and reduce the chance of damaging the pipe or fittings.
Access points and prep for a J tube unclog
Start by turning off the fixture's supply and clearing space under the sink or around the tub. Look for a cleanout plug, access port, or the trap itself. In many bathroom sinks, you’ll find the trap (the U-shaped pipe) below the drain; in kitchen layouts, the J section may be hidden behind cabinetry. If you can safely detach the trap, do so to inspect the inside; set the trap in a bucket to capture water and debris. Note: Do not force the connection back together until you’re sure the line is clear. The goal of access prep is to create a path for the tool and a clean workspace for inspecting the debris. If a cleanout plug is present, remove it gently and observe whether debris is loose enough to be pulled out by hand. In all cases, keep a rag handy to wipe excess water and prevent slips.
Tools and materials you’ll need (and why)
At minimum you’ll want a sink-safe plunger, a flexible drain snake or auger, a bucket, towels, and protective gear. A flashlight helps you see inside the bend; a small cup or syringe can help you flush debris after breaking it up. Use a kettle or pot for hot water; avoid boiling water for PVC in a bend, but warm to hot water can loosen residues. Baking soda is optional for an initial gentle fizz, while enzymatic cleaners can help break down organic matter over time but should not be mixed with mechanical methods. Organize your workspace so cables don’t kink or snag; plan to take slow, measured turns with the auger to prevent pipe damage.
Step-by-step: use a drain snake in a J-tube
Carefully insert the flexible auger into the J-tube access point, advancing it while rotating the handle. When you feel resistance, push slightly further to break through the clog, then twist and pull back to capture debris. If the auger begins to clear material, pull back gradually and watch for loosened fragments. Do not force the cable past the bend, as excessive pressure can crack joints. Maintain steady, gentle pressure and avoid sudden jerks that could dislodge seals. After a few passes, reassess the blockage visually or by running a small amount of water to gauge progress.
Step-by-step: hot-water flush and baking soda method
Boil water and carefully mix small portions into the drain with a steady pour, allowing the hot water to flush loosened debris toward the main line. If you prefer a non-chemical approach, add 1/2 cup baking soda followed by a cup of hot water and let it sit for several minutes before flushing again. The fizz can help break down organic matter, but don’t rely on it as the sole solution for a stubborn J-tube clog. Always observe progress; if water flow improves, continue with gradual flushes until clear.
Step-by-step: safe chemical options and enzyme cleaners
If mechanical methods clear only part of the blockage, consider enzymatic cleaners designed for organic matter. Avoid harsh chemical drain cleaners in metal or older PVC pipes, as they can degrade seals and joints over time. Use enzymatic products according to the label, and flush with plenty of water after the recommended dwell time. Do not mix cleaners with each other or with the baking soda/vinegar approach. If you must use chemical aids, prioritize products labeled for septic-safe, pipe-friendly use and respect warranty considerations for your fixtures.
Step-by-step: reassemble and test drainage
Reattach any traps or cleanouts you removed, ensuring all connections are snug but not overtightened. Turn the water back on and run warm water through the J-tube for several minutes to confirm consistent flow. Listen for abnormal noises or gurgling that would indicate an ongoing obstruction. If water still backs up or drains slowly, repeat the cleaning steps in a measured way, focusing on the bend and the vertical leg where debris often accumulates. Document what worked so you can adjust future maintenance.
Maintenance and prevention to avoid future clogs
Preventive steps save time and protect your plumbing. Regularly purge the J-tube with hot water after heavy usage periods, avoid pouring grease or oily substances down the drain, and install a mesh screen to catch hair and solids. Periodic maintenance—every 6–12 months, depending on usage—helps keep the bend clear. If you notice slow drainage, address it early with a quick flush or a brief snaking session. A simple drain-check routine can keep your home running smoothly and reduce the risk of a full blockage.
When to call a professional and signs of more serious issues
If you’ve attempted the above methods and the J tube remains clogged, or if you notice frequent blockages despite maintenance, it’s time to consult a licensed plumber. Persistent backups may indicate bigger problems like sewer line issues, vent blockages, or damaged joints that require specialized tools and expertise. Additionally, if you encounter sewer gas, standing water in multiple fixtures, or recurring mold around the drain area, professional intervention is warranted to prevent health and safety risks.
Common mistakes and troubleshooting
Common mistakes include applying excessive force with the auger, mixing chemical cleaners with other treatments, and neglecting safety gear. Always start with PPE, protect nearby surfaces, and work slowly to avoid pipe damage. If water is not draining after initial steps, pause and reassess the setup. Keeping a log of what you tried helps you identify the most effective technique and prevents repeating ineffective actions.
Tools & Materials
- drain snake / plumber’s auger(6–10 ft flexible steel cable; use for J-tubes)
- cup plunger (sink plunger)(non-flange type; for initial pressure)
- bucket(to catch water and debris)
- rubber gloves(protect hands from dirty water)
- eye protection (safety goggles)(shield eyes from splashes)
- flashlight(to inspect dark bends)
- kettle or pot of hot water(for flushing after clearing the obstruction)
- baking soda(optional; can help loosen organic residue)
- white vinegar or enzymatic cleaner(avoid mixing with other cleaners; use only after mechanical clearing if needed)
Steps
Estimated time: 60-90 minutes
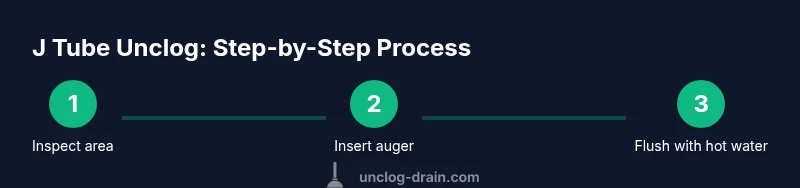
- 1
Identify access points and safety
Begin by locating the closest access to the J-tube and assessing the surrounding area. Confirm you have a sturdy cleanout or trap access, and ensure water supply is manageable. Establish a clear plan for tool use and note any potential risks to seals or joints. This initial assessment reduces guesswork and lowers the risk of unintended damage.
Tip: Take a quick photo of the setup before disassembly to aid reassembly. - 2
Clear workspace and prep tools
Move nearby items away from the sink or tub, lay towels to catch spills, and assemble your auger, plunger, and bucket. Verify all tools are clean and functioning. A tidy workspace minimizes accidents and helps you work more precisely when you reach the bend.
Tip: Test the auger on a plain length of pipe or section to feel the resistance pattern before entering the J-tube. - 3
Insert the drain snake into the J-tube
Gently feed the auger into the access point, keeping the cable straight as you advance. When you encounter resistance, pause and rotate to help the tip bite through the clog. Avoid forcing the cable; excessive force can damage seals or joints. Continue until you reach a point where debris loosens.
Tip: Maintain gentle, steady pressure and monitor resistance; sudden jolts can crack fittings. - 4
Rotate and advance the auger to break the clog
With the auger inside the bend, apply a slow turning motion while pushing forward a few inches at a time. When you feel material give, slowly retract the cable while continuing to rotate. This action helps capture and pull loose debris away from the hard bend.
Tip: If the cable stops advancing, back the cable out slightly and reattempt with smaller motions. - 5
Withdraw the snake and inspect debris
Carefully pull the auger out and inspect the tip for any collected material. Look for hair, grease, or mineral buildup that may require another pass. If debris remains, you can reinsert and try a few more passes focusing on the bend. Do not force through stubborn sections.
Tip: Keep the debris contained in the bucket to avoid a re-clog elsewhere. - 6
Flush with hot water to push remaining buildup downstream
Boil water and carefully pour it into the drain, allowing it to travel through the bend and down the main line. This flush helps carry away loosened matter. Run several batches if needed, but avoid sudden eruptions that could splash or overflow.
Tip: Always pour slowly and monitor the flow; sudden surges can push water back toward fixtures. - 7
If needed, apply baking soda and vinegar or enzymatic cleaner
If organic matter persists after mechanical clearing, you can try a brief baking soda and vinegar fizz or a targeted enzymatic cleaner. Do not combine with other cleaners during this step. Allow dwell time as directed, then flush with additional hot water.
Tip: Avoid using strong chemical cleaners in combination with mechanical attempts. - 8
Reassemble the trap and run water to test
Reattach any traps or cleanouts you removed, ensuring a snug fit. Restore water and observe drainage for a few minutes. If water keeps backing up, repeat the cleaning cycle or inspect other upstream blocks. A successful test confirms clearance.
Tip: Keep a small flashlight handy to recheck tight seals after reassembly. - 9
Prevent future clogs with regular maintenance
Develop a simple routine: avoid pouring grease, wipe down fixtures, and install screens to catch hair. Schedule periodic flushing with hot water to minimize buildup. Document what you did and when for future reference.
Tip: Create a simple maintenance calendar and stick to it; consistency beats reactive fixes.
Common Questions
What is a j tube in plumbing?
A j tube is a curved section of pipe that guides wastewater to the main drain. Debris tends to collect at the bend, causing slow drainage or backups. Identifying this geometry helps target your cleanup approach safely.
A j tube is a curved pipe section that guides wastewater to the drain. Debris collects there, causing slow drainage, so targeting the bend helps you clear it safely.
Can I use chemical drain cleaners for a j tube unclog?
Chemical cleaners can damage joints and seals, especially in older pipes. If you must use chemicals, choose a pipe-safe enzymatic product and follow the label. Prefer mechanical methods first for safety.
Chemicals can harm pipes and seals. If you use them, choose enzymatic cleaners and follow the directions, but start with mechanical methods.
Is it safe to use hot water on PVC pipes?
Hot water is generally safe for many PVC pipes when used modestly. Avoid boiling water on very new PVC or excessively hot pours that could soften or warp the plastic. Use warm to hot water instead.
Hot water is usually okay for PVC if it’s not boiling and you pour gradually. Boiling water can warp some pipes, so go warm-to-hot instead.
How long should I wait after a flush to test drainage?
After flushing, wait 2–5 minutes to observe flow, then run water for several minutes. If drainage remains slow, repeat the flush and check for remaining obstructions near the bend.
Give it 2–5 minutes to show progress after flushing, then run water for several minutes to test the drain.
When should I call a professional?
Call a plumber if the clog recurs despite multiple attempts, if there are multiple backed-up fixtures, or if you suspect sewer-line issues or vent blockages. A professional can diagnose hidden problems and use specialized tools.
If clogs keep coming back or you suspect sewer or vent issues, get a plumber to diagnose and fix it.
How can I prevent future clogs in a J-tube?
Preventive steps include avoiding grease down drains, using screens, and routine hot-water flushes. Regularly inspect for slow drainage and address it early with light maintenance rather than waiting for a full blockage.
Keep drains clean by avoiding grease, using screens, and flushing with hot water regularly to prevent clogs.
Watch Video
Key Points
- Identify the J-tube bend and access points before starting
- Use a drill or auger with gentle, controlled movements
- Flush with hot water to clear loosened debris
- Prevent future clogs with routine maintenance and screens