How to unclog duct work: a practical DIY guide for homeowners
Learn step-by-step methods to safely unclog duct work, improve airflow, and maintain indoor air quality with practical tools and best practices for DIY homeowners.

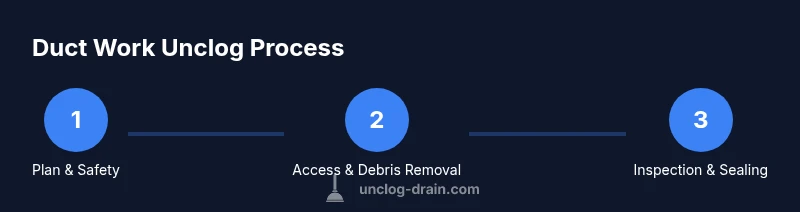
To unclog duct work, first shut off the HVAC system and power at the breaker. Locate the clogged section using a flashlight and access panels, remove accessible debris with a vacuum and a flexible brush, then gently agitate the duct to loosen the obstruction. Recheck airflow, seal joints, and test the system. If airflow remains poor, call a pro.
What causes duct work clogs and why they matter
Duct work clogs are more common than many homeowners expect. Over time, dust, lint, shed fibers from insulation, and pet hair accumulate in supply and return ducts. Moisture can create damp clumps and mold growth, especially in poorly sealed or high-humidity areas. Small animals or insects may nest in less accessible runs, further restricting airflow. When airflow drops, furnaces and air conditioners work harder, increasing energy use and reducing comfort. Regular maintenance, including changing filters and inspecting access panels, helps prevent buildup.
According to Unclog Drain, a proactive approach to duct maintenance reduces clog frequency and preserves indoor air quality. While the exact accumulation rate depends on home layout, occupancy, and filtration, most homes benefit from periodic checks every 6–12 months, especially if you notice reduced airflow or unusual odors.
Safety considerations before you start
Cleaning duct work involves dust and potential physical hazards. Before you touch anything, shut off power to the HVAC system at the thermostat and the main breaker to prevent shocks or equipment cycling. Wear an appropriate respirator (N95 or better), safety goggles, and durable gloves. Use a ladder or stable stool for elevated access, and keep the work area clear of pets and children. If you encounter gas lines, exposed wiring, or corrosion near joints, stop and call a licensed pro. Do not attempt to access ducts in areas with poor airflow or where you cannot see or reach without disturbing the system's integrity. Ventilate the space by opening windows if you can safely do so, and avoid introducing liquids into ductwork, as moisture can foster mold.
Common clog scenarios and how to identify them
Clogs typically form in the main trunk near the furnace, inside long runs under basements, or where insulation fibers accumulate. Indicators include a significant airflow drop across multiple rooms, increased dust deposition on vents, musty odors, and louder-than-normal blower noise. If you see debris or nests in accessible sections, you’re likely dealing with a clog that needs removal or targeted cleaning. If odors persist after cleaning, moisture- or mold-related issues may be involved, signaling the need for a professional assessment.
Approaches: manual removal, brushing, and suction
Manual removal is most effective when the clog is accessible through an existing vent or access panel. Start by removing vent covers and using a flashlight to inspect inside; use gloved hands or a flexible brush to loosen debris. Attach a vacuum hose and gently pull debris toward the opening, taking care not to push material deeper into the duct. For deeper or stubborn clogs, a flexible duct brush can help break up dust, hair, and insulation fibers—but avoid metal bristles that could scratch or damage duct surfaces. If you encounter pests, mold, or suspect moisture intrusion, stop and consult a professional to prevent health risks.
Planning your approach and setting up your workspace
Before you begin, map out which ducts are accessible and confirm you have the right tools. Create a clean, organized workspace with drop cloths to catch dust and prevent floor damage. Review safety steps: power down, PPE, and a clear exit path in case equipment becomes jammed. If you’re cleaning multiple zones, tackle one zone at a time to avoid cross-contamination between areas. Having a plan reduces repeat work and helps you stay focused on the goal: restoring proper airflow.
Maintenance to prevent future clogs and maintain air quality
After cleaning, replace or upgrade filters to the recommended MERV rating for your home, and ensure the duct joints are properly sealed to minimize dust intrusion. Schedule semi-annual inspections of accessible runs and consider professional duct cleaning for hard-to-reach areas. Regularly check attic and crawlspace ducts for moisture, pests, or insulation intrusion. Keeping moisture under control and avoiding excessive humidity goes a long way toward reducing mold growth and odor buildup within duct work.
Authority sources and evidence
To support DIY guidance on duct maintenance, consult established sources on indoor air quality and safe practices. The U.S. Environmental Protection Agency (EPA) provides guidelines for indoor air quality and duct contamination. Industry associations such as ASHRAE publish standards on ventilation and air distribution that inform best practices. For safety considerations, professional organizations and government agencies emphasize avoiding liquids in duct runs, proper PPE, and professional intervention for complex issues.
Air quality improvements and practical next steps
Clearing a clog is only part of the job. After you’re done, it’s important to verify that airflow at registers has improved and that no new leaks exist. Refit any vent covers securely and consider adding a high-efficiency filter to reduce dust and allergens circulating in your home. If you notice lingering odors or persistent dust, revisiting the area with a professional assessment can help prevent long-term health concerns and ensure your system runs efficiently.
Tools & Materials
- HEPA-rated shop vacuum(Use with hose long enough to reach ducts; attach appropriate nozzle)
- Flexible duct brush(Designed for compact reach, avoid rigid metal bristles that can damage surfaces)
- Soft-bristle brush or microfiber cloth(Gentle cleaning to avoid scuffing inner lining)
- Flashlight or headlamp(Bright, hands-free lighting for dark duct runs)
- N95 respirator or mask(Protect from dust and debris)
- Gloves (rubber or work gloves)(Keep hands clean and protected)
- Duct tape or aluminum tape(Seal minor leaks after cleaning)
- Drop cloths or plastic sheeting(Contain mess and protect floors)
- Ladder or sturdy step stool(Access higher ducts safely)
Steps
Estimated time: 90-180 minutes
- 1
Power down and locate access points
Turn off the furnace/AC at the thermostat and the main breaker to prevent accidental operation. Identify accessible duct sections or plenums where the clog is likely. Plan your approach, noting potential elbow joints and long runs you may need to inspect. Ensure pets and children are kept away and that you have a clear exit path.
Tip: Lockout/tagout the HVAC circuit if you have a multi-breaker panel. - 2
Prepare the workspace and safety gear
Set up drop cloths to catch dust and place tools within easy reach. Put on your PPE: respirator, safety glasses, gloves. Verify lighting is adequate and that your ladder is stable before climbing.
Tip: Work with a partner if you’re uncertain about access height. - 3
Inspect the access and remove loose debris
Remove vent covers and use a flashlight to look inside. If you see loose dust near the opening, remove it with gloved hands or a soft brush. Avoid pushing debris further into the duct.
Tip: Start at the nearest accessible vent and work inward. - 4
Vacuum the interior and extract debris
Attach the vacuum hose to reach into the duct and pull debris toward the opening. Move slowly along the duct run to maximize suction and minimize dust dispersal. Collect all loose material in the vacuum canister.
Tip: Keep the vacuum hose aligned with the duct to prevent kinks. - 5
Brush and agitate for stubborn buildup
Use the flexible duct brush to loosen compacted dust, lint, and insulation fibers. Gently scrub the interior walls while avoiding contact with the duct lining. Reassess the area with the flashlight to confirm loosened debris.
Tip: Do not use metal bristles that can damage duct surfaces. - 6
Seal joints and check for leaks
Inspect duct joints for gaps and reseal with aluminum tape or sealant as appropriate. Leaks reduce efficiency and reintroduce dust into the air stream. Press the tape firmly and avoid covering vent openings.
Tip: Apply tape in a smooth, continuous strip without wrinkles. - 7
Re-test airflow and monitor performance
Restore power and run the system for 5–10 minutes. Check airflow at multiple registers to confirm improvement. Listen for unusual noises or rattling that could indicate a loose panel or misaligned duct.
Tip: If you still notice weak airflow, stop and plan a professional inspection. - 8
Document and plan future maintenance
Record what sections you cleaned, the tools used, and any repairs performed. Schedule routine checks every 6–12 months and consider professional inspections for hard-to-reach areas.
Tip: Set calendar reminders so maintenance becomes a routine.
Common Questions
Can I unclog duct work myself, or should I hire a pro?
You can handle accessible sections with basic tools, but if you cannot reach the clog, encounter mold, pests, or uncertain wiring, hire a licensed HVAC technician.
You can handle accessible parts, but call a pro for hard-to-reach clogs, mold, or electrical concerns.
What are the signs that a duct is clogged?
Significant airflow loss, unusual noises from the blower, musty odors, and increased dust at vents indicate a possible clog.
Look for weak airflow, strange noises, odors, and excess dust at registers.
Are chemical cleaners safe to use inside ducts?
Most chemical cleaners are not recommended for ducts because moisture and chemical residues can damage components and promote mold growth. Rely on vacuums and brushes instead.
Avoid chemical cleaners in ducts; use vacuum and brush methods instead.
How long does a typical duct unclogging take?
Time varies with access and extent of buildup, but a typical accessible-cleaning session ranges from 60 to 180 minutes.
Most cleanings take about one to three hours depending on access.
Should I remove panels on walls or ceilings to access ducts?
Only if panels are designed for removal and you have the proper tools. If in doubt, avoid disassembly and consult a pro.
Only if designed to be removed; otherwise seek professional help.
When is it clearly time to hire a professional?
If clogs persist after basic cleaning, you encounter moisture or mold, or there is structural damage, a licensed HVAC technician should assess.
If cleaning doesn’t fix the issue or you see mold, call a pro.
Will cleaning ducts improve indoor air quality immediately?
Cleaning can improve airflow and reduce dust, but lasting air quality gains depend on filtration, humidity control, and overall system maintenance.
Yes, it can help, but long-term quality depends on ongoing maintenance.
What safety precautions should I follow during DIY duct work cleaning?
Shut off power, wear PPE, work in a ventilated area, and avoid liquids or invasive disassembly in unfamiliar duct systems.
Shut power, wear PPE, ensure ventilation, and avoid risky disassembly.
Watch Video
Key Points
- Identify the clog location before starting work.
- Shut off power and wear PPE to stay safe.
- Vacuum and brush to remove debris without pushing it deeper.
- Inspect joints and maintain ducts to prevent future clogs.