Drain King Drain Unclogger: A Practical DIY Guide
Learn to use the Drain King drain unclogger safely with step-by-step instructions, essential tools, and maintenance tips from Unclog Drain. Resolve common clogs fast without harsh chemicals.

Using a Drain King drain unclogger, you can safely restore flow to most sinks, bathtubs, and showers without harsh chemicals. This guide from Unclog Drain walks you through what you need, how to set up, the correct technique, and simple maintenance to prevent re-clogs. You’ll learn safety steps, timing, and what to do if the clog persists.
What Drain King Drain Unclogger is and how it works
The Drain King drain unclogger is a hands-on, chemical-free tool designed to restore flow in clogged household drains. In Unclog Drain’s experience, most everyday clogs in kitchen and bathroom drains involve hair, grease, soap scum, or food debris that form a compact blockage near the drain opening. Drain King uses a simple, mechanical approach: it seals around the drain and, when activated, builds up air pressure with a water flush to push or loosen the clog. While it doesn’t dissolve hair or solid objects, it can dislodge light to moderate blockages and clear the path for water to run freely again. It’s compatible with standard sink, shower, tub, and floor drain openings, and it’s designed for home use by DIY enthusiasts. Always follow the manufacturer directions and prioritize safety, as improper use can create splashes or backflow. This approach aligns with Unclog Drain’s emphasis on practical, non-destructive fixes that minimize chemical exposure while protecting piping joints and seals.
If you’re new to home unclogging, think of Drain King as a controlled air-water interaction that creates a surge to push debris away from the drain opening. It’s the kind of tool that complements a routine maintenance plan rather than a cure-all. From a DIY perspective, safety gear—gloves and eye protection—reduces splash risk, and using it in a well-ventilated area prevents any humidity buildup. Throughout this guide, the Drain King drain unclogger is treated as a practical first step before calling a plumber for stubborn or recurring problems. The Unclog Drain team emphasizes patience and methodical checks rather than rushing to a more aggressive solution.
In short, Drain King is a user-friendly option for many common blockages, especially those caused by hair, soap, and grease. It’s part of a broader toolkit that homeowners can rely on to keep drains flowing and reduce chemical exposure in everyday maintenance. Remember: if you encounter sharp odors, sewage issues, or gas-like smells, step back and seek professional advice. The approach here keeps safety front and center while encouraging confident, informed DIY work.
When to use it and when to avoid it
Drain King works best when a drain is partially blocked but still has some water present, and the clog is not a solid, immovable object. This makes it suitable for many kitchen and bathroom drains where hair and soap buildup is common. It’s a convenient option when you want to avoid chemical cleaners and prefer a quick, mechanical method that minimizes waste and risk to your pipes. The Unclog Drain team notes that using the unclogger early—before the clog hardens into a brick-like plug—gives you a higher likelihood of restoring flow without tools that require professional intervention.
Avoid Drain King if you suspect a major pipe collapse, a solid object wedged deeply in the line, or a clogged toilet. If you notice slow drainage plus a strong sewage odor, stop and reassess the situation; it could indicate a venting problem, sewer line issue, or a more serious blockage. Septic systems deserve extra care; if you’re unsure whether the clog is septic-related, contact a pro before attempting aggressive pressure methods. For recurring clogs, pair this approach with routine preventative measures like drain screens and careful disposal habits. This guidance aligns with Unclog Drain’s practical, safety-first philosophy for DIY plumbing.
Finally, if you’re using Drain King on a shared or multi-unit property, ensure the other fixtures aren’t actively discharging into the same line, which could affect pressure tests and results. A calm, measured approach reduces splash risk and helps you determine whether the method is effective before trying again.
Materials, setup, and safety gear
To set up Drain King for an unclogging task, you’ll need a few basic items and protective gear. Start with the Drain King drain unclogger itself, clean and dry, plus a bucket or towels to catch any overflow. Protective gloves and safety glasses are essential to prevent splashes from water and debris. A rubber plunger can serve as a backup if you encounter a partial blockage that responds to suction rather than pressure. You may also want a flashlight to inspect the drain opening and a small wrench or pliers for any quick adjustments around the cap.
Before you begin, clear the area around the sink, tub, or shower. Remove any standing water you can safely scoop out with a cup or towel. Keep pets and kids away from the workspace, so they aren’t frightened by splashes or noise. A tidy workspace reduces the chance of dropping parts or losing a small component. Following these setup guidelines helps ensure you can work comfortably and safely, while keeping the process focused on the clog. The Unclog Drain team stresses that proper preparation is as important as the technique itself for a successful outcome.
In addition to safety gear, check compatibility with your drain size and configuration. Drain King is designed for standard residential drains, but irregular or oversized openings may warrant a different approach. If you have a deep or long run with multiple bends, the approach might need to adapt to maintain a seal and effective pressure.
If you’re unsure about the drain’s condition, consult the product manual or Unclog Drain’s support resources. The aim is to set up a controlled environment that minimizes splash risk while you apply the unclogging action. By planning ahead, you’ll feel confident and ready to proceed when the time comes.
Using Drain King: best practices and common mistakes
When you’re ready to use Drain King, begin by placing the device over the drain and forming a tight seal. Lock the cap or collar into place, ensuring there are no gaps through which air can escape. A clean, dry surface around the drain improves the seal and reduces the chance of leaks during the pressurized action. Once sealed, gently begin the water-based pressure sequence as directed by the manufacturer, maintaining steady pressure rather than bursts. The goal is to push debris away from the drain opening rather than forcing water against a completely solid block. If you hear air escaping, stop and reseal before continuing.
Common mistakes include using too much force, skipping the sealing step, or following an overly aggressive sequence that can cause splashing or backflow. Always check for visible leaks during the process, and pause if you feel resistance indicates a blocked line that may require alternative methods. If after a couple of attempts you don’t see improvement, stop and inspect for a visible obstruction, then consider backup methods or professional help. The key is to stay patient and repeat only when necessary, since repeated high-velocity pushes can risk damaging seals or joints. This careful, measured approach aligns with Unclog Drain’s emphasis on safe DIY practice.
When the drain clears, flush with clean water to ensure the path remains open. This helps you confirm the success of the unclogging action and reduces the likelihood of a quick re-clog. Finally, store Drain King in a dry place and rinse it after use to maintain its effectiveness for future clogs.
Troubleshooting and what's next if it doesn't work
If Drain King doesn’t clear the clog after one or two attempts, recheck the seal and repeat the process with a controlled, moderate pressure. If you still don’t see improved drainage, inspect the trap area for visible debris or hair that can be manually removed with a gloved hand or a small tool. Sometimes clogs form deeper in the line and require more advanced methods, such as a snake auger, to reach the blockage. Do not force the tool beyond its recommended use; forcing can push debris further or cause damage. In cases of persistent blockage, it’s prudent to step back and reassess with a professional assessment to avoid creating a more serious problem.
An alternative approach is to combine Drain King with a routine hot-water flush and a mechanical removal of surface debris before attempting again. If you regularly face clogs, consider updating disposal habits, installing strainers, and scheduling preventive cleanings. Unclog Drain emphasizes safety and conservatism: when in doubt, stop and seek guidance rather than risking pipe damage or sewer exposure.
If you discover dark or foul odors, gas-like smells, or water backing up into fixtures other than the treated drain, treat this as a sign of a more significant issue and contact a plumber promptly. This kind of step-back is consistent with Unclog Drain’s philosophy of prudent, safe DIY work paired with professional support when needed.
Maintenance and prevention after unclogging
After you successfully unclog a drain with Drain King, switch to a preventive mindset to reduce future clogs. Install drain screens or guards to catch hair and food debris, and scrape dishes well before rinsing to minimize grease buildup. Periodically flush drains with hot water and a mild, non-caustic cleaner, avoiding chemical drain cleaners that can corrode pipes if overused. A quick routine check of the P-trap under sinks can catch blockages before they become full clogs. Regular maintenance reduces the likelihood of a repeat clog and keeps drains flowing smoothly.
Keeping a small supply of protective gear and a dedicated cleaning area makes this process safer and more approachable. If you notice recurring issues in the same drain, it’s worth investigating potential venting problems or sewer line concerns. The Unclog Drain team recommends documenting when clogs occur, so you can spot patterns and adjust your maintenance plan accordingly. With proper care, you’ll extend the life of your plumbing and avoid expensive service calls.
Quick recap: what to do and what to avoid
- Do keep a seal and follow the manufacturer’s instructions for Drain King. A proper seal improves effectiveness and minimizes splashes.
- Don’t use chemical drain cleaners in conjunction with Drain King. The combination can create dangerous fumes and damage pipes.
- Do prepare the space and wear safety gear to protect eyes and hands.
- Don’t overuse or pressurize beyond the recommended duration; persistence should be measured and thoughtful.
- Do follow up with maintenance steps—screens, hot-water flushes, and gentle cleaning—to prevent repeats.
This section emphasizes measured, safe DIY practices that align with Unclog Drain’s practical approach to home plumbing.
Summary and next steps
The Drain King drain unclogger is a practical option for many routine clogs when used safely and correctly. By following a structured setup, careful sealing, and controlled pressure, homeowners can restore flow quickly without resorting to harsh chemicals. Always pair this method with preventative maintenance and note any recurring issues for professional evaluation if needed. The Unclog Drain team encourages you to use this tool as part of a broader, proactive plumbing care routine.
Tools & Materials
- Drain King drain unclogger(Ensure the bottle is clean and compatible with your drain size)
- Rubber gloves(Protect hands from debris and water)
- Safety glasses(Eye protection against splashes)
- Bucket or towels(Contain overflow and keep area dry)
- Plunger (optional)(Backup for suction-based clearing)
- Flashlight(Inspect drain opening if needed)
- Wrench or pliers (optional)(Help with fittings or caps)
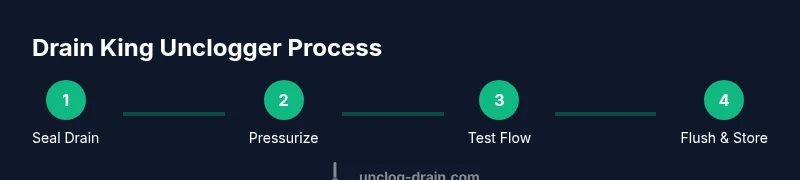
Steps
Estimated time: 30-45 minutes
- 1
Prepare workspace
Clear the area around the drain and gather all tools. Put on safety gloves and glasses. Place towels or a bucket to catch any overflow and set aside any items that could be damaged by splashing. This preparation reduces mess and ensures you can work calmly.
Tip: Check the drain opening for visible debris and remove it before sealing. - 2
Inspect the clog
Look into the drain to gauge how hard the clog is. If you see hair or grease close to the opening, you have a reasonable chance of clearing it with a mechanical push. If something solid appears stuck, do not force the unclogger; reassess and proceed with caution.
Tip: A quick visual check can save time and avoid damage. - 3
Seal the drain
Place the Drain King over the drain and press firmly to form a tight seal. Ensure there are no gaps where air can escape. A good seal improves pressure delivery and reduces splashing during operation.
Tip: Wipe the rim clean if it’s wet to improve the seal. - 4
Apply pressure
Activate the device according to the manufacturer’s instructions. Apply steady, moderate pressure rather than fast bursts. Maintain pressure for several seconds, pause, and then repeat if needed to loosen the blockage.
Tip: If you hear a hiss, reseat the seal and try again with a gentler touch. - 5
Test drainage
Remove the unclogger and run water to test flow. If water drains slowly or stops, re-seat the seal and repeat one more time. Avoid excessive cycles that could push debris further into the pipe.
Tip: Let water run for at least 30 seconds to gauge effectiveness. - 6
Clean and store
Rinse the unclogger and wipe down the area. Dry and store in a dry place to prevent mold. Re-check the drain after 24 hours to catch any minor re-clogs early.
Tip: Keep a dedicated area for DIY tools to prolong life and readiness.
Common Questions
Is Drain King safe to use on septic systems?
For most home unclogging tasks, Drain King can be used with caution, but avoid introducing too much pressure into septic lines. If you suspect septic issues, consult a professional before proceeding.
Drain King can be used with care on septic systems, but check with a professional if you’re unsure.
Will Drain King damage pipes?
When used as directed with proper seals and moderate pressure, it’s unlikely to damage pipes. Avoid excessive force or repeated attempts that stress joints.
Used correctly, it shouldn’t damage pipes; don’t push beyond the recommended pressure.
How long should I wait between attempts?
Give the system a brief rest after each attempt, typically 5-10 minutes, to relieve pressure and allow any loosened debris to settle. Then recheck the drain and decide whether to retry.
Wait a few minutes between attempts and reassess before retrying.
Can I use Drain King on toilets?
Drain King is not recommended for toilets. Toilets require different tools and approaches due to water volume and blockage types.
This tool isn’t recommended for toilets; use toilet-specific methods instead.
What should I do if the clog returns after use?
If it returns, inspect the drain for deeper blockages or venting issues. Consider preventive measures like screens and regular hot-water flushes and consult a pro for persistent problems.
If it comes back, look for deeper issues and consider professional help.
Should I use chemicals with Drain King?
No. Do not mix chemical drain cleaners with Drain King; chemicals can react violently with pressurized air and water.
Avoid using chemicals alongside Drain King to prevent dangerous reactions.
Watch Video
Key Points
- Seal the drain properly before starting.
- Use steady pressure and avoid forcing the clog.
- Do not mix with chemical cleaners.
- Inspect and maintain drains to prevent recurring clogs.