How to Unblock Bath Drain: Step-by-Step Guide
Learn practical, DIY-friendly steps to unblock a bath drain safely using mechanical methods first, with maintenance tips to prevent future clogs. From plunger to drain snake, this Unclog Drain guide keeps your bathroom flowing.

By following this guide, you will unblock a bath drain quickly using mechanical methods first, reserving chemicals as a last resort. You’ll need basic tools like a plunger, a drain snake, a bucket, gloves, and a towel, plus simple safety steps to protect yourself. This approach minimizes splash, prevents pipe damage, and restores normal water flow efficiently.
Why bath drains clog and what to expect
Bath drains clog when hair, soap scum, mineral buildup, and small objects accumulate where water flows. In a typical bathtub, the trap and pipe architecture create a collection point for debris, so even a small amount can slow drainage over time. The Unclog Drain team found that most tub clogs start with hair tangles combined with soap scum, forming a stubborn, fibrous block that resists simple plunging. The symptoms resemble a lingering wet rug: water drains slowly, a faint odor may develop, and you might notice air bubbles as the pipe struggles to clear the path. Understanding the typical culprits helps you choose the right method and avoid overdoing it with harsh cleaners. This guide emphasizes mechanical, non-chemical approaches first to minimize risk to pipes and seals while restoring good flow. If you’re dealing with a bath clog, you’ll often start with the simplest mechanical method and escalate only if needed.
Safety and preparation
Before you begin, put on rubber gloves and eye protection, and lay down towels to catch splashes. Ensure the bathroom is well-ventilated, especially if you’ll be using hot water or attempting a chemical option later. Clear the area around the tub, remove any loose objects, and keep a bucket nearby to catch standing water. Do not mix cleaners; if you plan to introduce any chemicals, read the product label thoroughly and use them in a well-ventilated area. Unclog Drain’s safety guidelines emphasize patience and cleanliness to prevent accidental spills or skin contact. With preparation complete, you’re ready to diagnose and address the blockage with controlled, repeatable steps.
Diagnostic tips to pinpoint the blockage
Start by running a small amount of water to observe the drain’s response and listen for gurgling, which can indicate a venting issue or a partial blockage. If water pools and stays high, the clog is likely downstream of the drain cover. Check for other slow drains in the same bathroom; a shared drain issue may point to the main line rather than a tub-specific snag. If you can access the trap or the drain cover, remove the cover carefully and inspect for hair or soap scum buildup. A quick visual check often reveals the most obvious obstruction, allowing you to tailor your next step. For deeper clogs, move to mechanical methods rather than jumping to chemical cleaners, which can damage seals if misused.
Mechanical methods: plunger and drain snake
Mechanical methods often solve tub clogs without chemicals. Start with a standard cup plunger or a flange plunger, fully covering the drain with a vertical seal. Add enough water to cover the plunger cup, then push and pull with steady, confident strokes to create suction. If the drain remains stubborn, switch to a drain snake (auger). Insert the snake gently, rotate clockwise, and push forward until you feel resistance; then pull back a little and repeat. Several careful passes can dislodge hair and soap scum, restoring flow. Always keep a bucket handy to capture any debris that comes free and wipe the area clean after each pass.
Chemically speaking: when and how to use alternatives
Chemical drain cleaners are a last resort for bath drains and should be used with extreme caution. They can damage older pipes, seals, or septic systems if misused or overused. If you choose to try an enzymatic or enzyme-based cleaner, follow the label directions precisely and avoid mixing products. After any chemical attempt, flush the system with plenty of hot water to clear the line and reduce residue. For most homeowners, mechanical methods suffice and are far safer for frequent maintenance, reducing reliance on harsh chemicals while keeping pipes clear.
If clog persists: removing the P-trap or seeking professional help
If the clog remains after multiple mechanical attempts, you might need to access the P-trap under the tub. Place a bucket beneath the trap, slowly loosen the slip nuts with the appropriate wrench, and carefully remove the trap to inspect for hair and buildup. Clean the interior of the trap, then reassemble and run hot water to test. If you still see slow drainage or if there’s standing sewage, stop DIY attempts and contact a professional plumber. Pro guidance can prevent accidental damage in tight spaces and identify issues like venting problems or deeper main-line clogs.
Prevention and maintenance routines for long-term flow
To prevent future clogs, install a fine-mesh hair catcher over the drain and clean it weekly. Regularly flush the drain with hot water and a small amount of baking soda followed by vinegar to help break down organic buildup without harsh chemicals. Periodically inspect the trap area for signs of leaks or unusual moisture, which can indicate worn seals. A simple maintenance schedule keeps tub drains flowing smoothly and reduces the frequency of major cleanouts. By adopting these habits, you’ll be better prepared for small clogs before they become big problems.
Tools & Materials
- Rubber gloves(Thick, elbow-length recommended)
- Plunger (cup or flange)(Choose tub-compatible size)
- Bucket(To catch water and debris)
- Towel or rags(Protect surfaces and absorb spills)
- Drain snake / auger(2- to 6-foot options work for tubs)
- Adjustable wrench(Helpful for trap nuts)
- Flashlight(Inspect dark corners under the drain)
- Safety goggles(Eye protection when working under sink structures)
- Vinegar and baking soda(Gentle de-bonder for maintenance)
Steps
Estimated time: 60-90 minutes
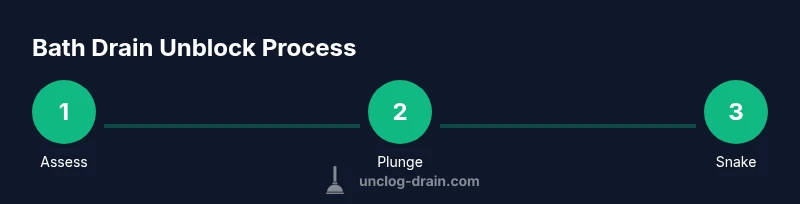
- 1
Assess the blockage and gather tools
Identify symptoms, confirm tub is slow to drain, and assemble the plunger, snake, bucket, gloves, and towels. Clear the area around the tub and remove any items that could be damaged by splashes. This preparation minimizes interruptions and helps you work efficiently.
Tip: Check other fixtures; if multiple drains are slow, the issue may be a main line. - 2
Remove standing water if possible
Use a cup or sponge to remove standing water so the plunger can form a proper seal. If water is too high, use a towel to soak up excess and then dispose in a toilet or sink.
Tip: A dry surface improves suction and effective plunging. - 3
Try the plunger first
Place the plunger over the drain, ensuring a tight seal, and push and pull rapidly for 15-30 seconds. If water starts to drain, continue in short bursts until flow improves. Refill the tub with enough water to cover the plunger and repeat as needed.
Tip: Maintain steady pressure; abrupt bursts can push clogs deeper. - 4
Use the drain snake if plunging fails
Insert the snake into the drain slowly, turning clockwise as you push. When you feel resistance, pause and rotate to break the clog, then pull back to bring debris out. Repeat several times until you sense less resistance and improved flow.
Tip: Avoid forcing the snake too aggressively; you can damage pipes. - 5
Inspect and clean the P-trap if accessible
If accessible, place a bucket beneath the trap, loosen the nuts, and remove the trap to check for hair buildup. Rinse the interior, reinstall securely, and test with hot water.
Tip: Ensure the trap seals are tight to prevent leaks. - 6
Flush and test the drain
Run hot water for several minutes to clear residue and verify a steady drain. If the water still backs up, repeat the snake or consider a professional assessment.
Tip: A final flush confirms the blockage is cleared before you finish. - 7
Consider maintenance for prevention
Install a hair catcher, perform monthly cleanouts, and flush with hot water regularly to minimize future buildup. Keep a simple maintenance routine so small clogs don’t escalate.
Tip: Regular prevention is easier than repeated deep cleaning. - 8
Know when to escalate
If you cannot clear the clog after multiple attempts or encounter sewage backup, stop DIY efforts and call a licensed plumber. Complex clogs may lie further in the main line or involve venting.
Tip: Professional help protects your plumbing and safety.
Common Questions
What is the best first step to unblock a bath drain?
Start by removing standing water and trying a plunger. If that doesn’t clear the clog, proceed to a drain snake. Mechanical methods are safer for most homes and effective for hair-and-soap-clogged tubs.
Begin with removing water and using a plunger; if needed, try a drain snake next. Mechanical methods are safest for most tubs.
Can chemical drain cleaners damage pipes?
Yes, chemical cleaners can corrode old pipes, damage seals, or harm septic systems if misused. Use them only as a last resort and follow label instructions exactly.
Chemicals can harm pipes if used improperly, so use them last and follow the instructions.
When should I call a plumber for a bath drain?
Call a plumber if the clog persists after multiple attempts, if you hear gurgling from the drain, or if sewage backs up. A professional can diagnose venting issues or deep obstructions.
Call a plumber if the clog stays after several attempts or you hear gurgling or sewage backup.
Is a drain snake safe for tubs?
Yes, a drain snake is generally safe when used slowly with gentle rotations. Avoid forcing the tool and stop if you feel resistance that doesn’t clear.
A drain snake is safe if used gently and you don’t force it hard.
How can I prevent bathtub clogs long-term?
Install a hair catcher, clean the trap regularly, and flush with hot water weekly. Avoid pouring grease or large solids down the drain.
Use a hair catcher and clean the trap; flush regularly to prevent clogs.
What if the clog is in the main sewer line?
If other fixtures are slow and you suspect a main-line clog, stop DIY attempts and contact a licensed plumber for a thorough inspection and safe remediation.
If it looks like the main line, call a plumber for safety and proper repair.
Watch Video
Key Points
- Assess blockage before taking action
- Prioritize mechanical methods over chemicals
- Test drain flow after each step
- Know when to call a pro to avoid damage