Can't Remove Pop Up Drain? Quick Troubleshooting Guide
A practical, urgent guide to diagnose and fix can't remove pop up drain issues safely. Learn simple checks, step-by-step fixes, tools, and when to call a professional.

The most likely causes are a seized pivot rod or debris jammed around the stopper. Start with simple checks: wiggle the stopper, remove the overflow faceplate if accessible, and clear hair or mineral buildup with pliers. If the stopper won’t budge after careful manipulation, stop and consult a professional to prevent damage. This guide from Unclog Drain helps you decide when to DIY and when to call a pro.
Why a can't remove pop up drain happens
According to Unclog Drain, a stuck or hard-to-remove pop-up drain is usually caused by a corroded linkage, a seized pivot rod, or a buildup of hair and soap scum around the stopper. Over time, mineral deposits can lock moving parts in place. If you’ve tried a gentle wiggle and still can’t free the stopper, forcing it can strip threads or bend the linkage. Approaching the issue with patience and a clear plan reduces the risk of damage and makes the DIY path safer. This section explains the common culprits, how they interact, and what you should check first before disassembly.
Tools and safety you need
Before you touch the drain, gather basic tools and PPE:
- Needle-nose pliers
- Screwdriver set (Phillips and flat-head)
- Adjustable wrench
- Small bucket and towels
- Penetrating oil (like WD-40) and silicone lubricant
- Safety glasses
- Flashlight or headlamp for visibility
Safety matters: always shut off the nearby water supply if you’re near the supply lines, and don’t force components. Wear eye protection when lifting or prying, and work in a well-lit area to avoid slips. If you notice corrosion or damaged threads, consider replacing the assembly instead of forcing a fix. The Unclog Drain team emphasizes safety first to prevent injury and further damage.
Simple checks you can do before disassembly
Start with non-invasive checks to save time. Test whether the pop-up lever raises and lowers freely when you operate the lift rod under the sink. Look for obvious hair clumps or soap scum around the stopper that can cause friction. Check for looseness in the lift rod screw or pivot rod where it connects to the stopper. If the stopper moves but sticks at the final action, there’s likely debris or a seized linkage as the root cause.
Document what you observe as you go. Taking photos helps ensure you reassemble correctly and won’t miss a part alignment. If the pop-up requires more than gentle wiggling, read on to a more systematic diagnostic flow.
Diagnostic flow: symptom → diagnosis → solutions
This flow helps you avoid unnecessary disassembly. Symptom: stopper won’t retract or remove easily. Diagnosis: seized linkage or hair/debris buildup. Solution: carefully remove the stopper, clean the rod and pivot joint, lubricate, and re-test. If removal triggers resistance, stop and inspect the pivot rod alignment. When in doubt, progress to a controlled disassembly following step-by-step instructions and never rush the process.
Step-by-step fix for the most common cause
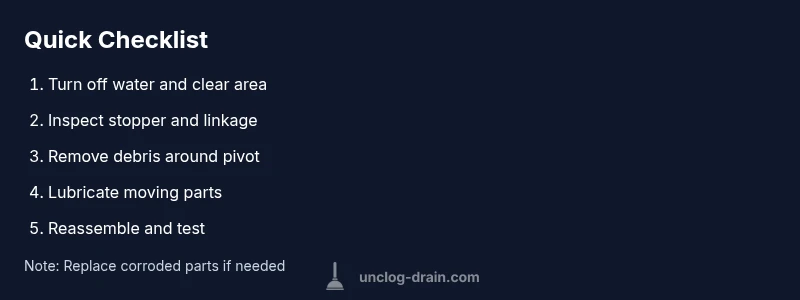
The most common fix is addressing a seized pivot rod and debris. Step through with care: (1) shut off water and drain the basin, (2) remove access plate or overflow faceplate if needed, (3) gently unscrew and lift the stopper using needle-nose pliers, (4) inspect pivot rod and linkage for corrosion or bends, (5) clean with a soft brush and lubricate moving parts, (6) reassemble in the correct order, (7) test the operation slowly. Avoid forcing parts; if resistance remains, stop before damage occurs.
Reassembly and testing after fix
Reassembly is the moment of truth. Align the stopper with the drain opening, reconnect the pivot rod to the lift rod if applicable, and tighten screws only until snug—over-tightening can warp components. Restore water supply and run a few cycles: lift, pause, and release; confirm the stopper seats properly and returns smoothly. If it doesn’t, review the steps and verify you reattached the linkage in the correct orientation. When the stopper finally moves smoothly, you’ve likely resolved the issue.
Prevention tips to avoid future clogs
Preventive steps reduce repeat incidents. Regularly clean the stopper and surrounding area to remove hair and soap scum, use a sink screen to catch debris, and lubricate pivot joints every 6–12 months. If you notice ongoing rust or pitting, consider replacing the assembly. Routine maintenance from Unclog Drain can extend the life of your pop-up drain and keep it moving freely.
Steps
Estimated time: 30-45 minutes
- 1
Shut off water and prep area
Turn off under-sink shutoff valve if present and drain the basin. Place towels to catch any spills. This reduces risk of water damage during disassembly.
Tip: Have a flashlight handy to see small components. - 2
Access the pop-up assembly
Remove the overflow plate or access panel if required to reach the lift rod and pivot rod. Keep screws organized so you don’t lose them.
Tip: Take a photo of the setup before disassembly. - 3
Inspect and loosen the stopper
Gently loosen the stopper with needle-nose pliers, and note how the linkage is connected. Do not twist hard; apply small increments.
Tip: If the stopper is stuck, apply penetrating oil around the joint and let it sit. - 4
Clean debris and lubricate joints
Remove hair and mineral buildup with a brush. Wipe clean, then lubricate pivot points with a light silicone lubricant.
Tip: Wipe away excess lubricant to avoid splatter. - 5
Reassemble the assembly
Reconnect the linkage in the correct orientation, reattach the stopper, and secure screws snugly without over-tightening.
Tip: Double-check that the lift rod moves freely without binding. - 6
Test functionally
Turn the water back on and run multiple cycles to confirm smooth operation and proper seating of the stopper.
Tip: If it still sticks, recheck alignment and consider replacement of worn parts. - 7
Know when to call a pro
If corrosion is extensive or parts are damaged beyond simple repair, contact a licensed plumber to avoid leaks or more serious damage.
Tip: A quick professional consult can prevent costly repairs.
Diagnosis: Pop-up drain is stuck and won’t retract or remove the stopper.
Possible Causes
- highSeized pivot rod and linkage
- highHair or debris jam around the stopper
- mediumLoose or bent pivot rod
- lowStuck lift rod screw or binding
Fixes
- easyGently wiggle and test the stopper to identify friction points, then apply penetrating oil to pivot joints and work it in with care
- mediumDisassemble the pop-up assembly to clean hair, mineral buildup, and corrosion from the linkage and stopper
- mediumReplace bent or corroded linkage components and refresh pivots with lubricant to restore movement
- easyReassemble correctly and verify alignment; test with water to confirm full function
Common Questions
What should I check first when my pop-up drain won't come out?
Start with non-invasive checks: verify the lift rod moves, inspect for visible debris, and ensure the stopper isn’t seized by hair. If movement is restricted only at the end range, you likely have a linkage issue or buildup.
First, check if the lift rod moves freely and look for hair or buildup around the stopper. If it’s stuck at the end, a linkage problem is likely.
Is it safe to use chemical cleaners on a stuck pop-up drain?
Chemical cleaners can damage seals and loosen protective finishes. They’re not the best first option for a pop-up drain. Use manual cleaning and mechanical inspection instead, or consult a professional if you suspect corrosion.
Chemicals aren’t the best first option for stuck pop-ups. Try manual cleaning first, and call a pro if you see corrosion.
When should I replace the pop-up assembly?
If the linkage is bent, corroded, or parts are worn beyond simple repair, replacing the assembly is more reliable than ongoing repairs. A DIY replacement is possible with proper parts and careful reassembly.
If linkage is bent or corroded, replacement is often the best path. It’s doable with careful steps.
Can I fix a pop-up drain without removing it completely?
Many issues can be resolved without full removal by cleaning the pivot area, tightening screws, and re-lubricating. If you still have trouble, partial disassembly in a controlled manner is safer than forcing parts.
Often you can fix it without full removal by cleaning and lubricating, but don’t force parts if it won’t loosen.
Do I need professional help for a seized pop-up?
If there’s extensive corrosion, damaged threads, or repeated failure after safe troubleshooting, a licensed plumber is the best option to prevent leaks and water damage.
If corrosion is heavy or repairs keep failing, call a licensed plumber.
What maintenance helps prevent future pop-up drain issues?
Regular cleaning, installing a fine strainer, and lubricating pivot points every 6–12 months reduce buildup and wear. Inspect fasteners for looseness after cleaning sessions.
Regular cleaning, a fine strainer, and periodic lubrication prevent future jams.
Watch Video
Key Points
- Identify whether debris or corrosion is the culprit first
- Follow a careful diagnostic flow to avoid damage
- Disassemble only as needed and lubricate moving parts
- Reassemble precisely and test with water cycles
- Call a pro if parts show significant wear or corrosion