Clogged Kitchen Sink with Disposal? Quick Fixes You Can Do
A practical, complete guide to diagnosing and fixing a clogged kitchen sink with disposal, with safety tips, troubleshooting flow, and prevention strategies for long-term relief.

The most likely cause is a partial clog in the disposal or the sink’s P-trap, often from trapped food debris. Start by cutting power to the disposal, unplugging or switching off at the circuit, then use tongs to remove visible food, flush with cold water, and attempt a controlled reset and rotation to dislodge the clog.
Diagnosing a clogged kitchen sink with disposal
If you're dealing with a clogged kitchen sink with disposal, the first clue is slow draining, intermittent backup, or a humming motor with no grind. In many homes, the problem starts as a partial blockage of food waste, grease, or fibrous bits that accumulate in the disposal chamber or the adjacent P-trap. According to Unclog Drain, diagnosing the issue quickly reduces damage risk and shortens downtime. Before you dive in, make sure power to the unit is off. If your disposal is on a switch, flip it off; if it's hard-wired, switch off the circuit breaker. Wear gloves and keep the area well lit. With the power off, you can safely test whether debris are visible in the sink or disposal inlet. Keep a bucket handy for any water or loose debris. Also check that the sink’s P-trap is accessible and free of standing water that could indicate a trap clog. Addressing the problem early helps prevent a larger, costlier clog.
Steps
Estimated time: 45-60 minutes
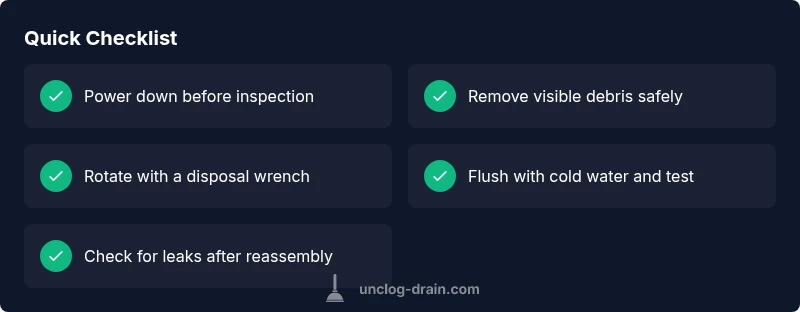
- 1
Power Down
Turn off the disposal at the wall switch or unplug from the outlet. If the unit is hard-wired, switch off the appropriate circuit. This protects you from accidental starts during inspection.
Tip: Always verify power is off with a quick test before touching the unit. - 2
Access the Disposal
Use a flashlight to locate the hex socket on the bottom of the disposal. If you can’t access it, remove the upper splash guard from inside the sink to visualize the chamber.
Tip: Avoid ramming objects into the disposal opening; use tools designed for disposal maintenance. - 3
Clear the Jam
Insert a disposal wrench or hex key and rotate the grinding chamber back and forth to free the blockage. Remove any visibly trapped debris with tongs.
Tip: Never put your hand inside the grinding chamber; debris can shift or spring loose. - 4
Remove Debris
Carefully pull out stuck food particles from the inlet and around the blades. Rinse the area with cold water to wash away loosened material.
Tip: Work in small motions to avoid pushing debris deeper into the unit. - 5
Reset and Test
Press the disposal’s reset button. Restore power and run cold water while turning on the disposal to verify it’s grinding smoothly.
Tip: If it hums without grinding, there’s likely a deeper jam or motor issue. - 6
Check the P-trap
Place a bucket beneath the pipe, loosen the slip nuts, and clean out any gunk or standing water. Reassemble securely and run water to test.
Tip: Ensure the trap screen or washer seals are intact to prevent leaks. - 7
Final Verification
Run the faucet and turn on the disposal; observe drainage, listen for steady grinding, and check for leaks under the cabinet.
Tip: If drainage remains slow after these steps, consider the next level of service.
Diagnosis: Slow-draining sink with occasional backups when the disposal runs
Possible Causes
- highPartial disposal jam or debris buildup
- highP-trap or drain line clog from grease and food particles
- mediumDishwasher drain hose issues causing backflow
- lowOverloading disposal with hard items (bones, ice)
- lowPower or wiring issue preventing disposal operation
Fixes
- easyUnplug the disposal or switch off the circuit and use tongs to remove visible debris from the disposal inlet.
- easyReset the disposal and rotate the grinding chamber with a disposal wrench or hex key to free a jam.
- easyLoosen P-trap slip nuts, empty and clean the trap, then reassemble and test drainage.
- mediumInspect dishwasher drain hose and air gap for kinks or misconnection; correct as needed.
- mediumIf symptoms persist after basic fixes, contact a plumber for a thorough inspection.
Common Questions
What causes a disposal to jam despite not backing up now?
A jam usually comes from fibrous or hard items wedged in the grind chamber or from a partial clog in the discharge path. Regularly running cold water while the unit operates helps clear loose debris and prevents future jams.
Disposals jam most often from tough debris; use cold water and remove the blockage safely if needed.
Can a dishwasher cause my kitchen sink to back up?
Yes. A misconnected dishwasher drain or a clogged air gap can push wastewater back into the sink. Ensure the hose is correctly connected and the air gap is clear.
A dishwasher hose issue can back up water into the sink; check the hose and air gap.
Is it safe to use chemical drain cleaners with a disposal?
Most chemical drain cleaners are not recommended with disposals. They can damage the unit and pipes. Use mechanical clearing methods first.
Avoid chemical cleaners in disposals; use mechanical removal instead.
When should I call a professional?
If the disposal won’t reset, won’t power on, or clogs recur after basic fixes, professional inspection is advised to avoid water damage or faulty wiring.
If it won’t reset or keeps clogging after DIY fixes, call a plumber.
How can I prevent future clogs?
Run water while using the disposal, avoid fibrous or non-disposable materials, clean the splash guard regularly, and schedule periodic maintenance of the P-trap.
Keep up with regular maintenance and smart usage to prevent clogs.
Watch Video
Key Points
- Unclog drains promptly to prevent bigger blockages
- Power off before any inspection or disassembly
- Use a disposal wrench to safely free jams
- Check P-trap and dishwasher hose for hidden clogs
- Call a professional if symptoms persist beyond basic fixes